LeadXplode Documentation
Thanks for purchasing LeadXplode WordPress plugin. This is step-by-step instruction guide to easily install and setup the LeadXplode lead capture system onto your theme. Let’s start.
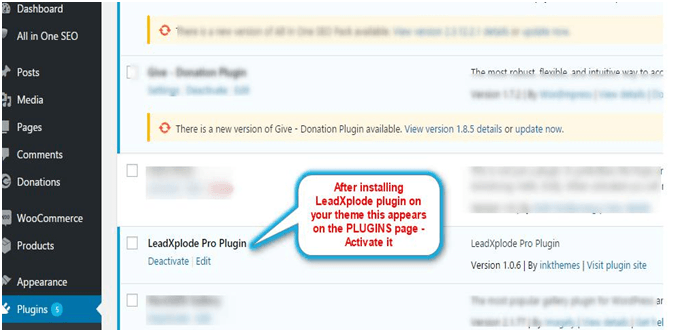
Install the Lead Xplode – Lead capture Plugin
Download the leadxplode.zip from your members area and install it. After Installing the new LEADXPLODE Pro plugin on your WordPress activate the plugin and get started.
Setup LEADXPLODE Plugin
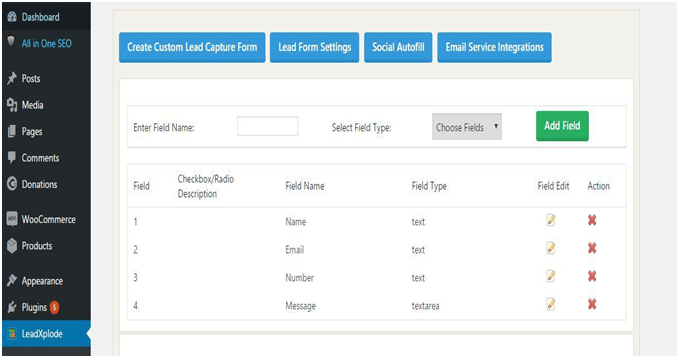
Once plugin got activated, LeadXplode menu will appear on left side of the dashboard. Click on that & you will get the following 4 tabs namely :
- Create Custom lead capture form
- Lead form settings
- Social autofill
- Email service integrations
These are clearly seen in the picture below.
Create Custom Lead Form
You’ve got the freedom to create extra labels/ field on your lead capture form that will be shown on your webpage. By default 4 fields are already created i.e. name, email, number and message.
- To add new field enter the suitable field name into “Enter Field Name”
- Select the field type from the drop-down “Select Field Type”
- Click on “Add Field”. Now you can see the new input field below the message
- To edit the existing/new created field click on respective field edit icon on the right side of each input field. Edit the field and save it.
- To delete the field just click the respective red-cross sign under the Action field.
Lead Form Settings
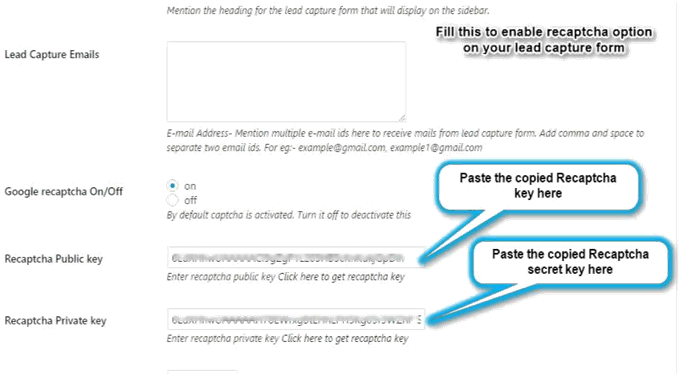
In the next step, you can click on Lead Form Settings to manage it.
- Enter suitable Lead Capture Form Heading so that it catches the user attention very well.
- Give valid email id to receive emails from Lead Capture Form.
- You can add multiple email ids also by just adding a comma with space in between them.
- You can turn on/off Google recaptcha by selecting the radio button. Enter your keys.
- Select the desired color from the drop down.
- Click save button.
By default the Captcha is deactivated, you can activate it by putting it on and then click on save option.
Google Recaptcha site key & secret key
There is an additional option of Form Recaptcha that can be enabled from the form itself by clicking on the GOOGLE RECAPTCHA ON/OFF button as ON. Its advantage is that it will prevent any robotic interruptions on your service while keeping a security check through this recaptcha text.
Register for a new site to get a unique ReCaptcha site key & secret key.
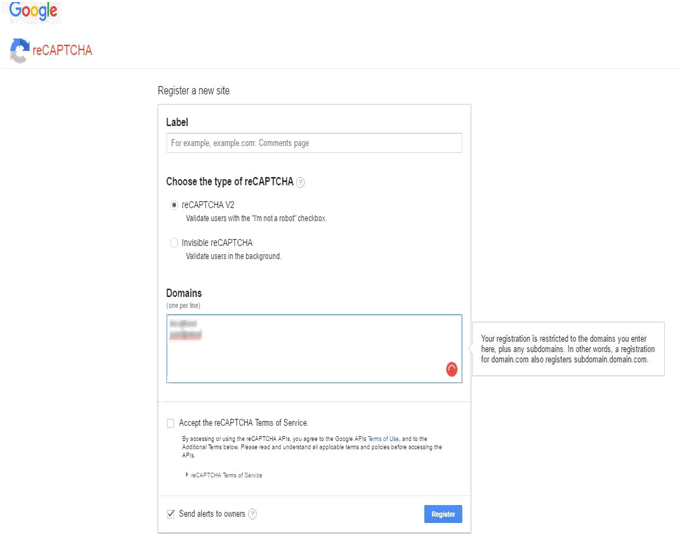
A new page will be directed that will provide you with the unique alphanumeric Recaptcha site key & secret key so that you can copy it & add to your site.
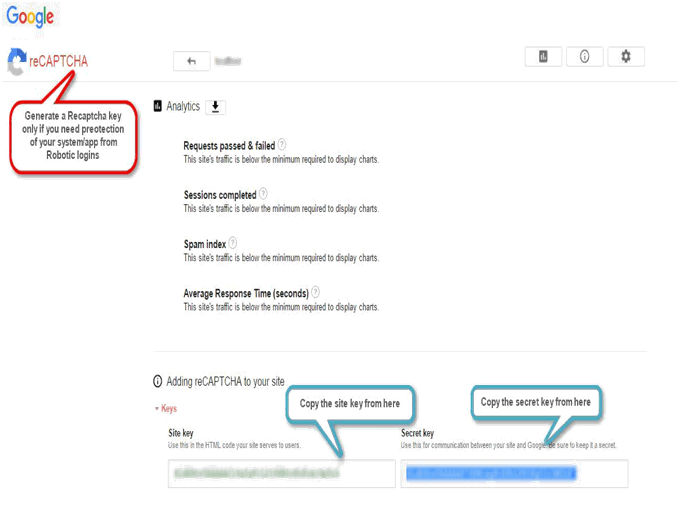
Paste the copied keys into the lead xplode lead capture settings form & click on save to save the settings as shown below.
Social Autofill Setting
Turn the social autofill option ON. This setting panel demands you to put the Google & Facebook API on its setup in order to capture data directly from the visitor’s Google/facebook account & autofill it in the lead capture form.
How To generate google API?
It’s easy & quick. Follow here.
Open your GMAIL account & type the URL https://console.developers.google.com/ A new window opens which leads you to your google develops dashboard as follows:
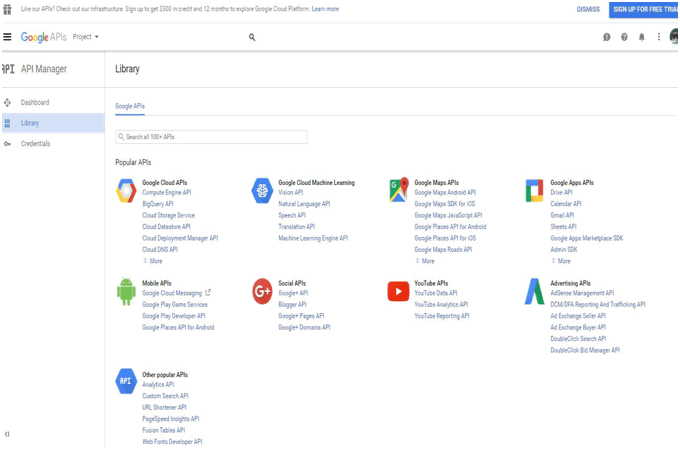
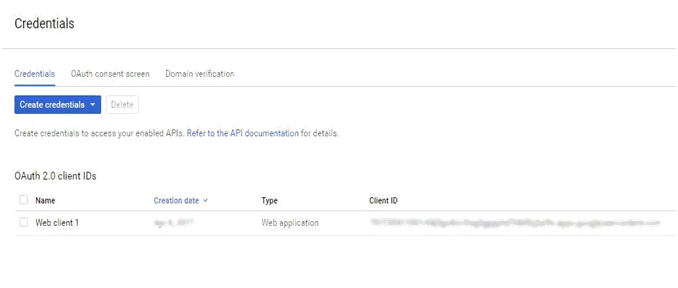
3 Menu appears on the sidebar: Dashboard, Library & Credentials.
Goto Credentials header in the sidebar Create new credentials:
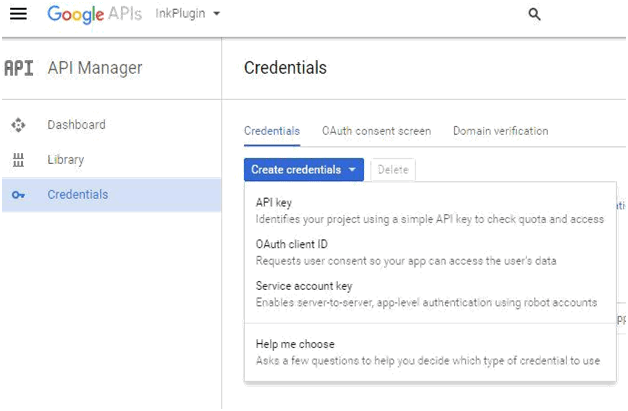
Under create new credentials you will get an option “0Auth consent screen” click on that & a new consent screen will open. Just Enter your product name & website domain name/ URL & it will automatically fetch your email address from GMAIL. It is pictorially represented below.
After clicking “Save” button. Your settings will be saved in this. Just after this click, on the credentials header & something like this appear.
Next is How to generate Facebook API?
Goto URL https://developers.facebook.com/apps & login with your facebook account.
A new window appears. In that space, just create a new App & get started.
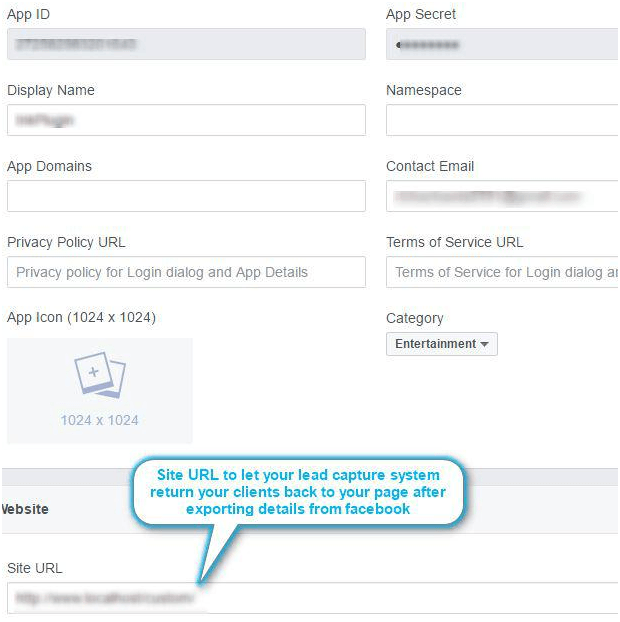
When you’ve successfully created your new App with a name. A window with your product name will appear which shows you the Facebook App ID & Secret, just copy these two & save somewhere on the clipboard for further use on the social autofill header of the plugin.
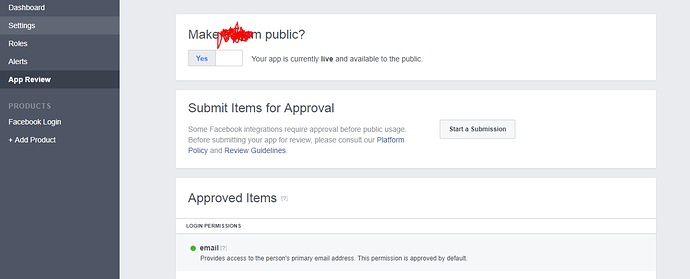
Remember to put the App as public rom the App review settings.

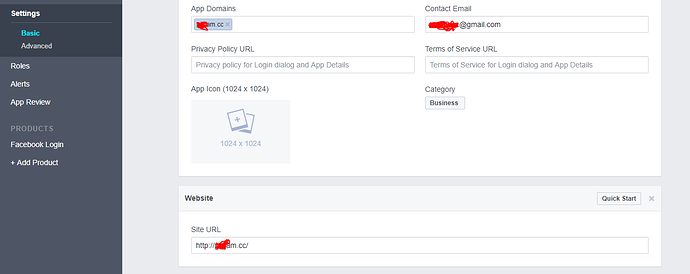
After copying the App ID & Secret, goto settings sub header in the sidebar & set the domain name as shown below in the picture. This domain name is necessary as it will take the client back to this domain after exporting all the data from facebook via social autofill option of the lead capture. Also, you should choose a category for which purpose the app is to be created.
P.S: Always remember to put a Backslash(/) after the domain name without which the system will not return back to the mentioned site URL & will show error.
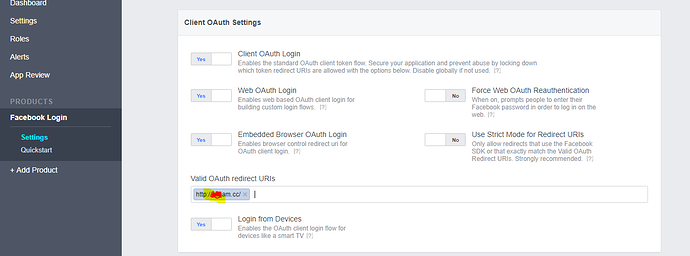
Remove www from the domains in App Domains and make sure you have made it public.
Go to Products -> Facebook Login, and set ‘Use Strict Mode for Redirect URIs’ to ‘No’, and put your domain into ‘Valid OAuth redirect URIs’
See below for screenshots of all my settings… Hope this helps! (make sure to like this post!!)
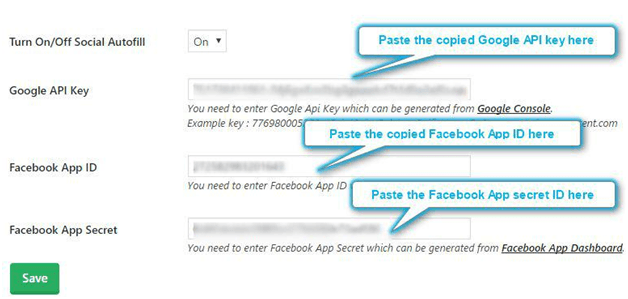
Now simply the saved Facebook & Google ID’s API’s & Secret keys can be pasted in the social autofill area of the plugin just as same as shown in the picture below.
Now the Social autofill field details are finally completed. Bingo!
You’re now just a step away from creating & sending bulk-email through your system.
Email Service Integrations
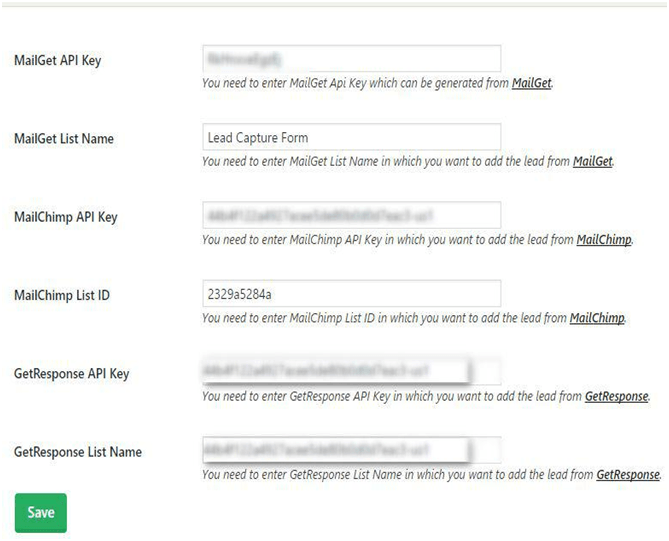
Firstly the email integration service requires 3 email marketing services that are already incorporated/ built-in within our Lead Xplode plugin . Just create , copy & paste the
MailGet or MailChimp or GetResponse API’s which ever services you are using & then you’re ready to launch your lead capture system on the web in the blink of an eye.
How to create MailGet API?
Creating a MailGet API is not as difficult as it may seem. Just signup for MailGet from here: https://www.formget.com/mailget/builder_login
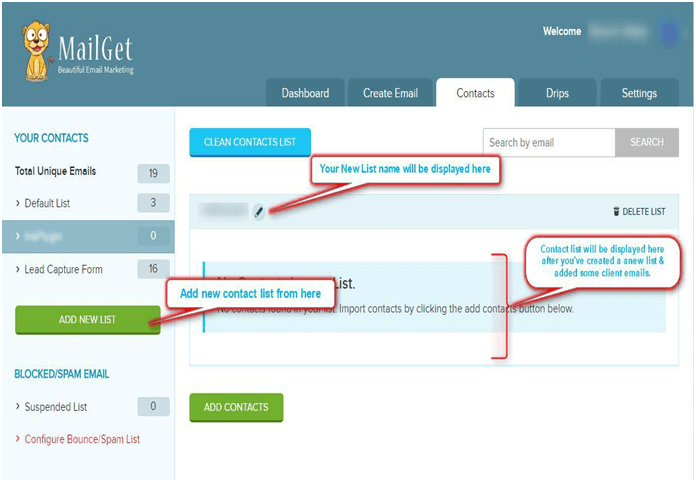
After you’ve successfully created your login, go to contacts & add a new list that you want to send the emails to. Get that concept with more clarity from the picture shown below:
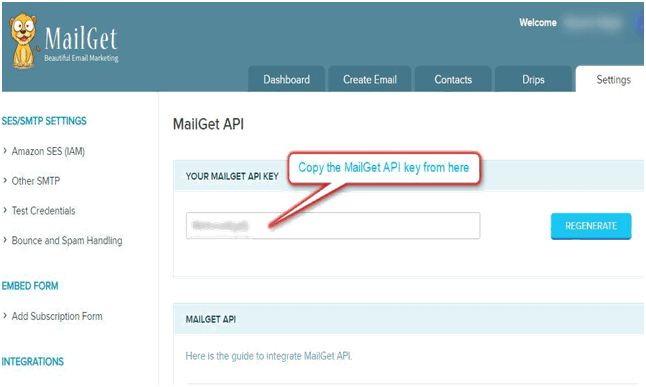
After Adding a new contact list, Goto settings header in the MailGet & you will find the MailGet API which you can copy & save on the clipboard for further use. Let’s see how does it the newly generated API looks.
How To create MailChimp API key & List ID?
To create a MailChimp List ID & API you firstly need to make a signup here: https://login.mailchimp.com/signup/
After successful signup, your dashboard will appear from where you have to create a campaign via “create campaign” option as shown below:
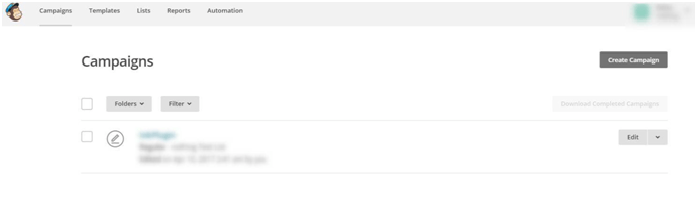
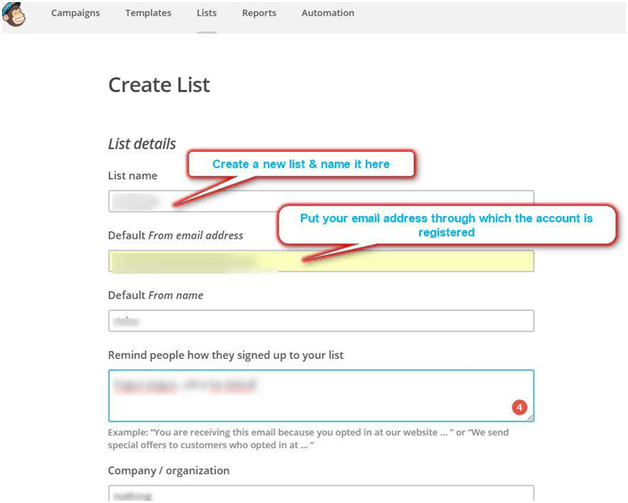
As shown above, the campaign you created will appear in the header campaigns. Now click on the list’s header that is just on the sideline of the same header. Create a list & that will appear on the lists page, the following will appear:
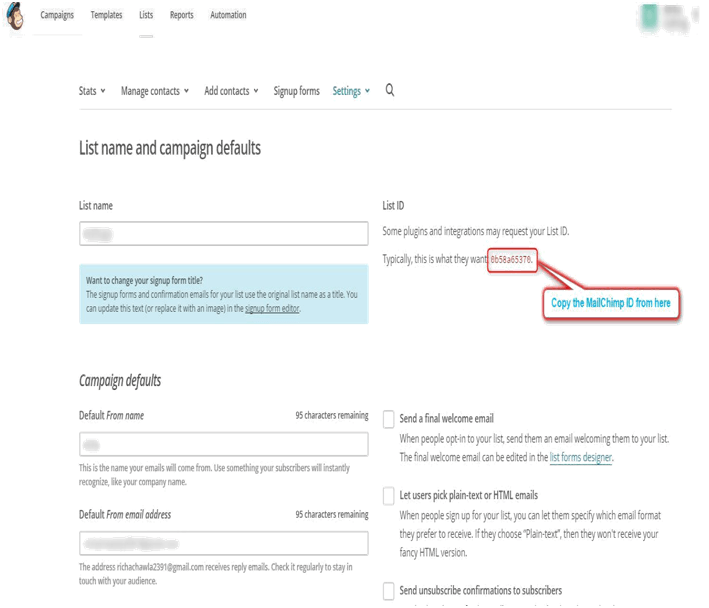
After successfully creating a list, you have to move to the lists> settings> List name & campaign defaults.
Here you will find the MailChimp List ID that you can copy & paste to the clipboard for further use in the email integration service. A pictorial representation is shown so as to make things more clear.
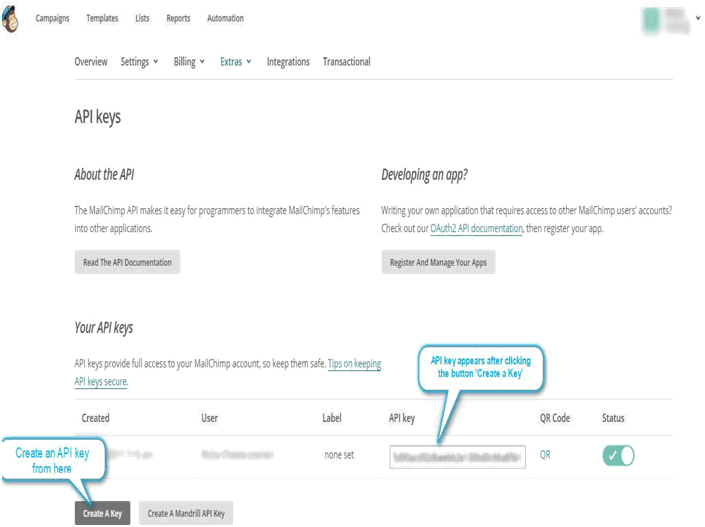
The MailChimp List ID is created, now the task is to obtain MailChimp API. Look here:
Goto top right end> your name displays> a drop down menu displays> Goto account>sub header Extras> drop down menu goto API keys will appear as shown below:
Next is How to create GetResponse API?
To create an API firstly you have to signup on GetResponse from here: https://www.getresponse.com/
Follow the steps as shown in the pictures below:
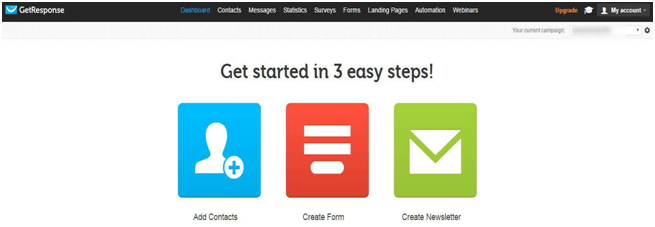
- GetResponse Dashboard
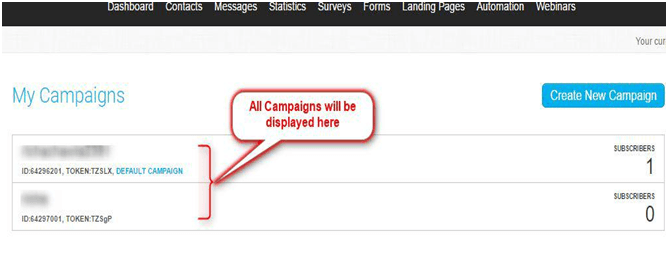
- Create a new Campaign

- All the campaigns created till date will be shown here: Just copy the List/campaign name from here.
- Goto top right end> My account> Integrations & here is the API displayed in a new window as shown below:
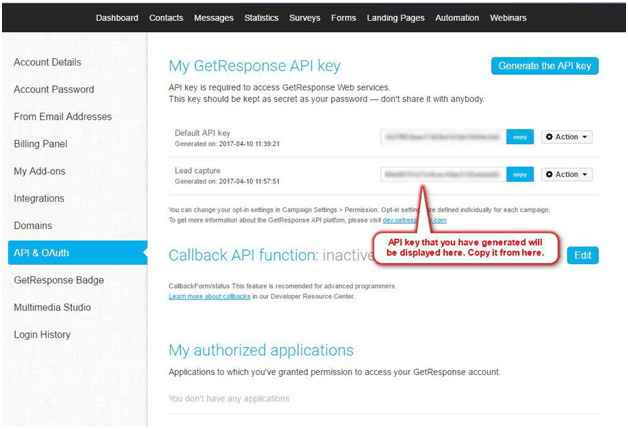
Copy the API & List name and paste them to the clipboard for further use.
After having created the MailChimp or MailGet or GetResponse API Just entered the API key and List name/id in respective email marketing service you’re using.
So, Congrats! You’re finally done with the setup.
Display Lead Capture Form on Webpage
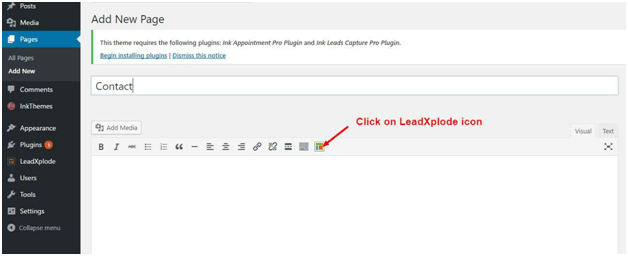
Lead Capture Form is now created and you can include it into any page of your website. Go to some page say Contact page of your website and click on the Lead Capture shortcode icon as shown in the image.
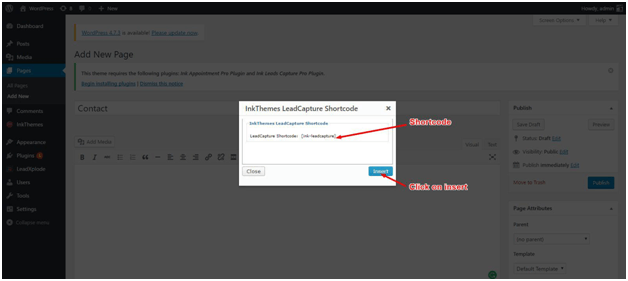
LeadCapture Shortcode window will appear on the screen and you need to include it into your page by just click on the insert button.
Or you can directly paste this code on your page – [ink-leadcapture]
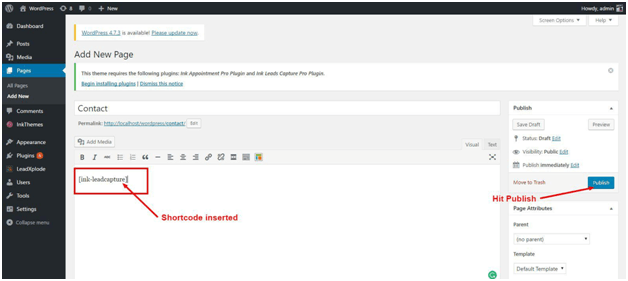
The shortcode is inserted into your page as you can see in the figure given below. Now publish the Lead Capture Form into your page by just click on Publish/Update button.
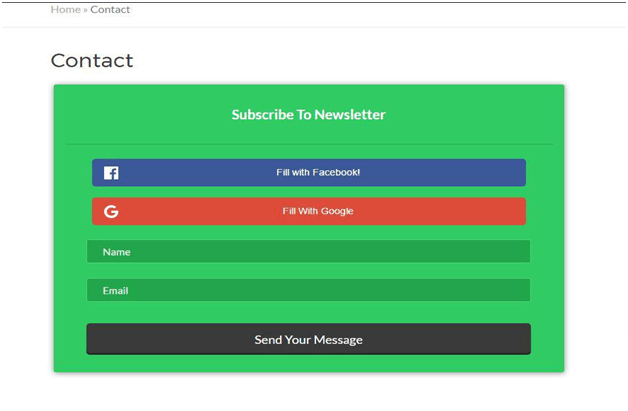
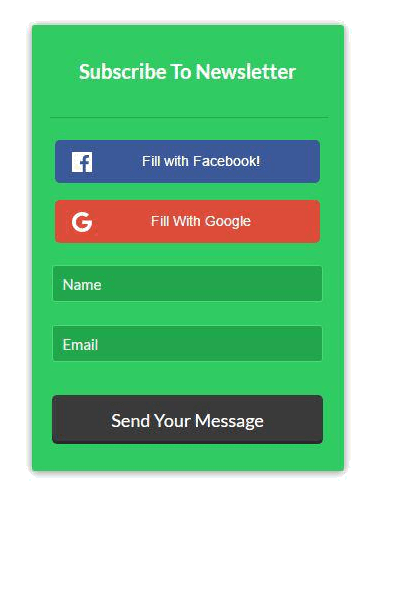
As you can see in the figure shown below, at the front end of the Lead Capture Form appears like this in the Contact page of your website.
You can also include LeadXplode Lead Capture Form in the sidebar of your Website so that it is visible on every page. You have many options to manage it according to the Widget Area of your theme. You need to follow simple steps to include it into the sidebar of your Website.
- Go to Appearance option of your Dashboard
- Select the Widgets option from submenus.
- As you can see the LeadXplode Widget appears in the Available Widgets
- Just need to drag it from an Available widget and drop it into primary, secondary widget area or home page widget area if available.
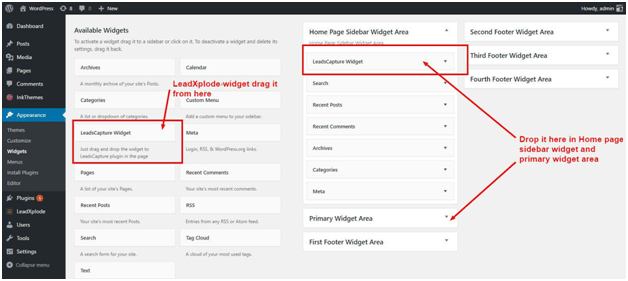
Now the Lead Capture Form displays into the Sidebar section of your homepage and Website.
I hope this documentation would have helped you to setup LeadXplode plugin. For any query or issue please contact us at [email protected].
