Digital Affiliate Box is a WordPress Theme and Plugin Combo to allow you to create your own digital affiliate store on Autopilot.
If you are interested to join affiliate program with envato.com this autopilot system will let you quickly launch your digital affiliate store and start selling products of themeforest, codecanyon, videohive, audiojungle, graphicriver, photodune, 3docean, activeden, just in a matter of minutes.
Digital Affiliate Box (DAB) connects with Envato marketplace to source and publish digital products on your website along with your affiliate links. That means whenever any product is sold on the marketplace through your website, you will get instant commissions on the purchase.
This document includes the entire steps to connect DAB with Envato Marketplace to enable creation of your own digital store with affiliate products.
Check Digital Affiliate WordPress Theme For Envato MarketPlace
API Documentation of Connecting Envato Marketplace with Digital Affiliate Box
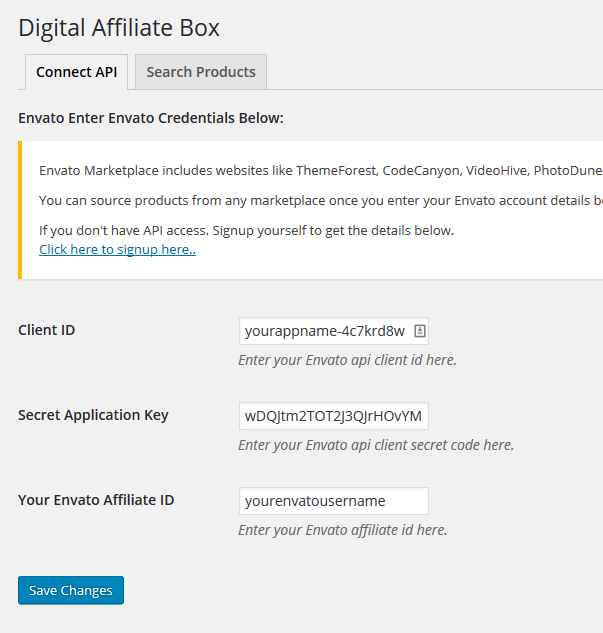
Envato Marketplace includes websites like ThemeForest, CodeCanyon, VideoHive, PhotoDune, AudioJungle, GraphicsRiver, 3D Ocean.
You can source products from any marketplace once you enter your Envato account details below.
Here is the details of how to find out the Envato account API details to connect in Digital Affiliate Box.
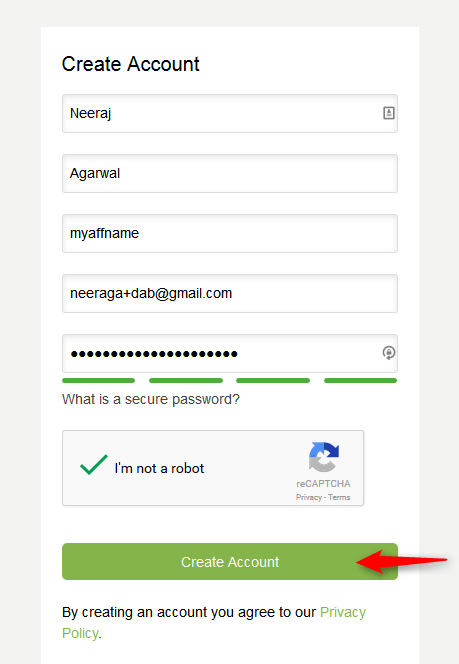
Step 1: Sign Up For Your Account With Envato
https://account.envato.com/sign_up
(Note: Signup username is also your affiliate id that you will enter in DigitalAffiliateBox settings in Step 6.)
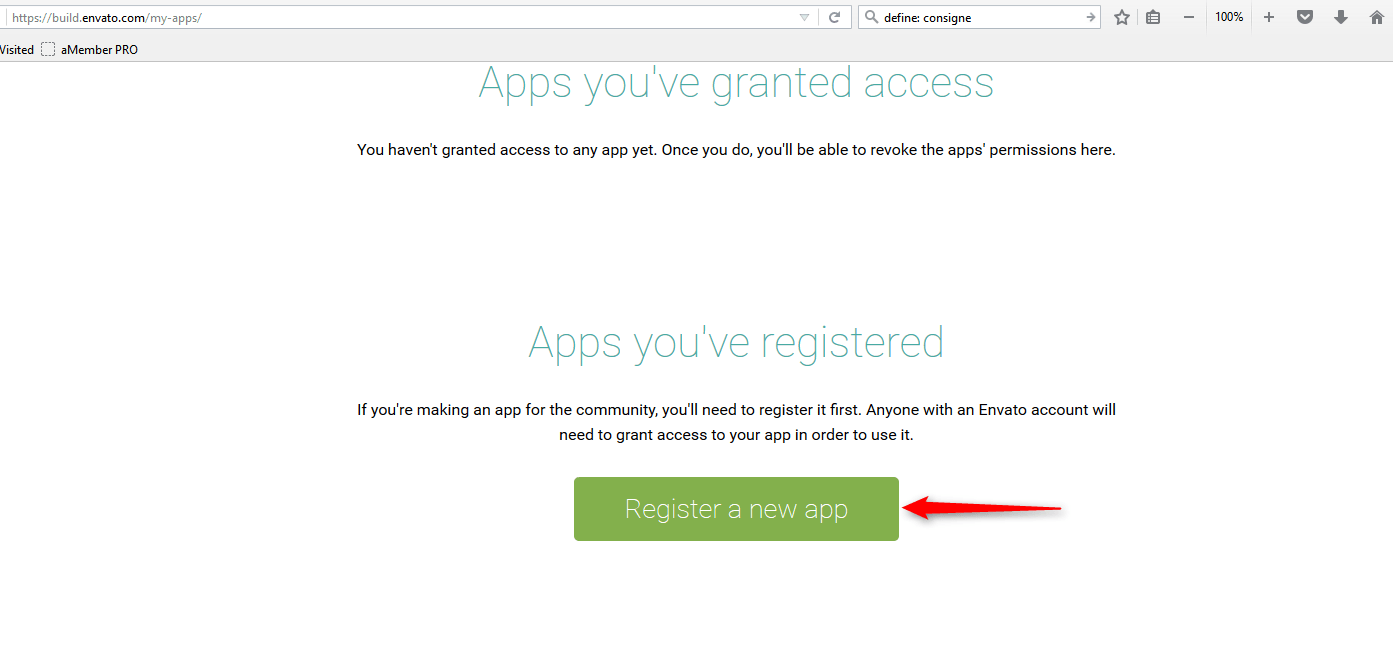
Step 2: Register Your New App
Click on the link. https://build.envato.com/my-apps/
Step 3: Enter Details To Register App
You will reach the following URL for registering your app.
https://build.envato.com/register/

On the register screen:
- Enter the App Name as desired. You can use anything that you like.
- Choose the default permission of “View and search Envato sites”
- In the Confirmation URL enter:
http://www.yourdomain.com/wp-admin/admin.php?page=digiaffibox
Replace yourdomain in the link above with your own domain name.
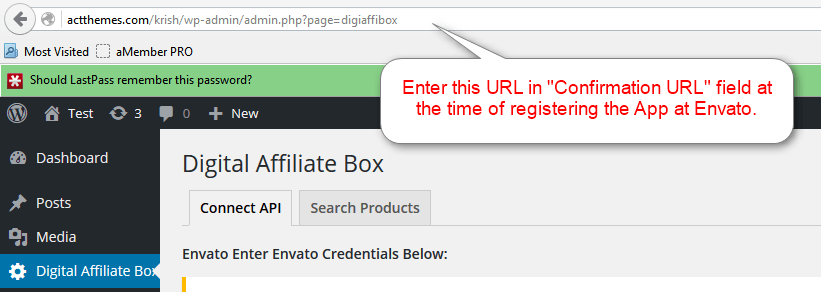
4. Tick the terms and conditions checkbox.
5. Click on Register App
Step 4: Copy Secret Application Key
Once the app is successfully registered. You will get a secret application key. Copy it for later use.
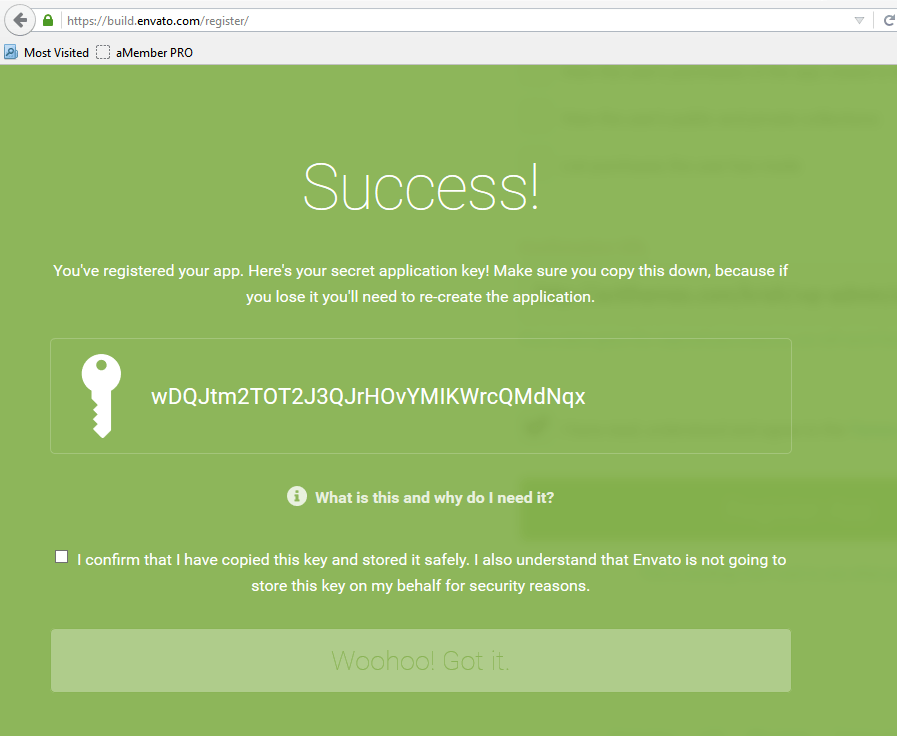
Step 5: Copy Client ID
Click on Woohoo! Got It button and you will be redirected to Apps you’ve registered page. https://build.envato.com/my-apps
Here you will get the OAuth client ID. Copy it for later use.

Step 6: Enter The Envato Credentials
Now head back t the backend of the installation of Digital Affiliate Box.
Enter the Client ID in the first text box in the plugin settings that you got in Step 5.
Enter the Secret Application Key that you got in Step 4.
Enter the Affiliate ID that you used as a username in Step 1.
Step 7: Click On Authorize App Within The Plugin
To authorize you can also click the link below.
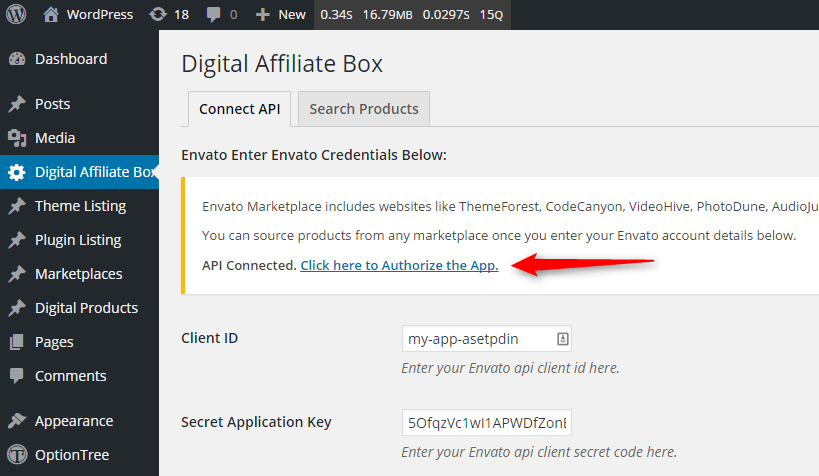
Your plugin is now connected with Envato and you can now source the products from it.
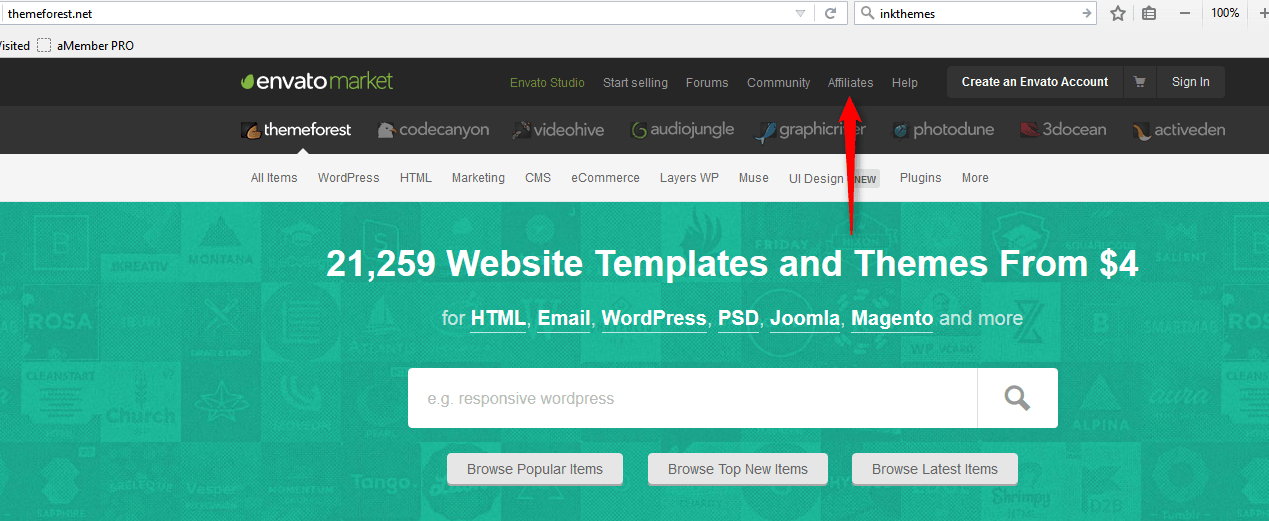
Step 8: Register For Affiliate
You can now head over to any of the product marketplace like ThemeForest.net or CodeCanyon.net and click the Affiliate link on the top header.
Step 9: Verify Affiliate Status
Enter few personal details including your country etc along with payment details to verify your affiliate status.
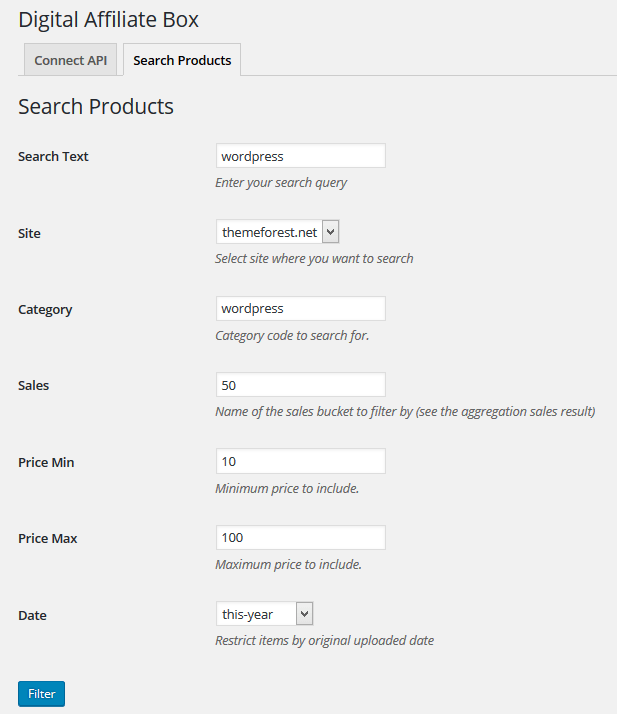
Step 10: Search Products
That’s it. Next we will start searching the product from within the Digital Affiliate Box plugin to import them to the website.
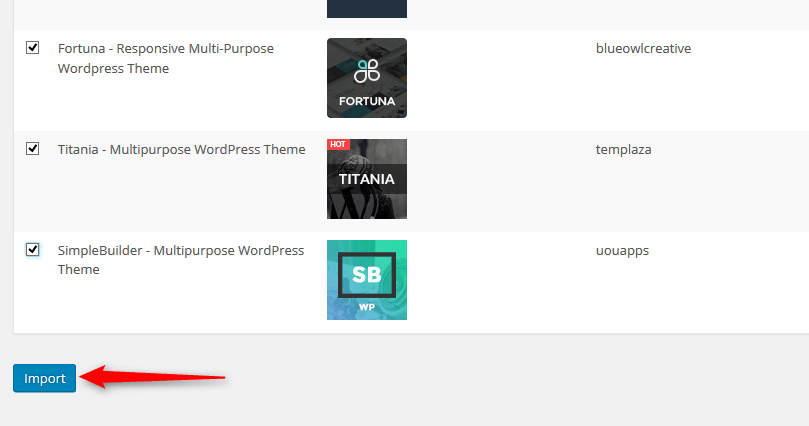
Step 11: Import The Products
Based on the search the products will be displayed along with the total count of the products.
Simply select and Import the product to your store.
Step 12: Customize Your Website’s Header & Logo
Through this setting, you can manually adjust various aspects of your website like Headers, Site Identity, Colors, Menus, Widgets, etc.
Follow the path, Appearance → Customize
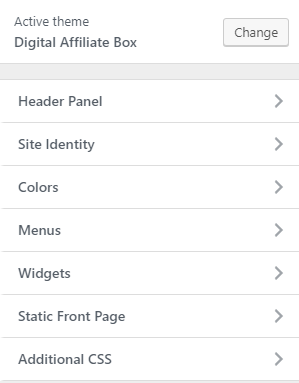
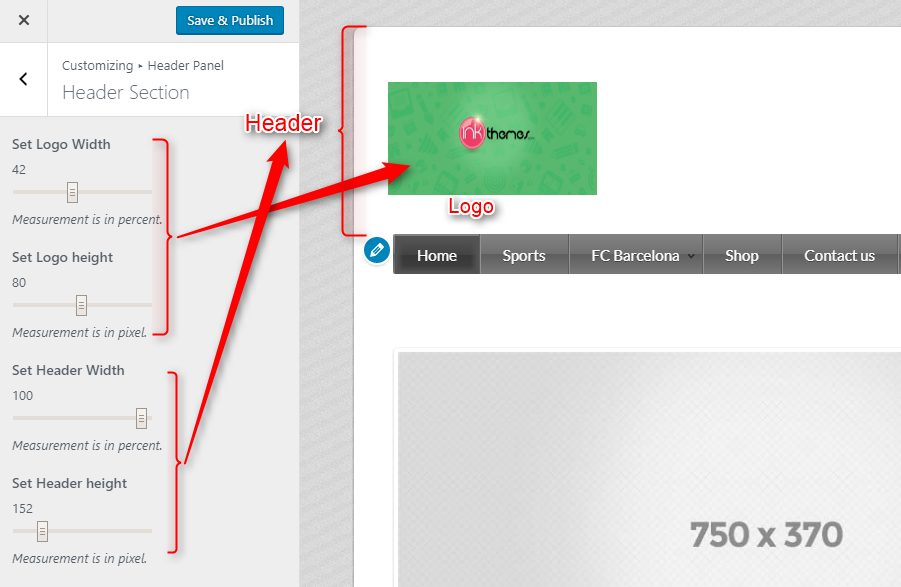
1. Appearance → Customize → Header Panel → Header Section
This setting authorizes you to manually adjust Header & Logo’s width and height.
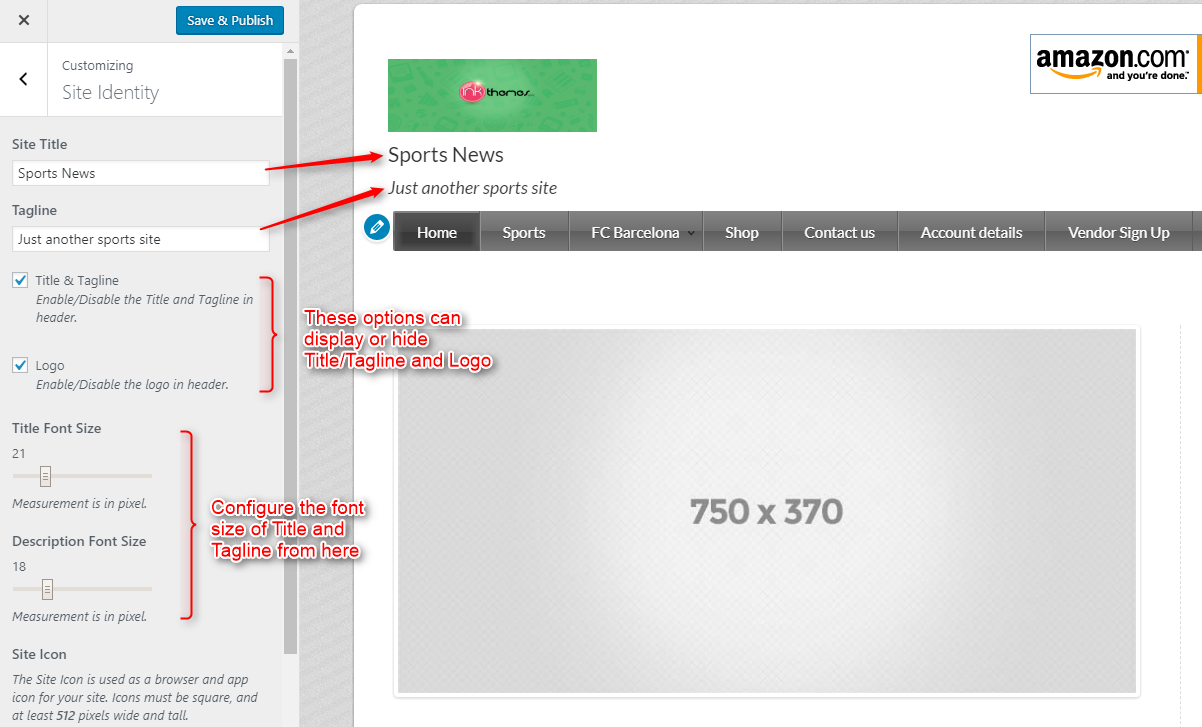
2. Appearance → Customize → Site Identity
Site Identity setting permits you to configure various settings like Site Title, Tagline, Title Font Size and Tagline Font Size. You can also show/hide Site Title and Logo at the same or one at a time through this customization setting.
Step 13: Configure Your Website’s Appearance
Once the products are imported, you can now focus on making your website presentable using various Theme Options.
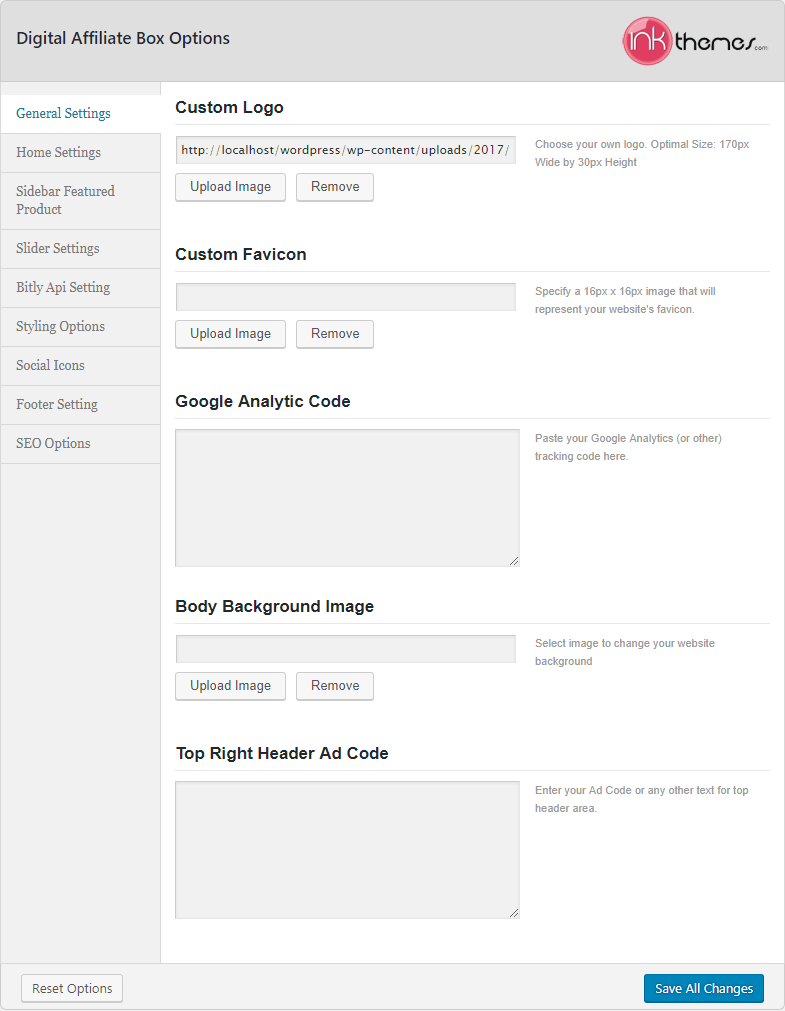
1. Appearance → Theme Options → General Settings
Through this setting, you can add your own logo, favicon, body background image and top right header Ad code.
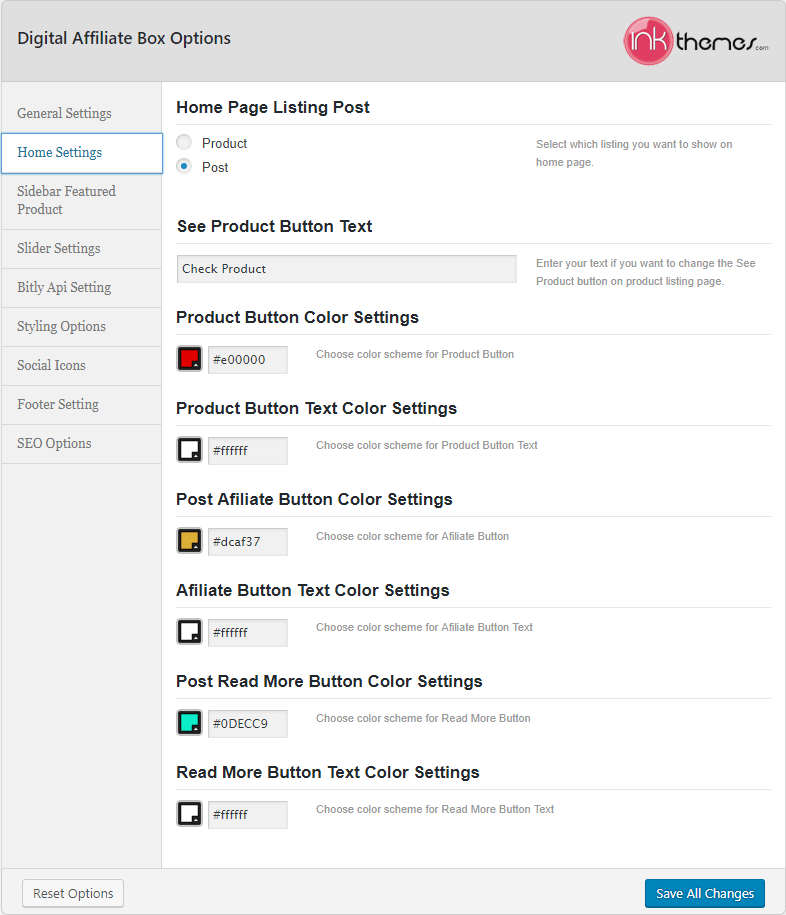
2. Appearance → Theme Options → Home Settings
Home settings allow you to configure the listing you want to feature on your homepage, set different colors for product, affiliate and read more buttons.
3. Appearance → Theme Options → Sidebar Featured Product
This setting will allow you to post a featured product on the sidebar with all the necessary details.
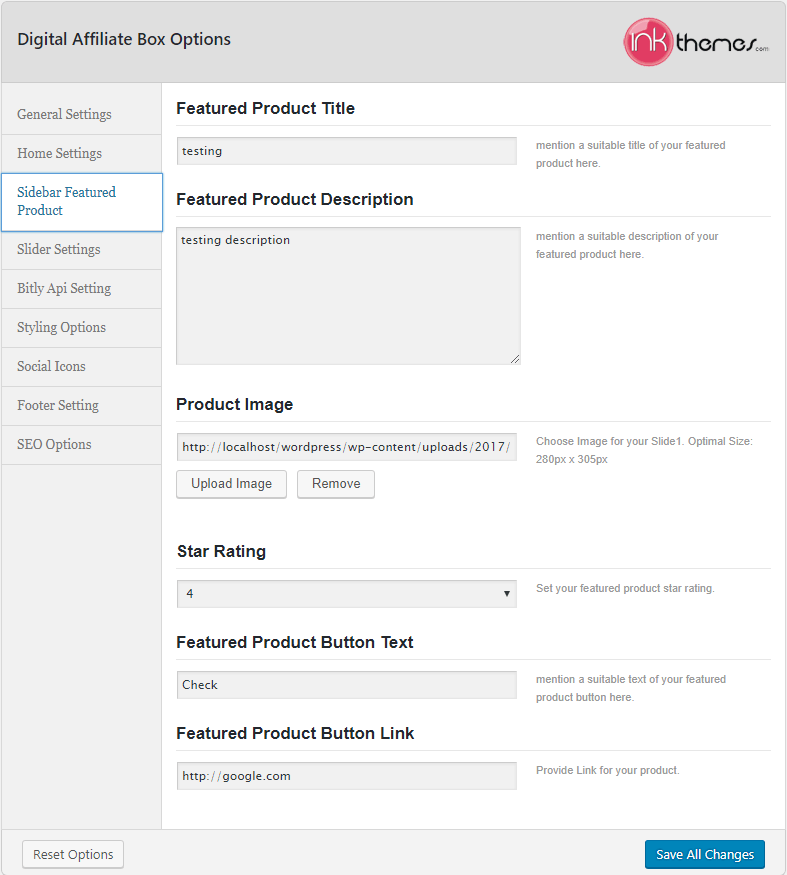
Sidebar Featured Product setting also permits you to showcase products on any of the pages or posts.
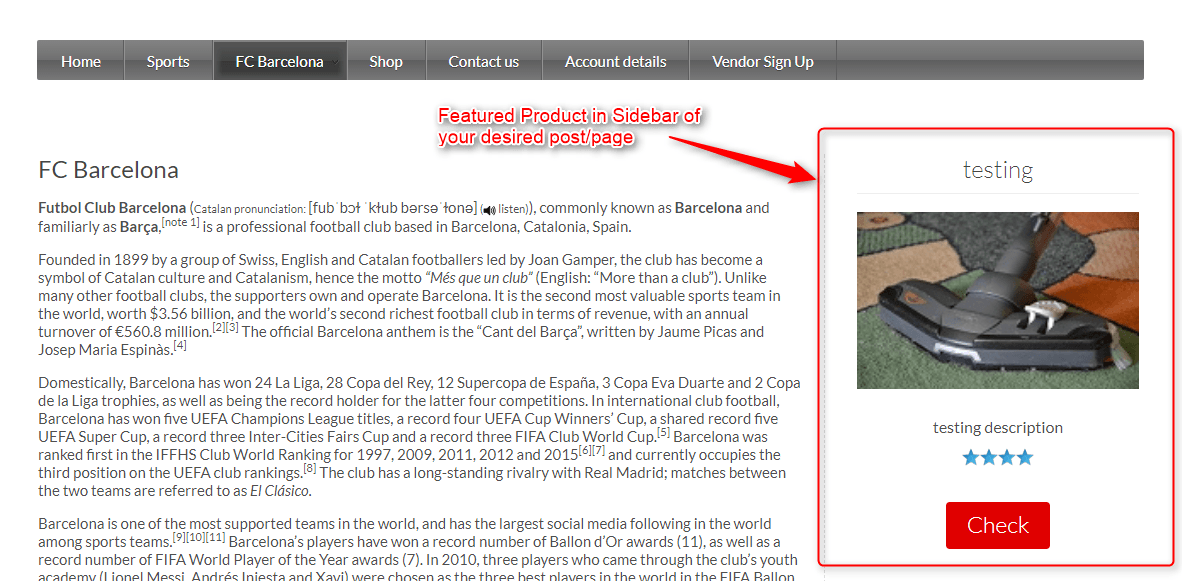
Once you are editing a page/post and wanting to feature a product, all you have to do is select the check box on meta post box like so –

After checking the box, it will appear on the front end –
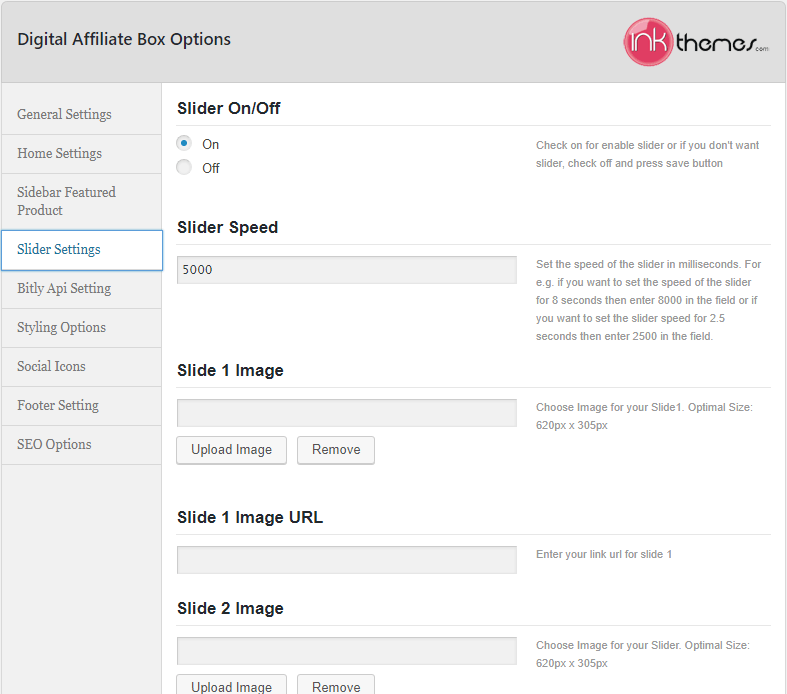
4. Appearance → Theme Options → Slider Settings
Slider setting will permit you to add multiple images with redirection links, which is displayed in the carousel format.
5. Appearance → Theme Options → Bitly API Settings

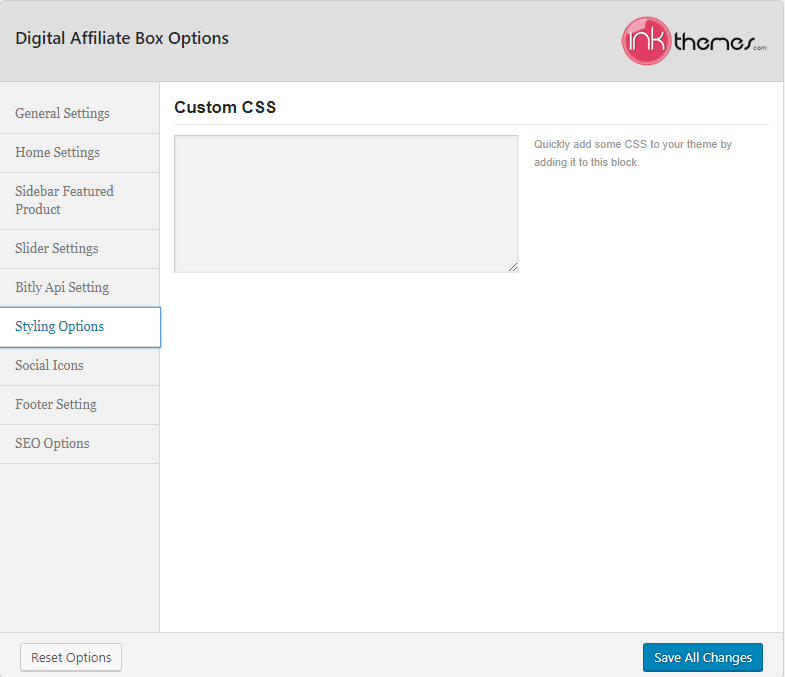
6. Appearance → Theme Options → Styling Options
Add custom CSS styling here.
7. Appearance → Theme Options → Social Icons
This setting allows you to add your social media icons and links for effective social media marketing.
![]()
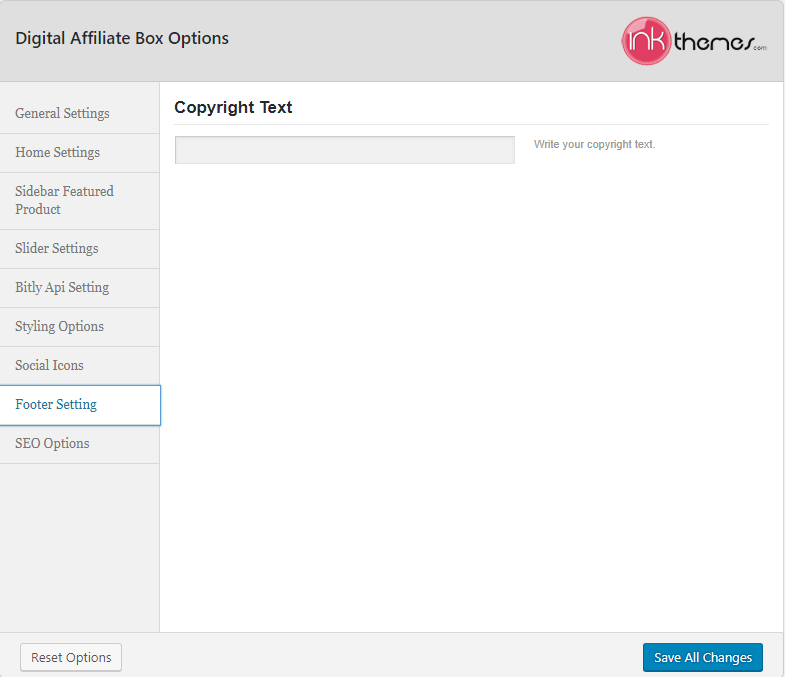
8. Appearance → Theme Options → Footer Settings
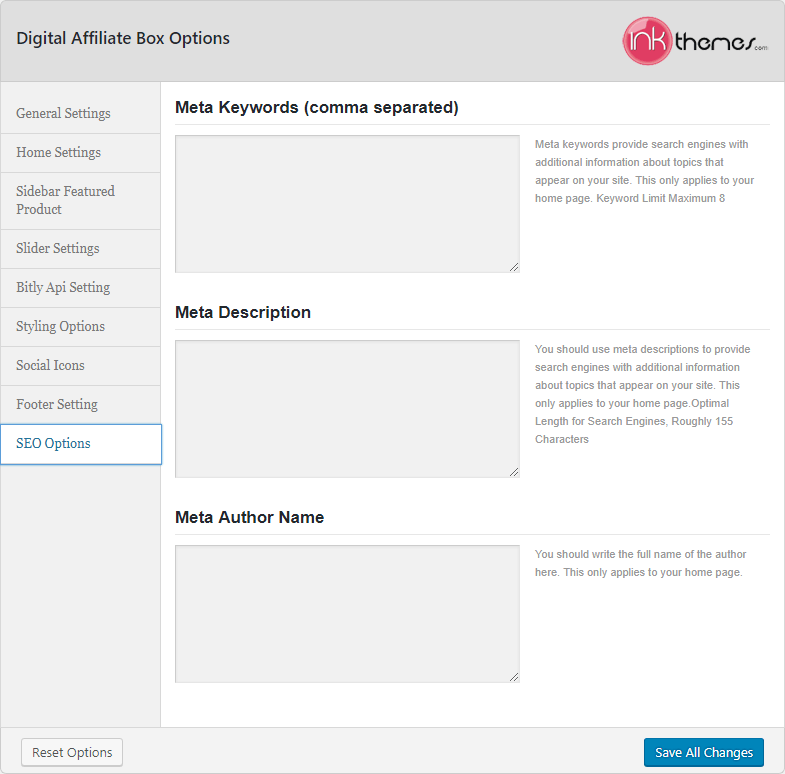
9. Appearance → Theme Options → SEO Options
Step 14: Website Ready with Automation
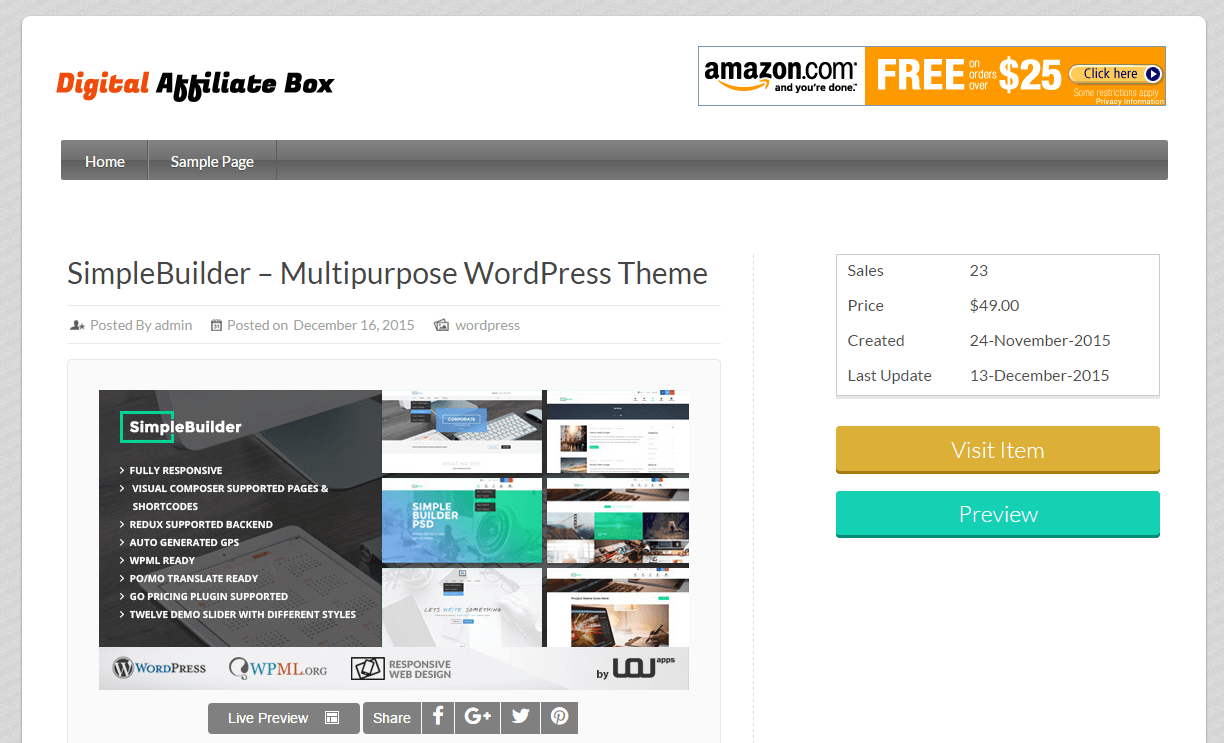
Once the products are imported, the website is customized with various theme options, everything will appear on the homepage along with the entire details and your affiliate link via Digital Affiliate Box’s autopilot mode.
Other useful resources of your interest – Affiliate Marketing Guide.
