Get Your Site Ready in Just 1 Click
Thank you for purchasing our theme. If you have any questions that are beyond the scope of this help file, please feel free to ask your queries either at our support forum or at [email protected]. You can also watch videos available in the membership Area.
If you wish to hire us for customizations, please click here, we would love to assist you.
What is Woodpecker Theme?
Woodpecker is a perfectly designed professional WordPress theme which is perfect for any business niche.
You can easily make a beautiful and professional business website within no time.
Woodpecker comes with all the demanding elements that strengthen your business website.
All key elements like a movable full-width slider on the homepage to show multiple images, 3 column feature area to describe your business services, two video box to add videos on the homepage and more.
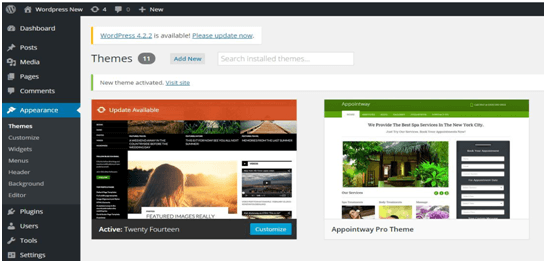
How to Install Woodpecker Theme?
Before installing the Woodpecker theme on your website make sure that:
- You have a web server installed on your machine.
- You have installed WordPress on your server.
Installing the theme is very simple and easy. It will hardly take a minute. Just follow the simple steps given below:
To install the theme, go to your WordPress dashboard. Dashboard > Themes > Install Themes
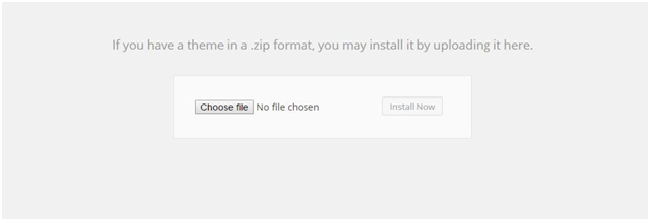
Choose the woodpecker.zip file and upload it on your dashboard. Upload> Choose File> Install Now >Activate the theme.
General Settings
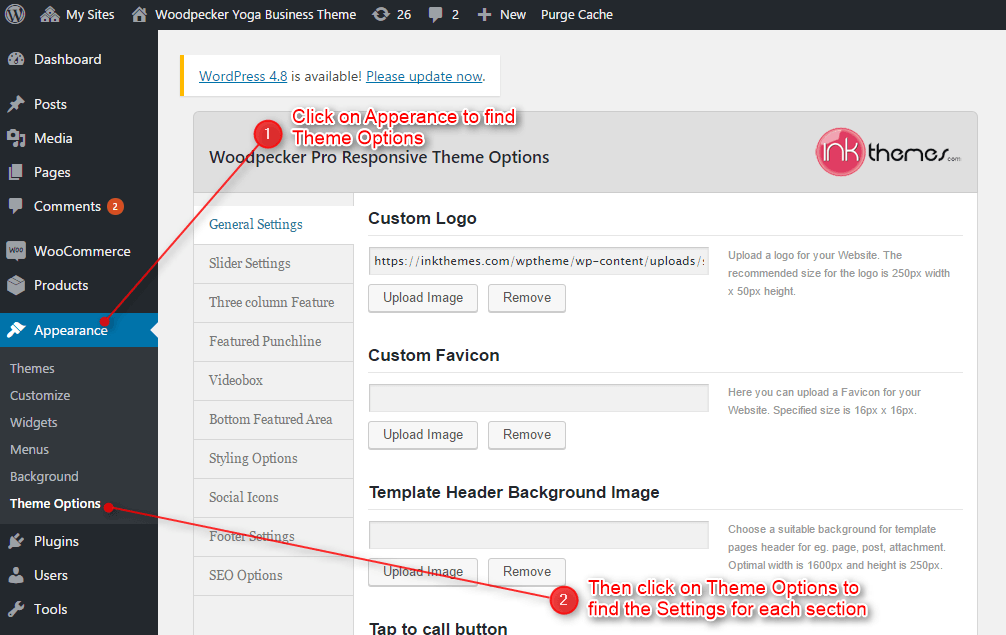
First of all, you need to find theme options panel for configuring the changes.
How to upload logo, favicon and background image on the website?
Uploading logo, favicon and background images on the website are very simple.
Moreover, you can mention the mobile navigation menu on the website (which will display when the theme is opened in mobile browsers) and add Google tracking code.
The theme has an option to give a background image to the header area of each page post on your website.
Just go to your dashboard and do the following steps: Dashboard > Appearance > Theme Options > General Settings
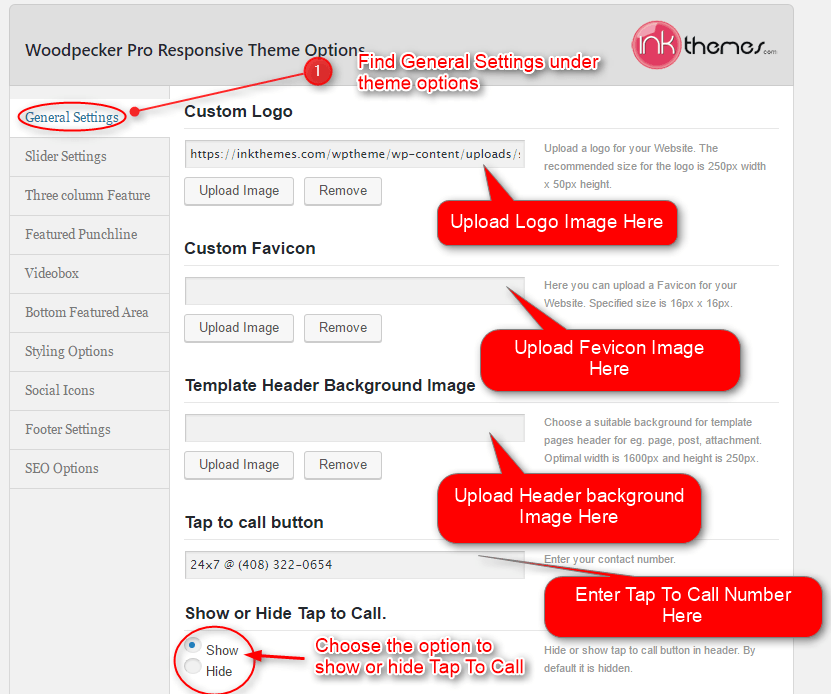
After uploading the logos, favicon, mobile navigation menu and tracking code, click on Save All Changes button.
You can see the how favicon and logo appears on front page of your website.
![]()
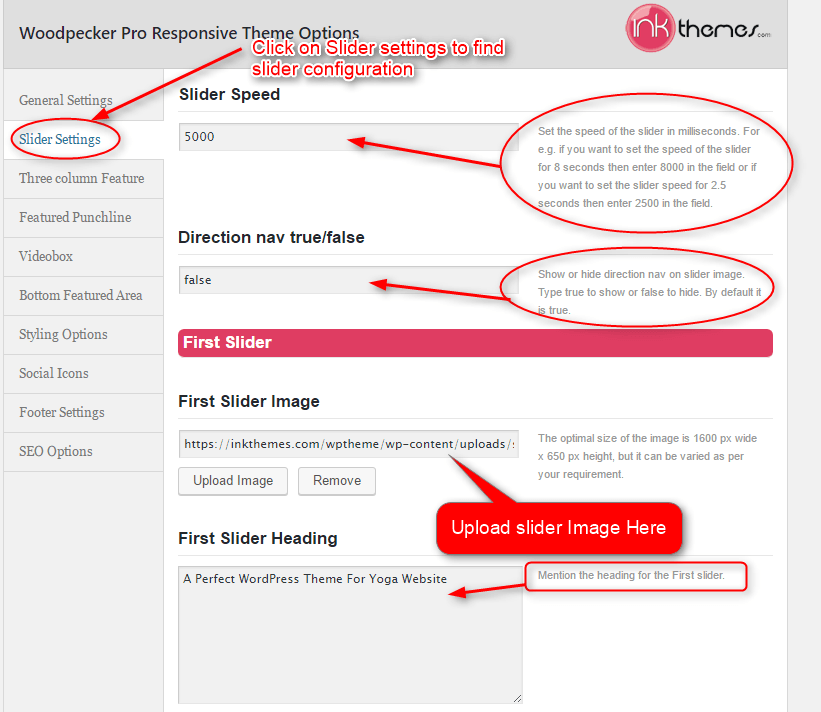
How to activate the slider on the home page?
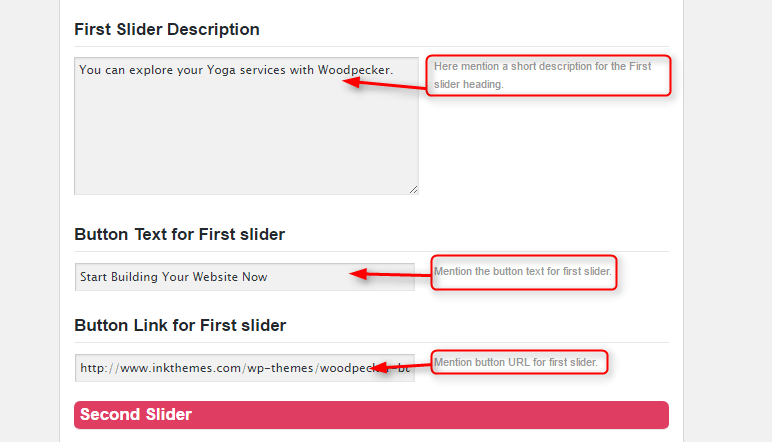
Woodpecker has a full-width slider. In the slider, you can show a maximum of 6 images whereas minimum would be one. With each slider image, you can set the heading and short description according to you. Moreover, you can also set a clickable button on each slider.
You can activate slider on the homepage by performing the following steps given below.
Dashboard>Appearance>Theme Options>Slider Settings
Click on Upload Image button and upload the images which you want to show in the slider.
Moreover, you can also set the slider speed (in milliseconds) according to you. For e.g. If you want to set the slider speed as 3 seconds then enter 3000.
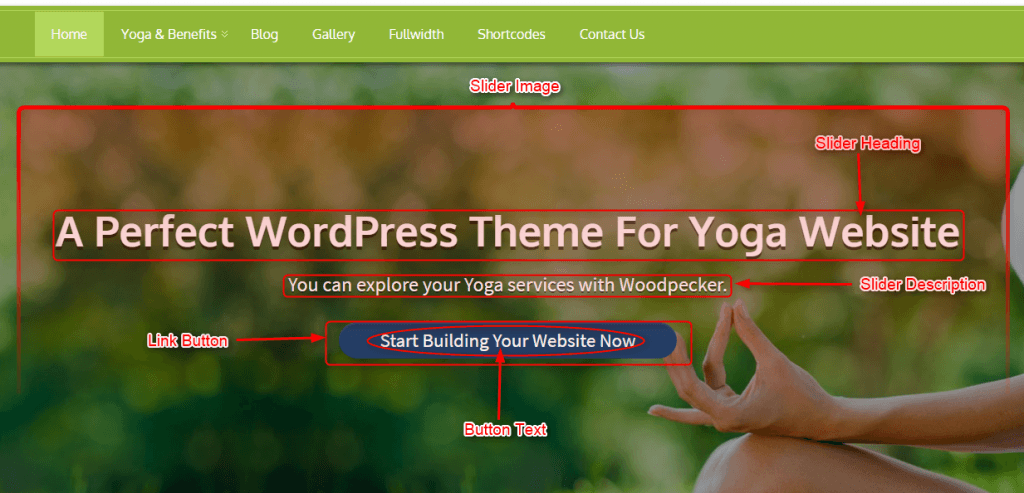
Just see how the slider section looks after configuring the changes.
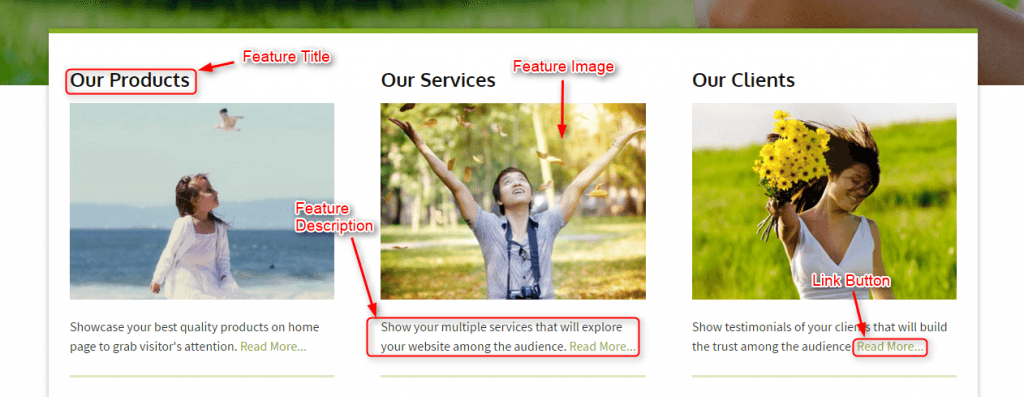
How to use Three column Feature?
You can give three feature images in the center of the home page with its title and the short description. You can give a hyperlink to each title of the image.
Set the feature image by the following procedure.
Go to Appearance > Theme Options > Three column Feature.
You can see a dashboard image as shown below.

Have a look at how Feature section appears on the homepage.
How to use Featured Punchline?
In Featured Punchline option, you can give proper heading and subheading to the video or images in the VideoBox.
To do this, just go to Appearance>Theme Options>Featured Punchline. See the dashboard view in the image below:
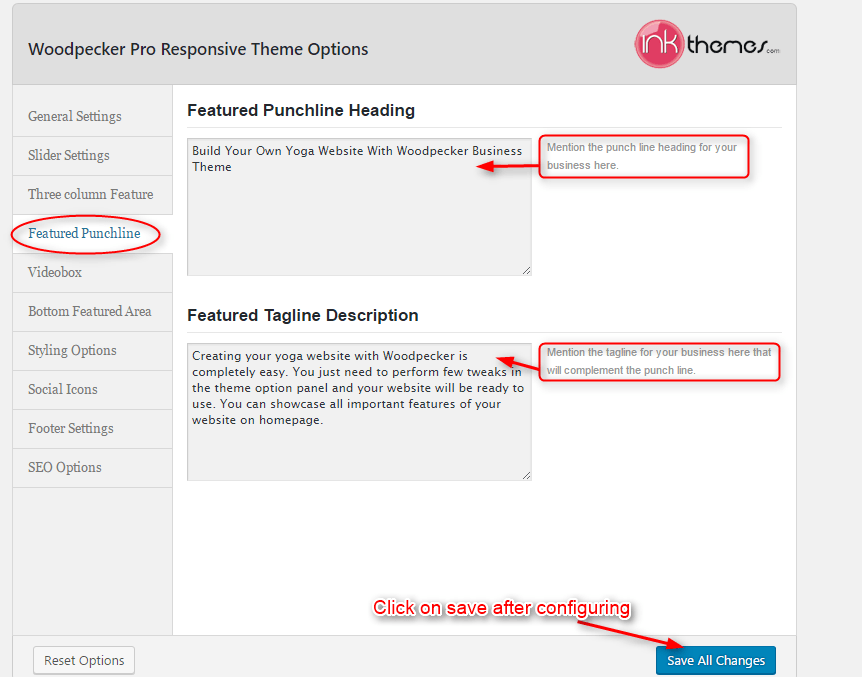
See the image below to have a look over punchline on the homepage.

How to use VideoBox?
In the VideoBox, you can do either of the two things.
- Put videos with caption.
- Put images with caption and Hyperlink them with a video. To implement either of the things, do the following procedure. Go to Appearance>Theme Options>Videobox
If you want to put the first video, then put it’s iframe codes in the field option named as VideoBox First.
Similarly, in order to put the second video, put the Embeddable codes in the field option VideoBox Second.
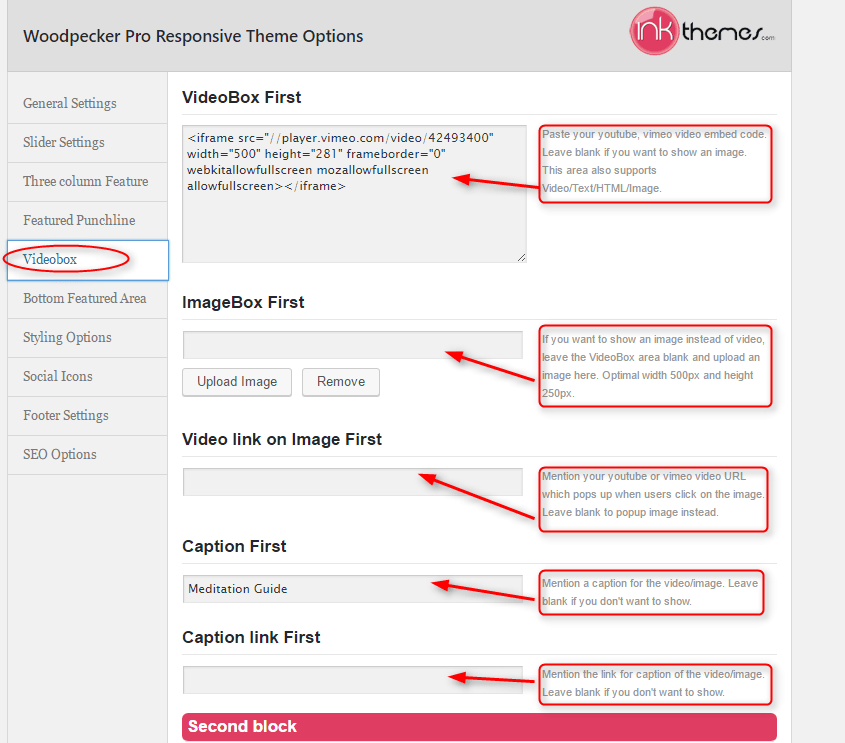
Alternative of Embedding videos Insert videos Hyperlinked to Images.
Instead of videos, if you want to put images, just upload the images in Image Box First and ImageBox Second.
You can link the video to each image by putting its URL in Video link on Image First and Video link on Image Second.
Note: If you are supposed to put images, then keep that video box empty.
Besides, you can give a caption to each image and can hyperlink it.
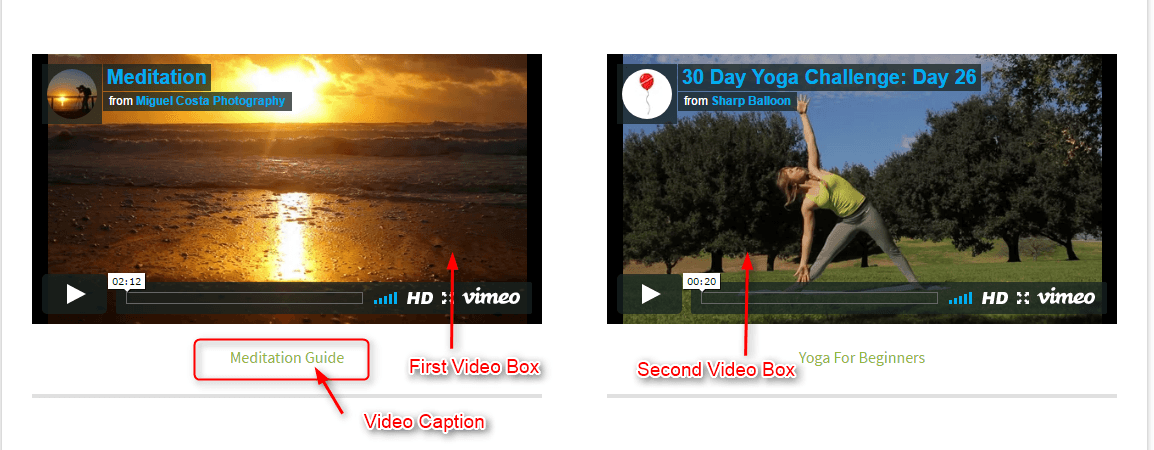
After configuring video box settings just check the homepage
How to use Bottom Feature area?
In the bottom feature area, you can give a short description about your business. It is just like giving a portfolio in a unique and distinct region.
To create the portfolio Go To Appearance > Theme Option > Bottom Featured Area.
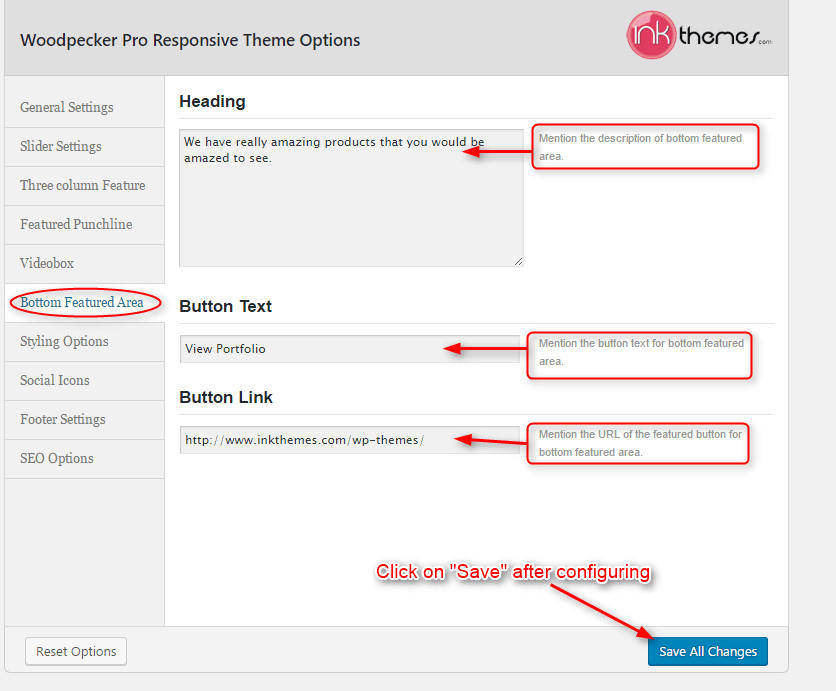
Look how this section will appear in the front end

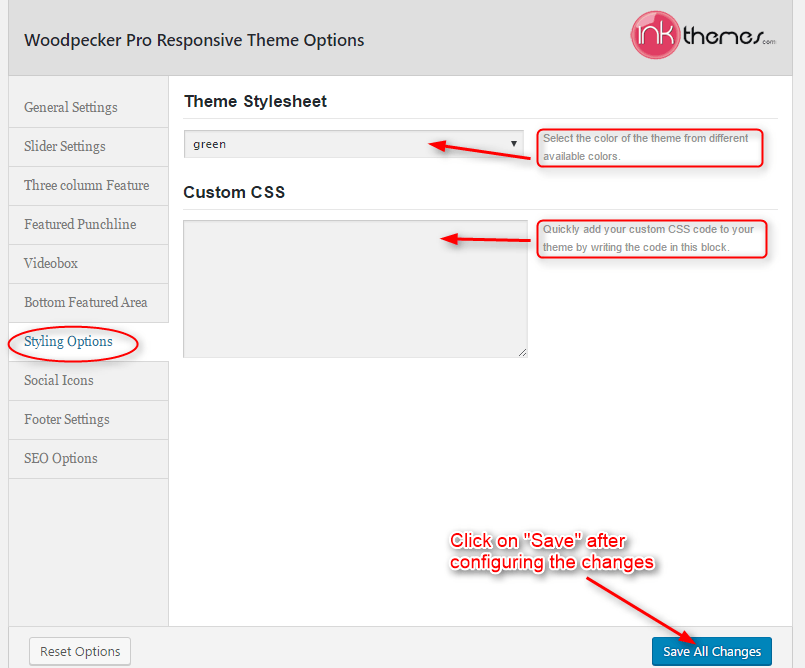
How to change the theme style options?
You can make the website in different colors. The theme has various inbuilt color options.
To change the theme color Go To Appearance > Theme Options > Styling Options.
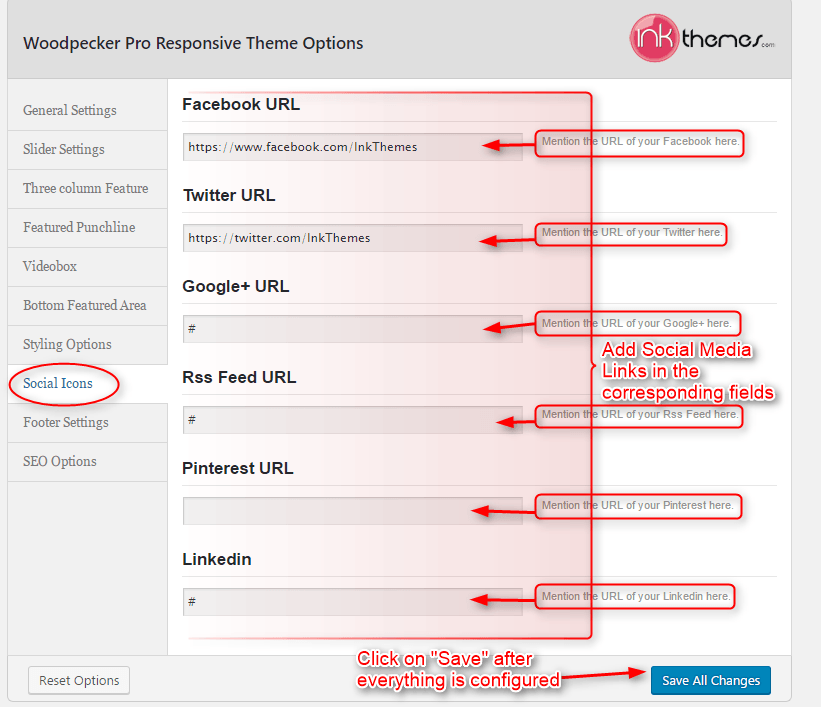
How to add social icons on the website?
Social icons are going to appear in the header and footer area of the website. You can add social icons very easily.
Go To Appearance > Theme Options > Social Icons
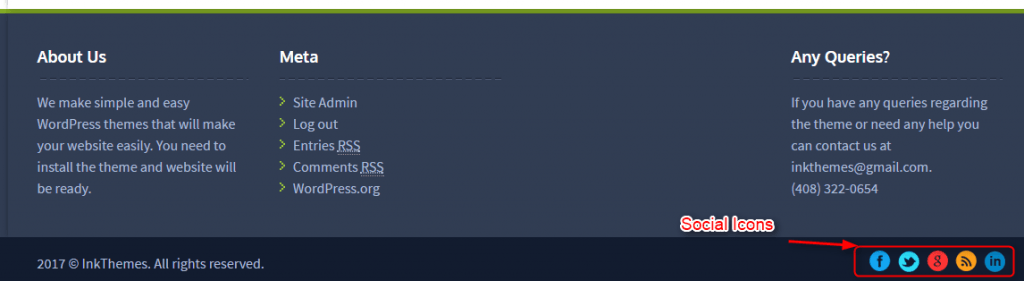
Social icons will be displayed in the same manner as shown in the image below.
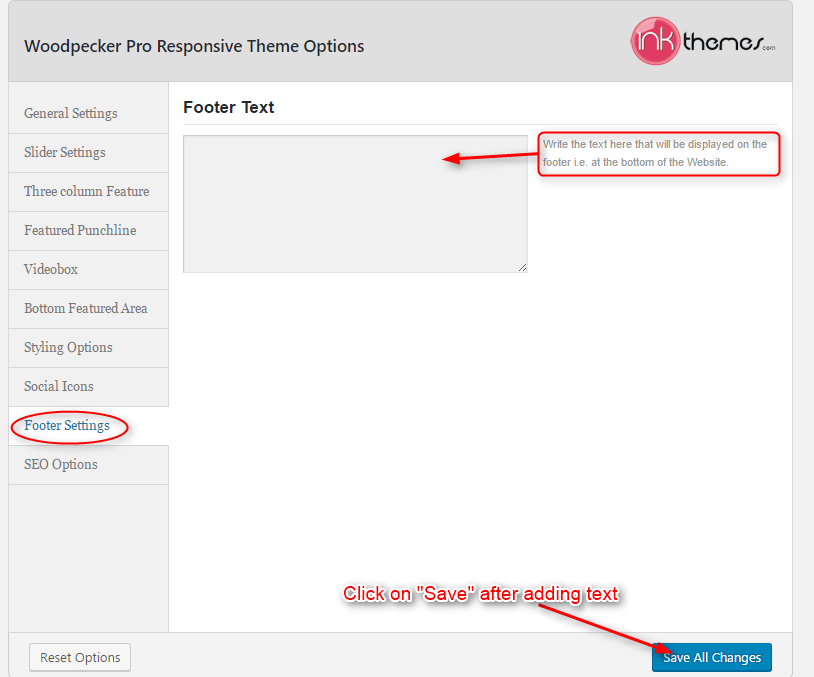
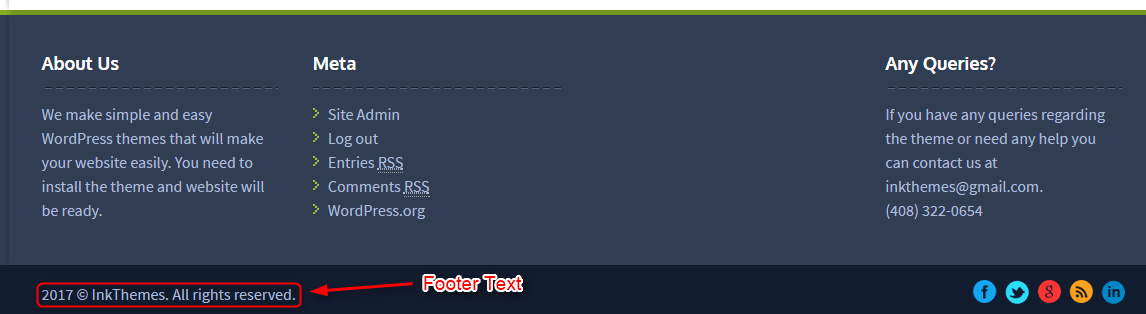
How to use Footer Settings?
Footer settings give you the privilege to stick a background image behind the footer widgets and also to have a footer text at the bottom of the website.
You can see the place of Footer Text and background Image in the image below.
Footer text will appear in the same manner as shown in the image below.
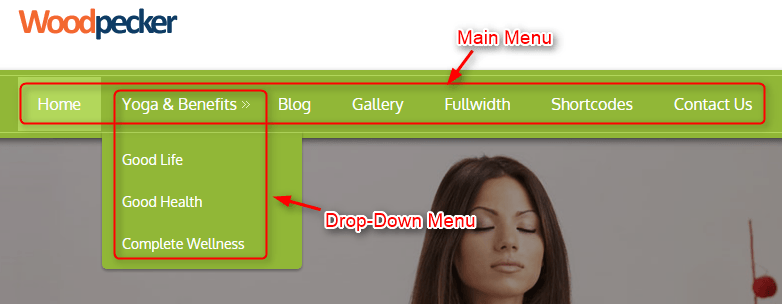
How to create a Main & Drop-down Menu on a website?
Main Menu
You can easily customize menu with the following steps: Dashboard> Appearance> Menus
Give Menu Name (let’s say menu) and click on Create Menu.
Create a home page of the website, for that, Go to link tab, give Link Text and URL.
Click on Add to Menu. The homepage is added now and listed in the menu.
Similarly, to add other pages to the menu go to Pages option, Check off all the pages and click on Add to Menu.
Building Drop-down Menus
For making drop-down menus all you have to do is add new page
Then name it for eg. Submenu 1 and set any of your pre-developed pages as a parent page for which you want to create drop-down, after that select template & click publish button.
Similar process you can follow making multiple Submenus
Now, these pages will move to the Menu Structure area. Here, you can rearrange the options sequentially by drag and drop action.
Finally, click on Save Menu button.
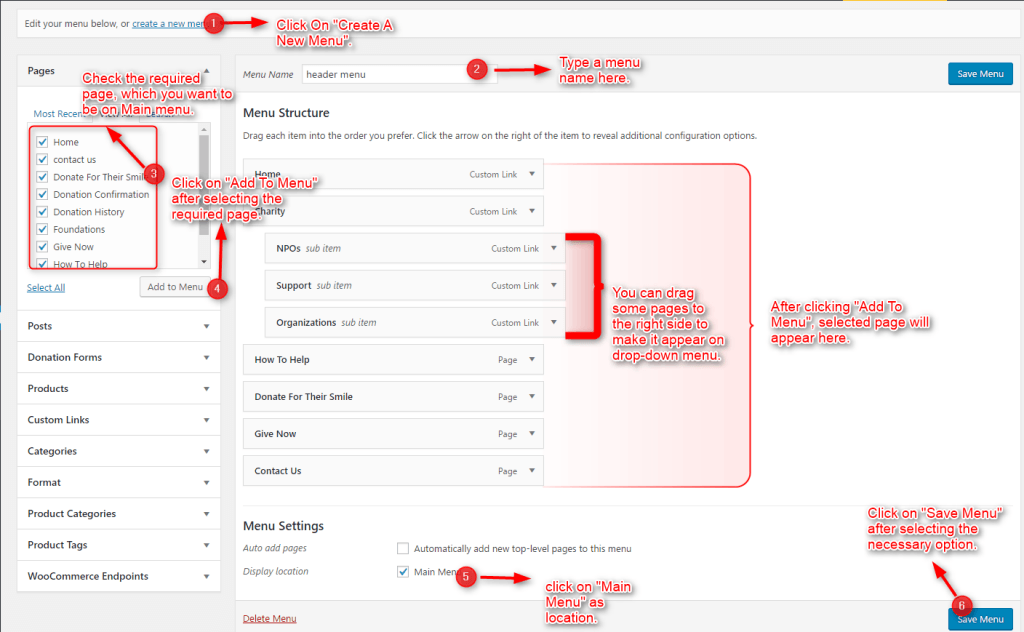
You can see the Menus in the image below.
How to create a gallery page on the website?
You can easily create a gallery page in the theme by following the steps given below:
Step1: Firstly, create a new page. Go to Dashboard>Pages >Add New
Then Go to Add Media

You can name the page as a Gallery.
Step 2: Click on Add Media to create a gallery.
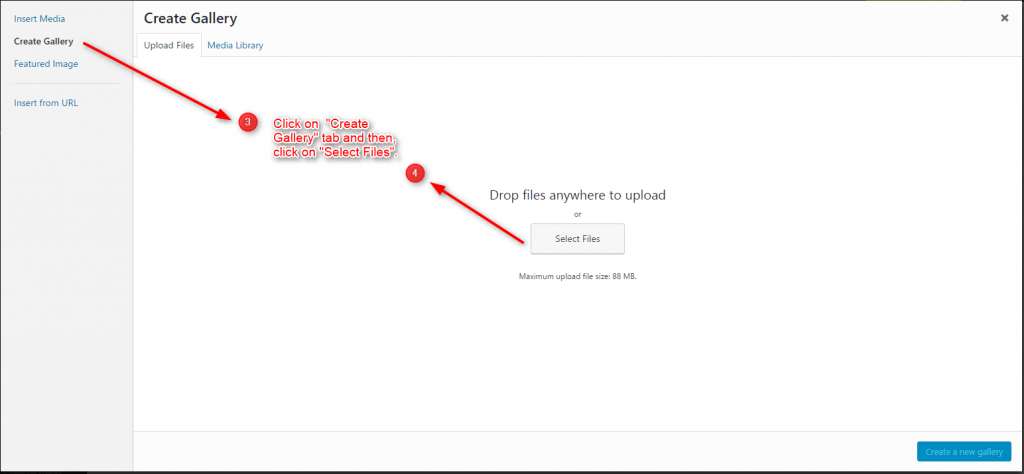
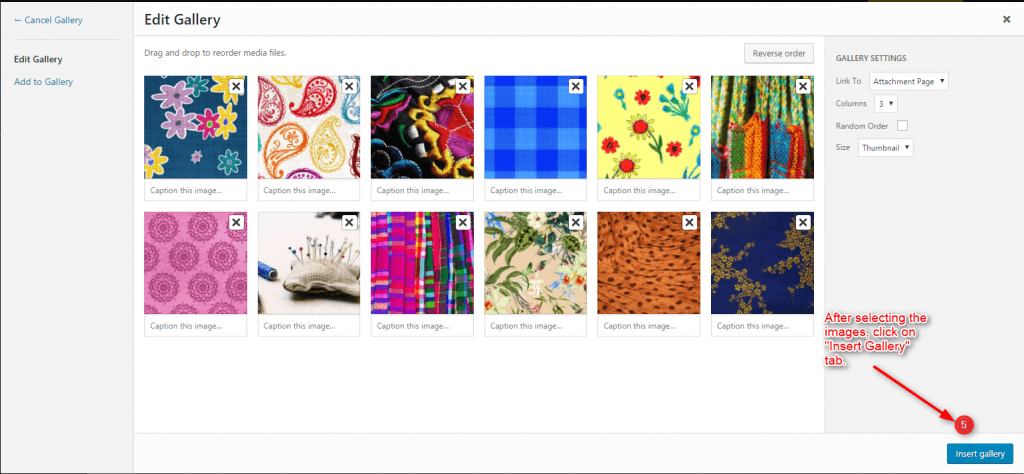
Select The Create Gallery Button on the top left, Upload the image files for Gallery page
Step3: Once the images get uploaded, click on Create a new gallery option as shown in the below image.
After this Edit Gallery page opens up.
Make sure that Link To field should have an Attachment Page option.
Now click on the Insert Gallery.
Step4: After configuring everything you can check the Page Template under Page Attributes. Make sure that it must be on Gallery Page.
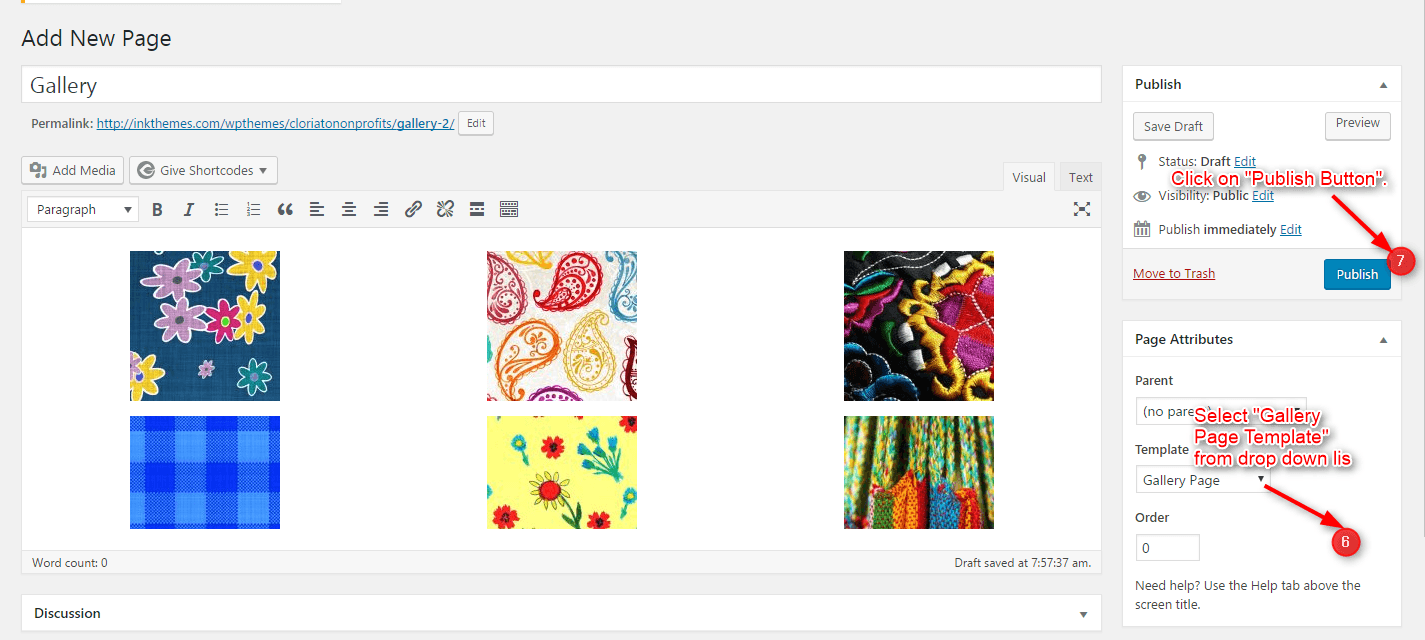
When you complete the above step, you can see a gallery shortcode appears on the page.
Click on Publish button.
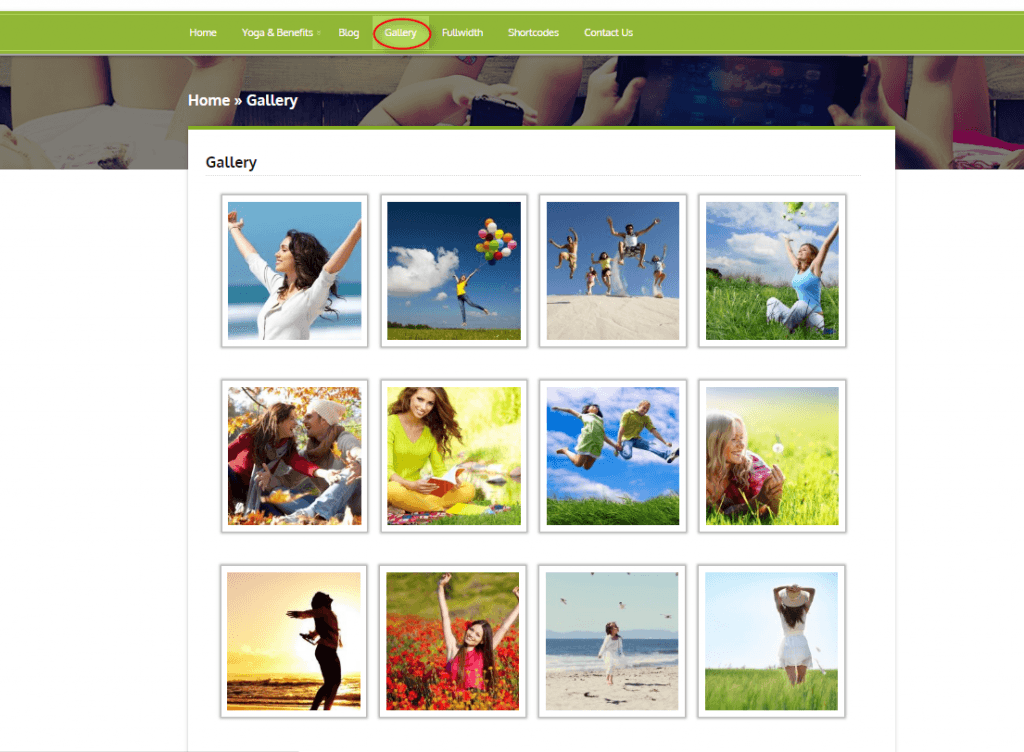
Gallery page layout can be seen in the image below.
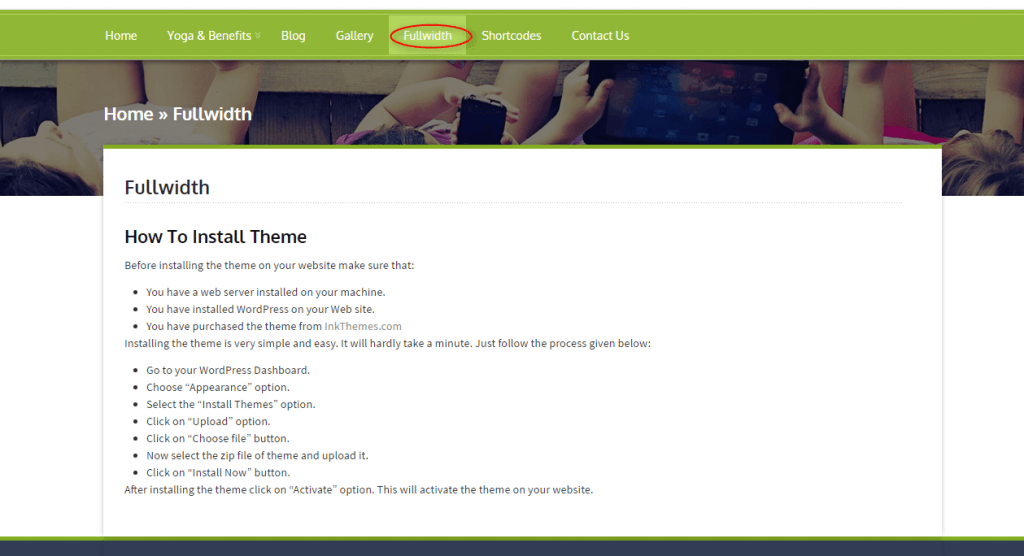
How to make a Fullwidth Page?
Fullwidth Layout
Similar to the Gallery Page, To create a Fullwidth page all you have to do is select the appropriate Fullwidth Template from the Page Attributes.
You can see the layout of the full-width page in the image below.
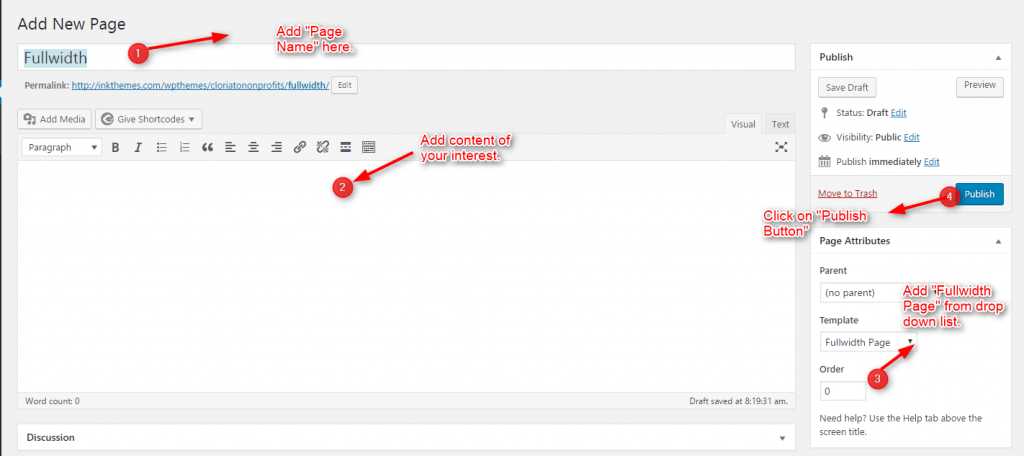
See the layout of the Fullwidth page in the image below.
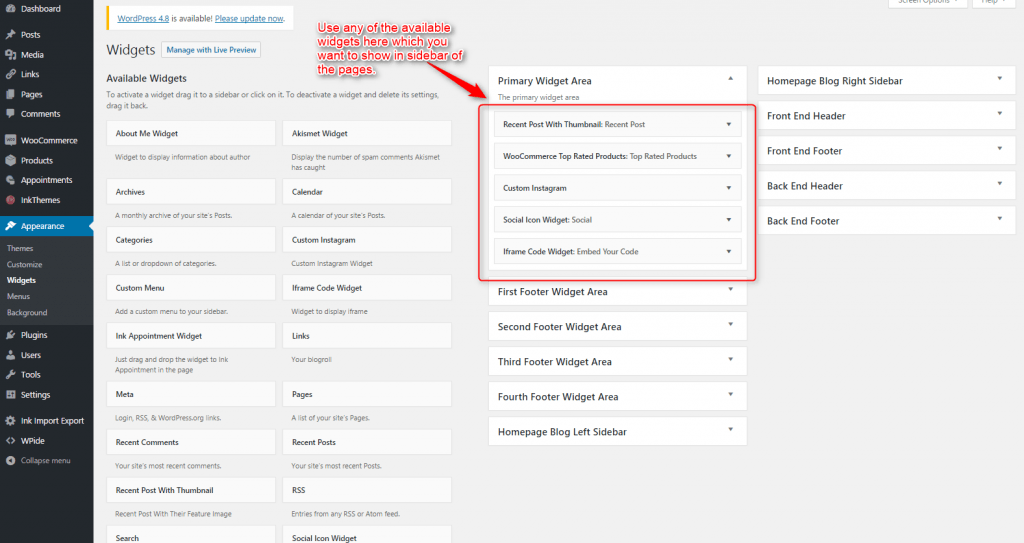
How to add Widgets in Sidebar & Footer?
To add widgets you need to click on Apprenace>Widgets
Widgets in Sidebar
For adding widgets in the sidebar all you have to do is select Widgets option from Appearance panel, then drag widget of your need & drop it in primary widgets area or in secondary widgets area according to your requirement, at the end click save button and your widgets are ready to use.
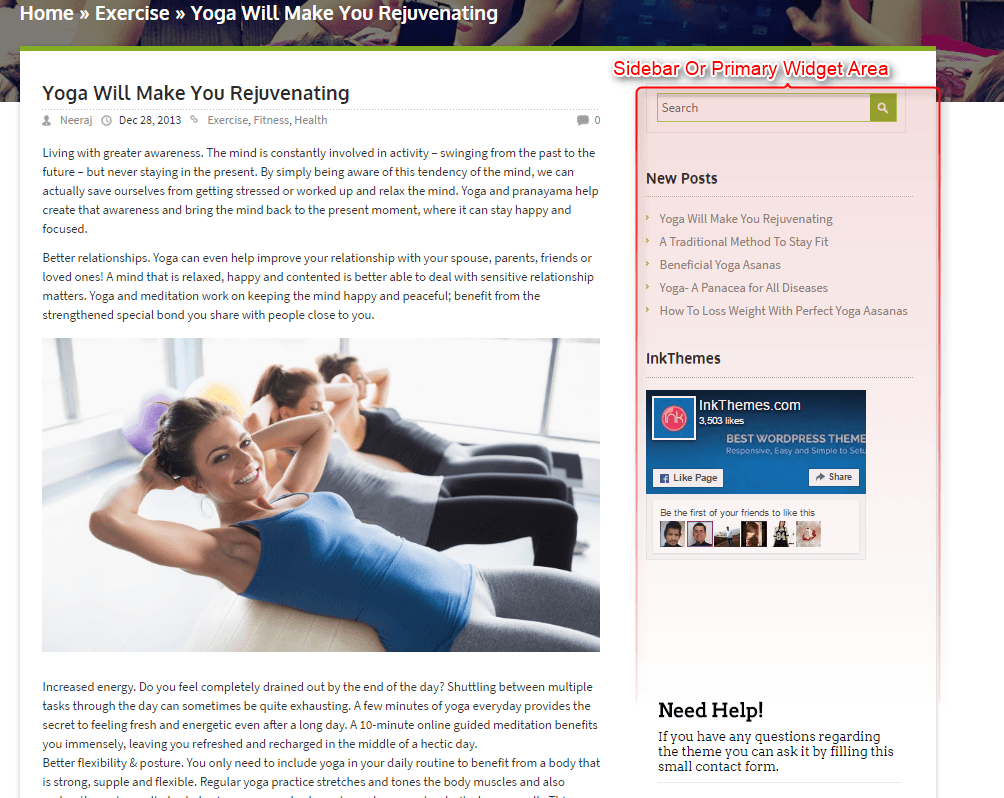
You can see the sidebar any of the pages or post like as shown in the image below.
The Sidebar front end can be seen in the below image.
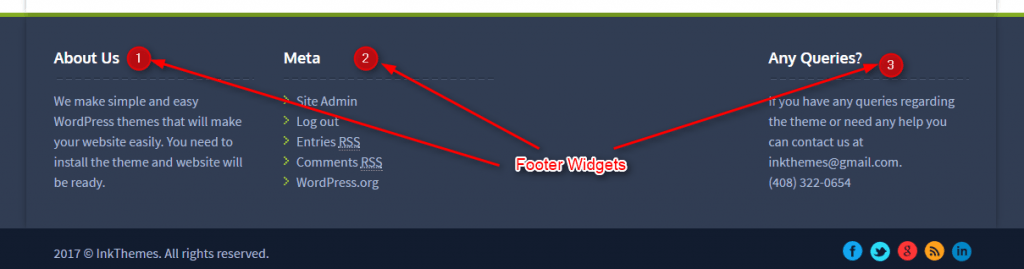
Widgets in Footer
Similar to the primary widget area, you can add the widgets in the footer as well. all you need to find the footer widgets.
Footer widgets can be seen or checked after configuring as in the following image.
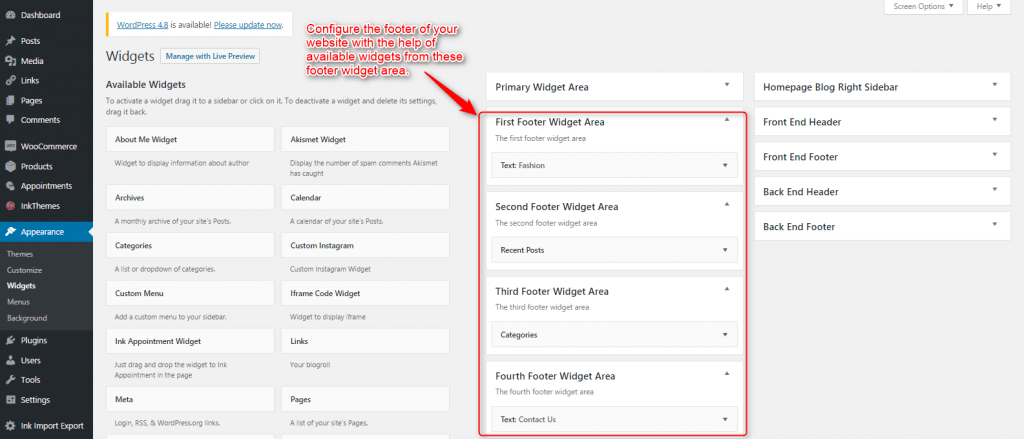
Footer Widgets can be clearly seen in the image below.
Thanks for purchasing the Woodpecker theme. If you have any questions that are beyond the scope of this documentation, you can freely ask it on our support forum.
Grap This Beautiful Theme – WoodPecker WordPress Theme
Here is the link you need to follow-
