“RoadFighter WordPress” Documentation by InkThemes.com
Get Your Site Ready in Just 1 Click
Thank you for purchasing our theme. If you have any questions that are beyond the scope of this help file, please feel free to ask questions on our support forum at https://www.inkthemes.com/support/. You can also Watch the Video Demo Available in the Membership Area.
1. Beginning (Important)
Installing the theme
To use the RoadFighter WordPress Theme, you need to install WordPress on your server. If you don’t know how to do it, please visit: https://codex.wordpress.org/Installing_WordPress
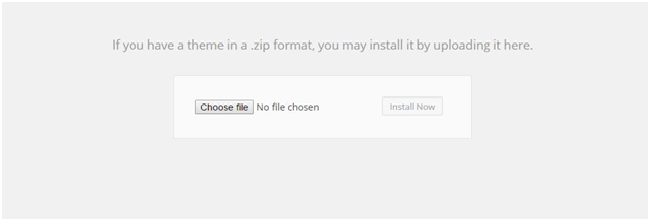
In the dashboard, you need to go on Appearnace>Themes>Add New>>upload the file.
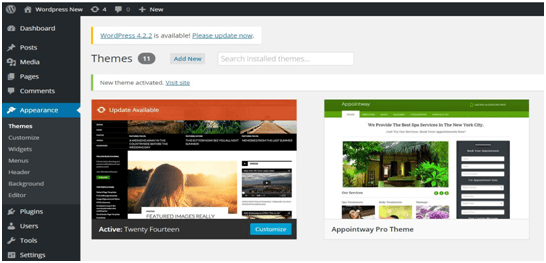
Once you the file get uploaded, you will find RoadFighter WordPress theme in the themes directory under Appearance>Themes.
Click on RoadFighter and activate it.
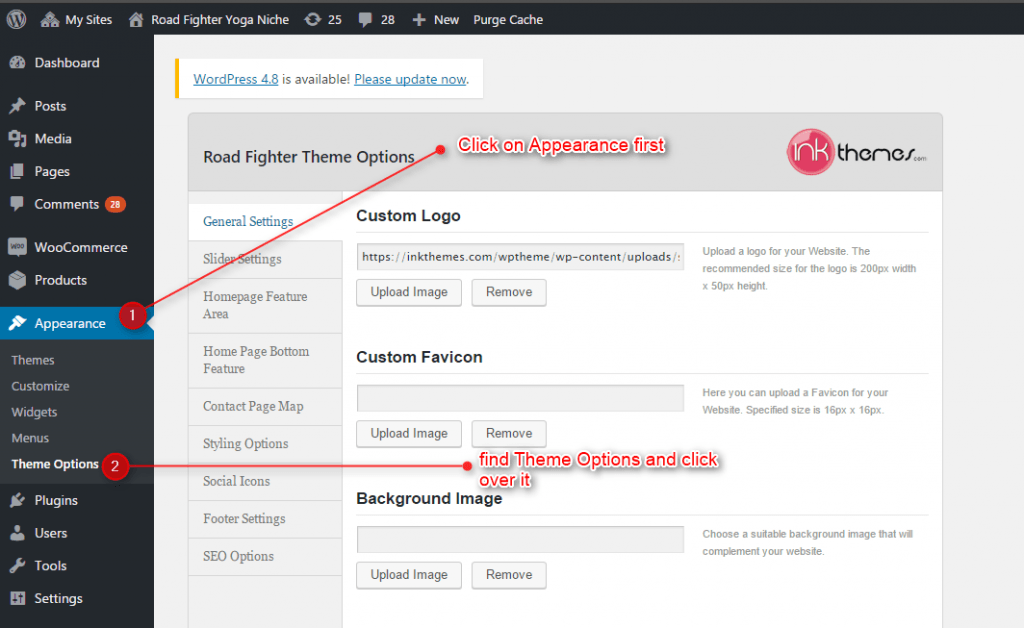
Now the theme is ready to get customized by you. All you need to find theme options panel now.
Creating the Pages
You would need to build new pages from Add Page menu and select the Appropriate Template for each page.
For “Blog” Choose the “Blog Template” from Page Attributes.
For “Fullwidth Page” Choose the “Fullwidth Template” from Page Attributes.
For “Contact Page” Choose the “Contact Us Template” from Page Attributes.
2. Configuring Homepage
Specifying Logo & Favicon
Please go to “Appearance -> Theme Options -> General Settings” in the WordPress admin, upload logo, favicon and background images on the website.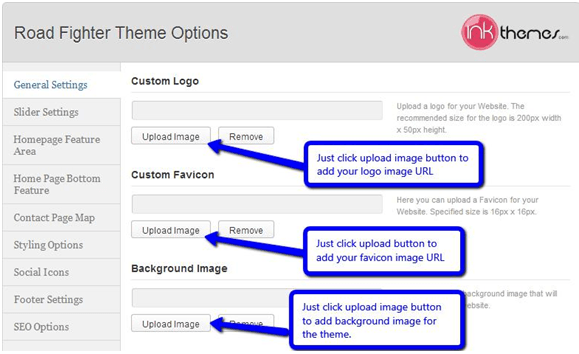
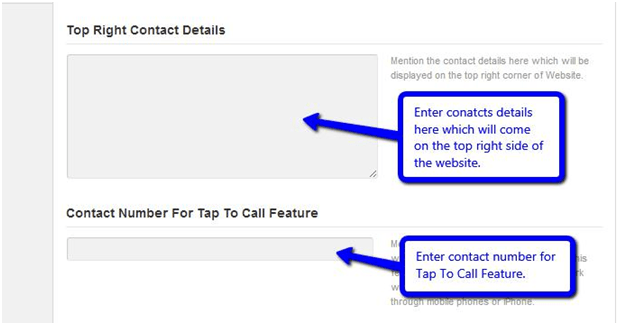
Adding top right contact details
In this section, you can add your contact details at the top right section of the website, The main benefit of this section is when a user open website on a mobile device then he/she can directly contact to you.
Just go to “Appearance -> Theme Options -> General Settings” And you can write your contact details in “Top Right Contact Details”, and for tap to call button write the number in “Contact Number for Tap To Call Feature”.
![]()
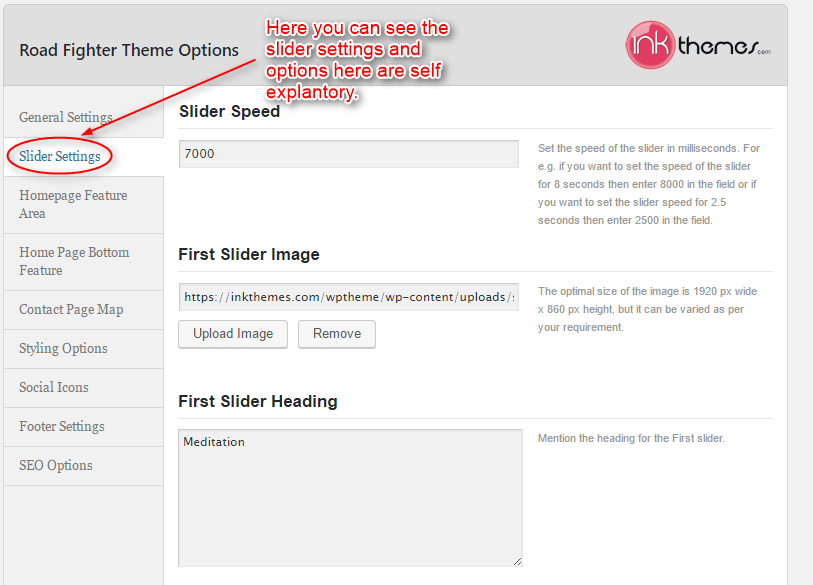
3. Slider Settings
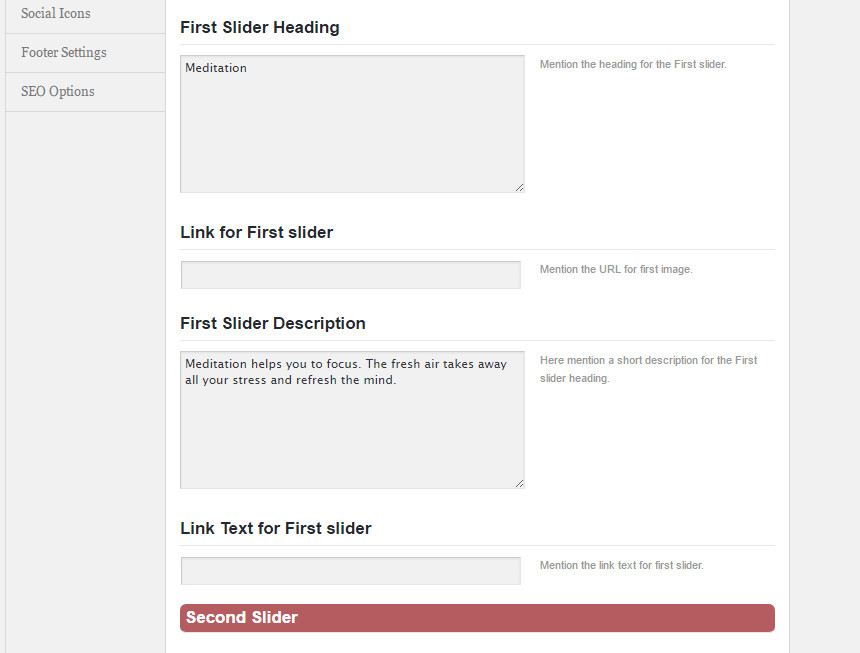
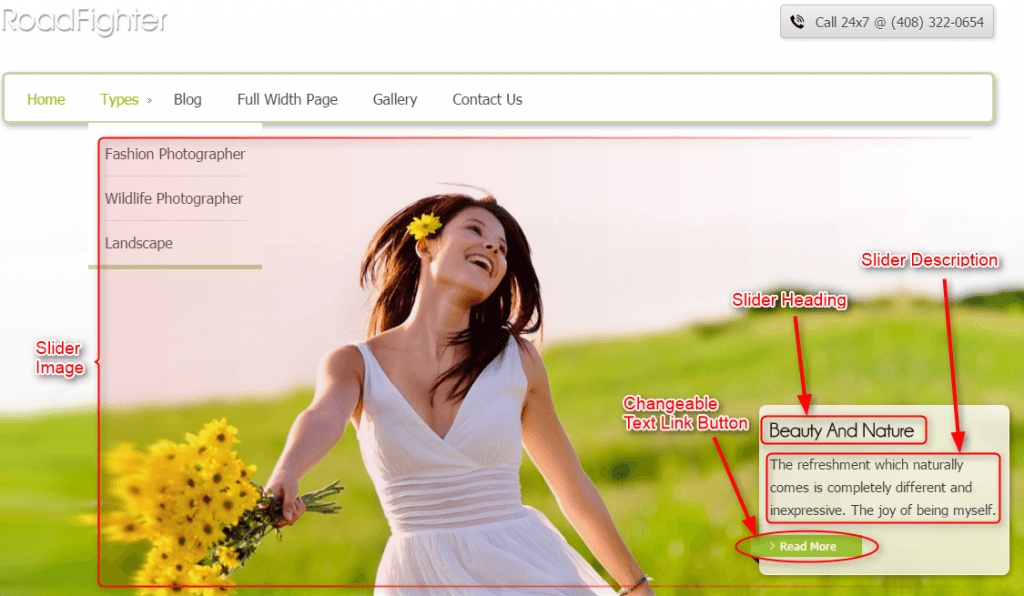
Just Upload the Images in the Slider from the Themes Options Panel and the images would start to appear on the Home Page of the Website. Slider image and slider link can be easily inserted with the help of the options given below. Also, you can give the heading and description of the slider in this section. A link can also be added to the image which will redirect to the given address. Likewise, you can add six different slider images on your website.
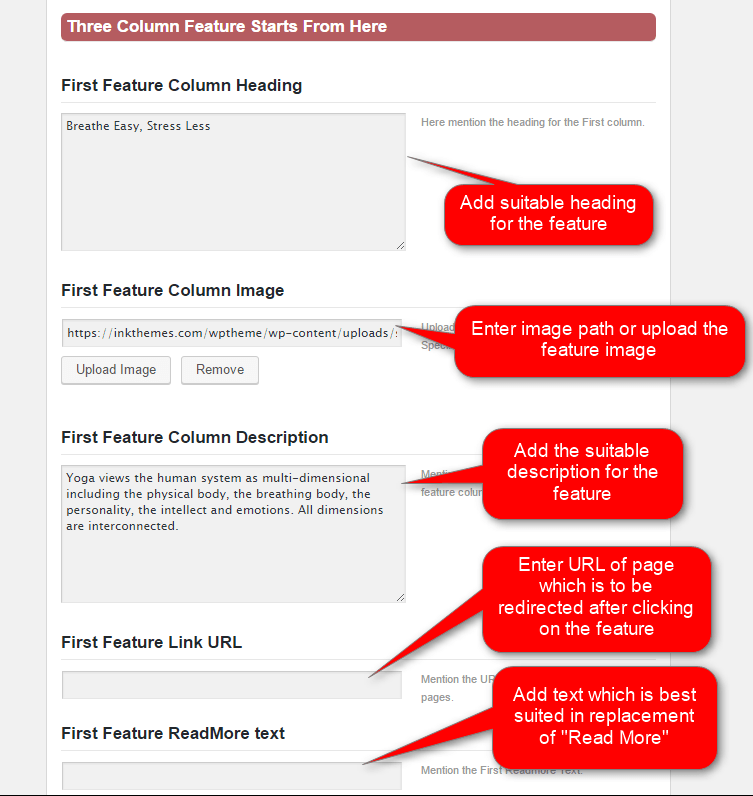
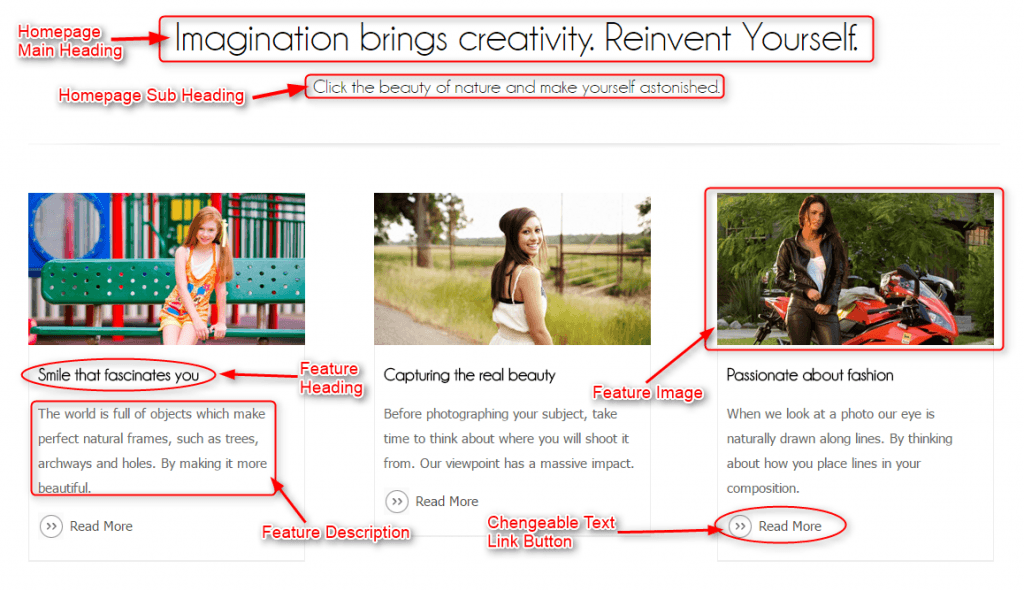
4. Home Page Feature Settings
In this section, we have given the option to add heading and subheading of the home page just below the slider.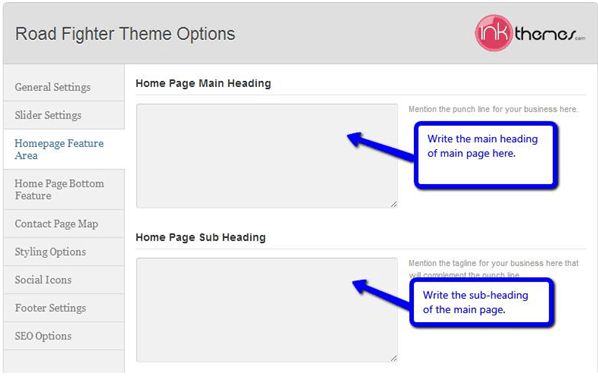
And also we have given three column feature areas where you can showcase your services by inserting the images, heading, description, and link.
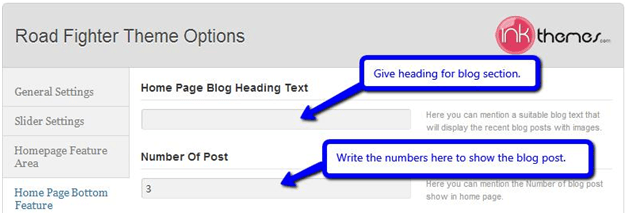
5. HomePage Bottom Feature Settings
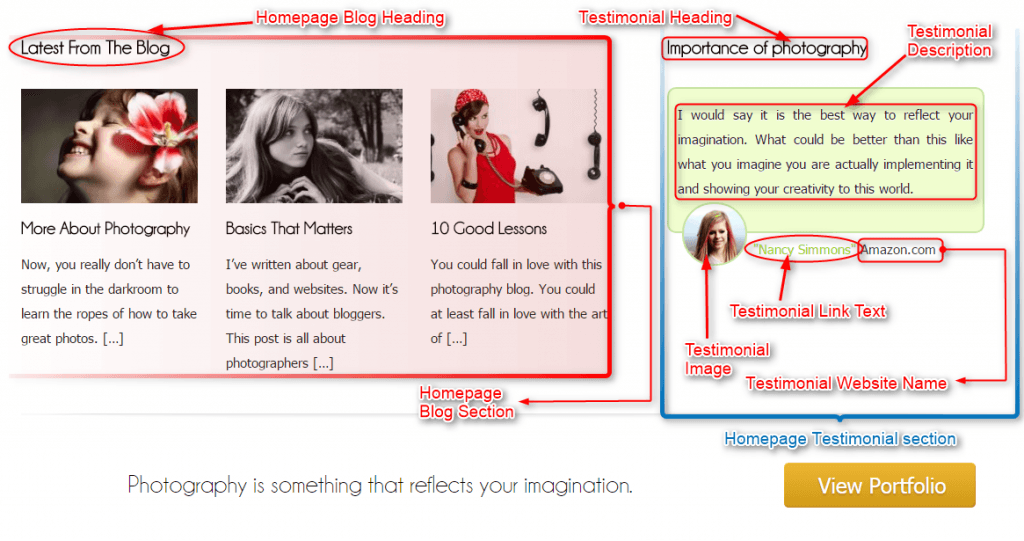
Below the feature area, we have given space to show the blog posts. Here you can show those posts which contain images. So you can select heading for that and can select how many posts do you want to show on the front page.
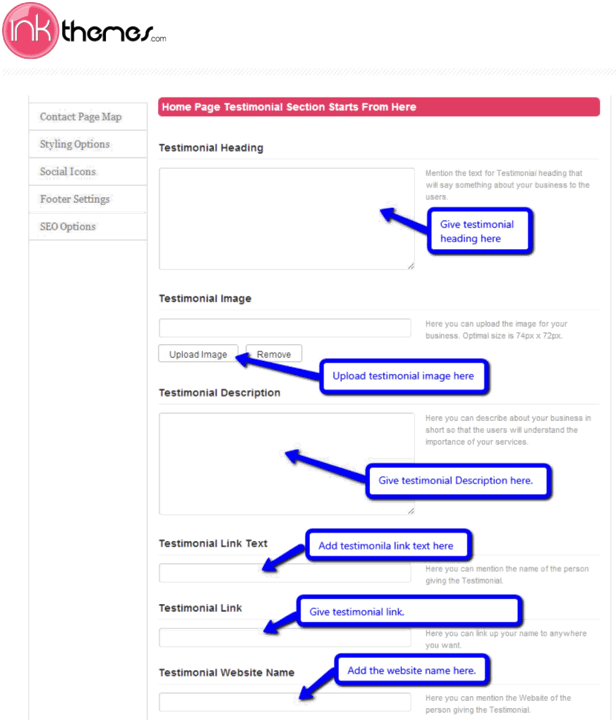
Testimonial Section
You find testimonial section under Homepage bottom section. From here only you will be able to configure it.
On the right side of the blog post, testimonial section is given. Here you can add text about the author, its image or any other content. Here we have given the option to write the following details.
Testimonial Headings.
Testimonial Image.
Testimonial Description.
Testimonial Link Text
Testimonial Link
Testimonial Website Name
HomePage Bottom Tagline
Another unique feature that you can also configure under homepage feature settings is Homepage tagline section.
You can add a suitable tagline or a quote for your business which is followed by a button link. The user will click on this button and you can let him enter on any of your page or posts via URL.

See how tagline appears on homepage

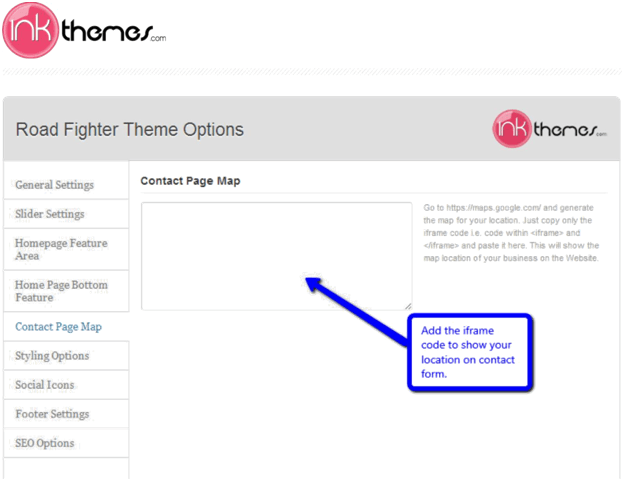
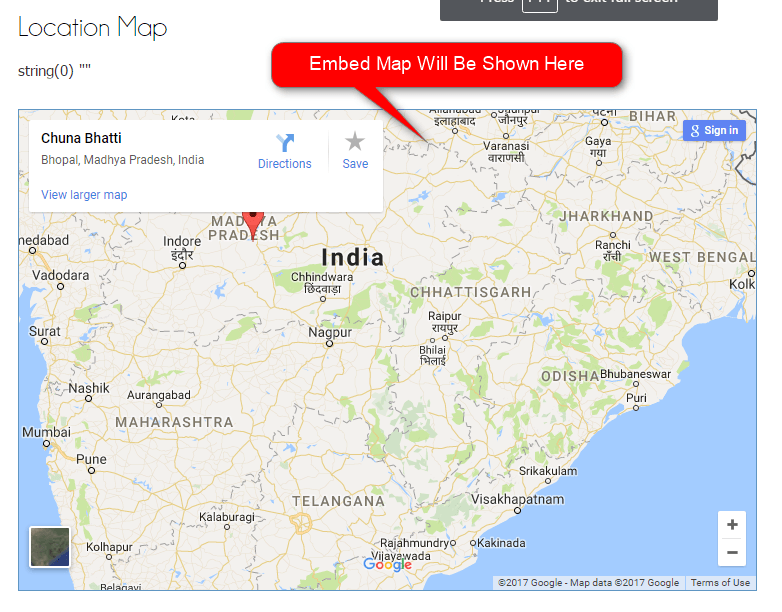
6. Contact Page Map
There is an option in the theme options panel to add the map of your location to the contact page.
Here you can add the iframe code to show your location.
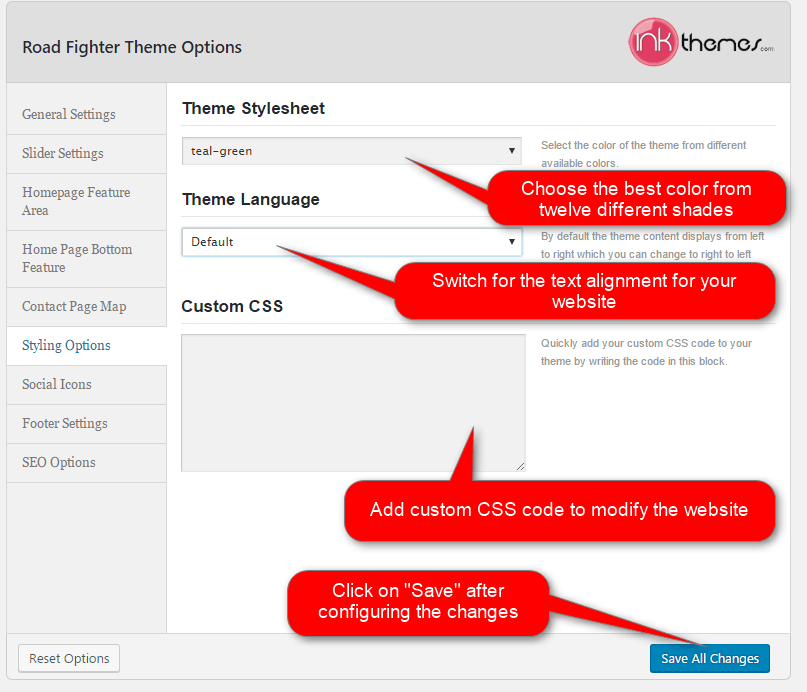
7. Styling Options
Modifications can be made easily by adding the CSS code in Custom CSS section. We have provided twelve color options with a theme, you can change them according to your requirement.
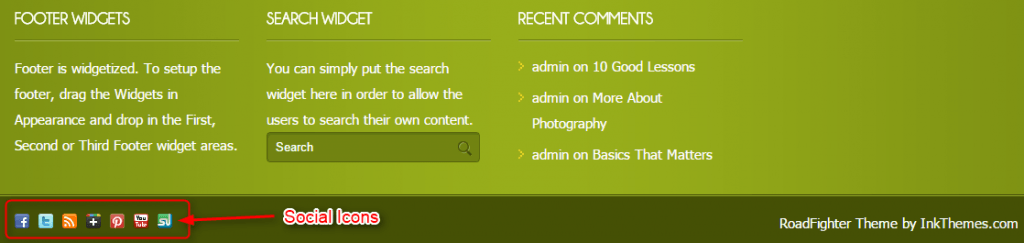
8. Social Icons
From this option you can add social icons to your website, You have to just add the link of your social icon.
![]()
See how & where these social icons will appear on the homepage
9. Footer Settings
Here you can write the footer copyright text.
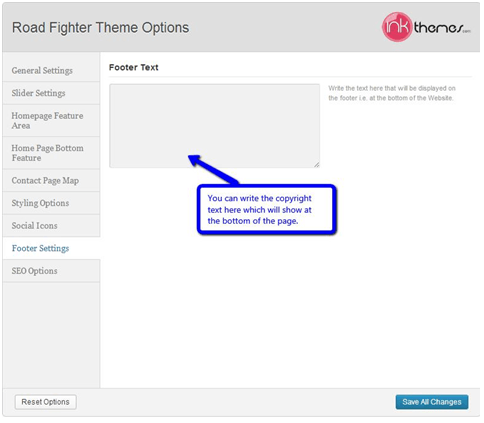
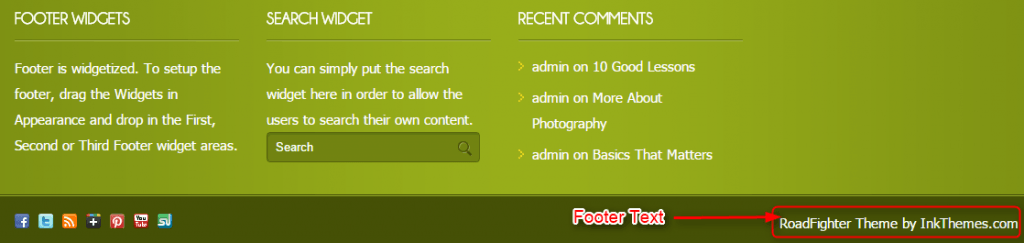
Image shows where the footer text will be shown on the homepage.
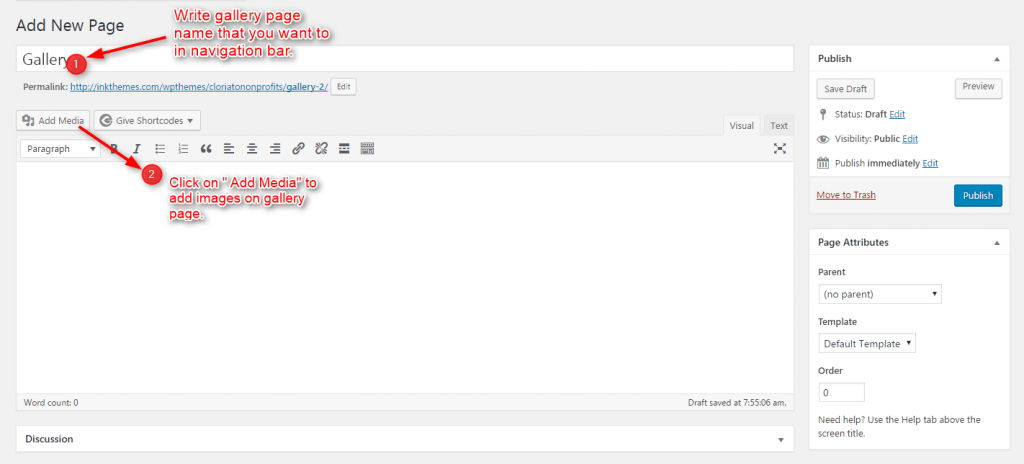
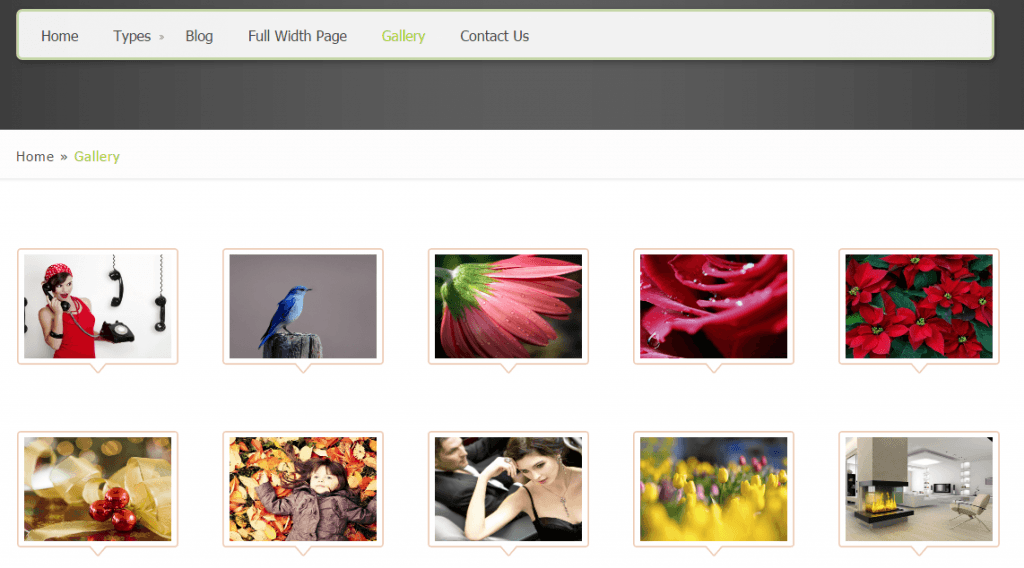
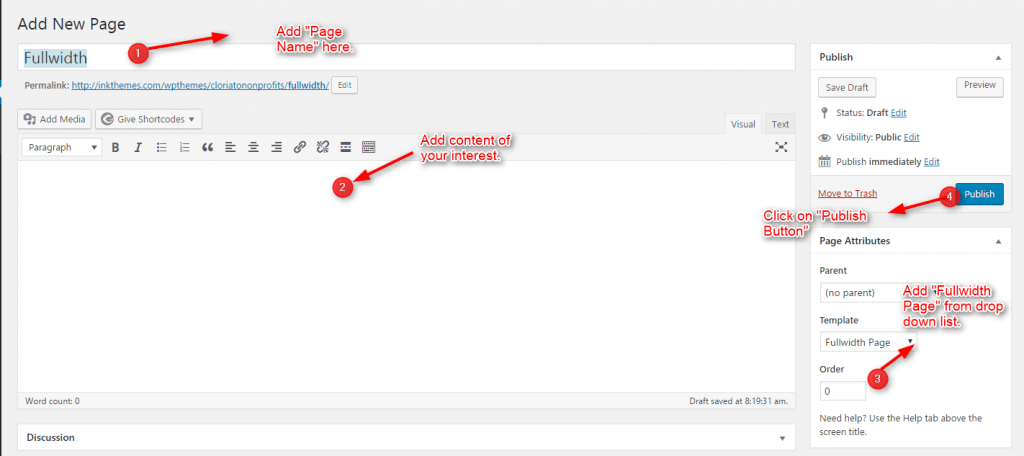
10. Building Gallery
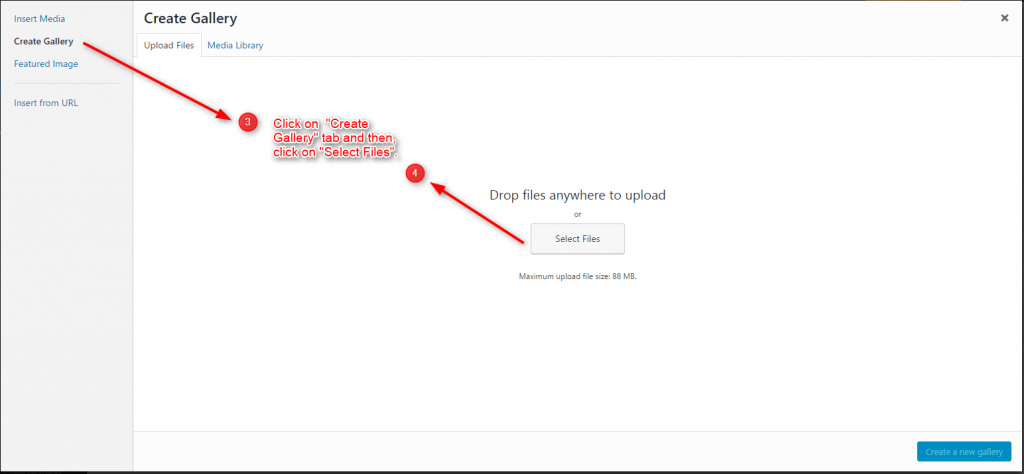
To create a gallery page you have to first select the “Add New” option from the Pages section of your dashboard. Then give the name of the page after that select the “fullwidth” template from page attribute section and then select the image for the gallery from “Add Media” button above the editor. After that you have to select the images for your gallery and then click on “Create a new gallery” as shown on image.
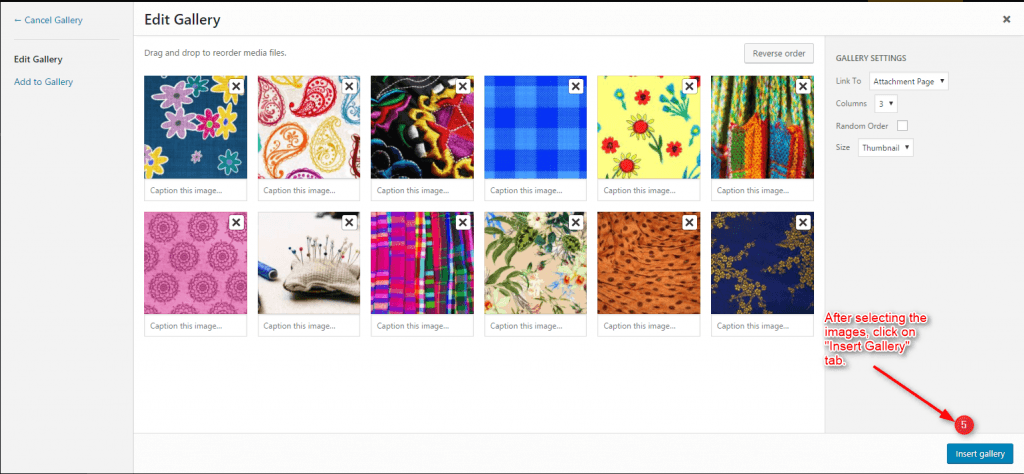
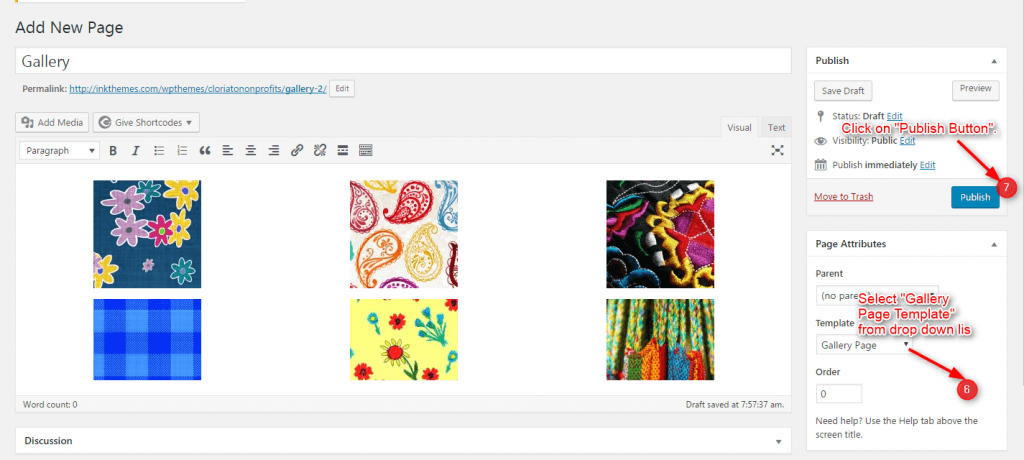
After selecting a “Create a new gallery” you will be redirected to the page where you have to select the number of columns which you have to show on the gallery page. And then click on the insert gallery. This will create the gallery page. Here is the preview of the gallery page.
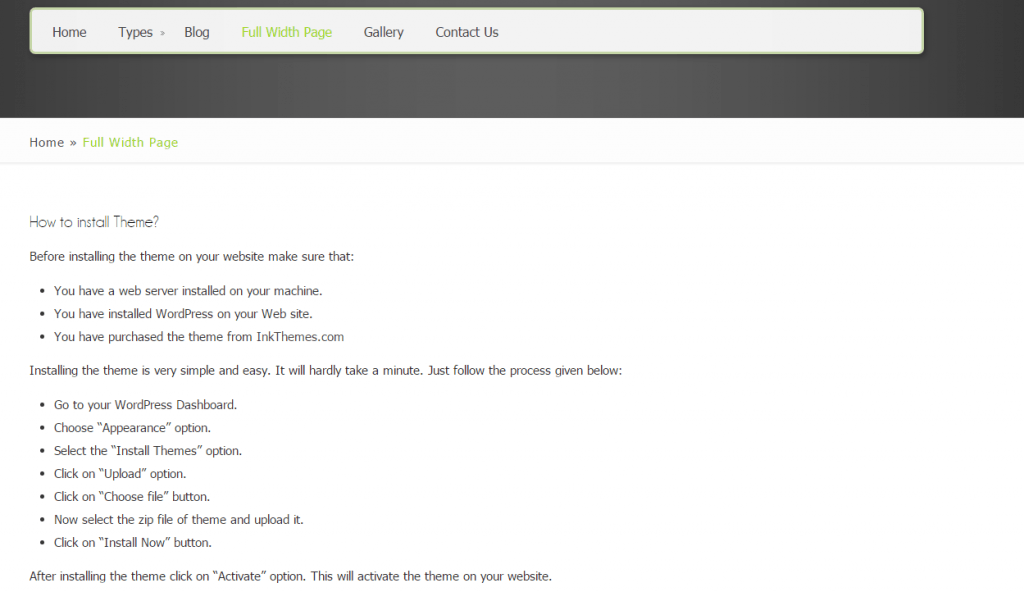
11. Building Fullwidth
Full-width Layout
Similar to the Gallery Page, to create a Full-width page all you have to do is select the appropriate Full-width Template from the Page Attributes.
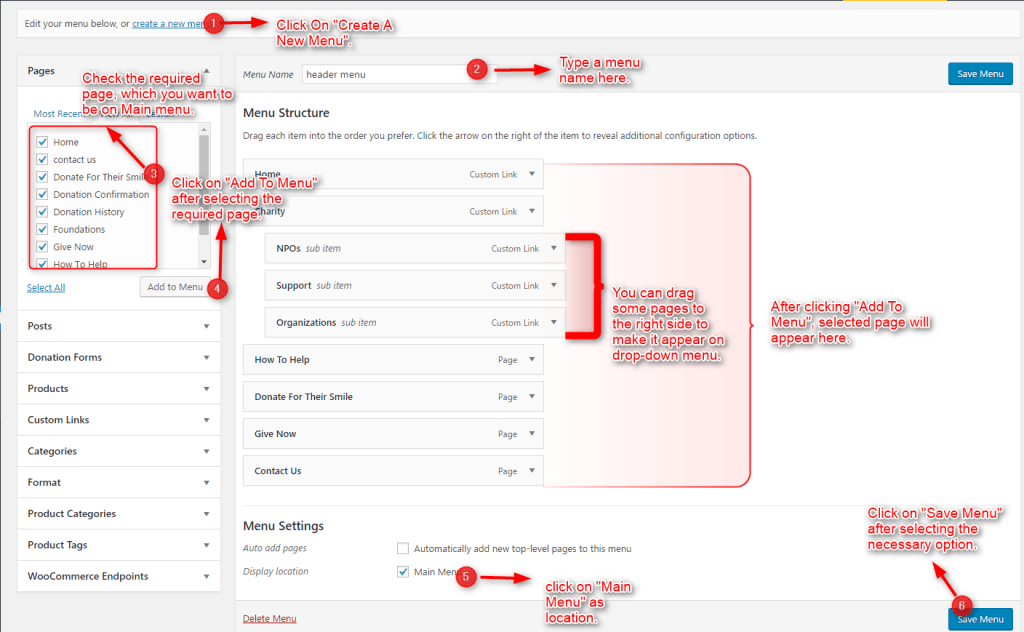
12. Building Menus
Menu with Menu Manager
RoadFighter Theme has a prebuilt feature of displaying all the pages and subpages in the menu. However, you can also build a custom menu using the Menu option under the
“Appearance” Section.
You can also change the order of the menu according to your requirement by simply drag and drop the menu items.
Building Drop Down Menus
For making drop-down menus all you have to do is add a new page
Then name it for eg. Submenu 1 and set any of your pre-developed page as a parent page for which you want to create drop-down, after that select template & click publish button
See how the menu appears on front page

13. How to add Widgets
Widgets in Sidebar
For adding widgets in the sidebar all you have to do is select Widgets option from Appearance panel, then drag widget of your need & drop it in primary widgets area or in secondary widgets area according to your requirement, at the end click save button and your widgets are ready to use.
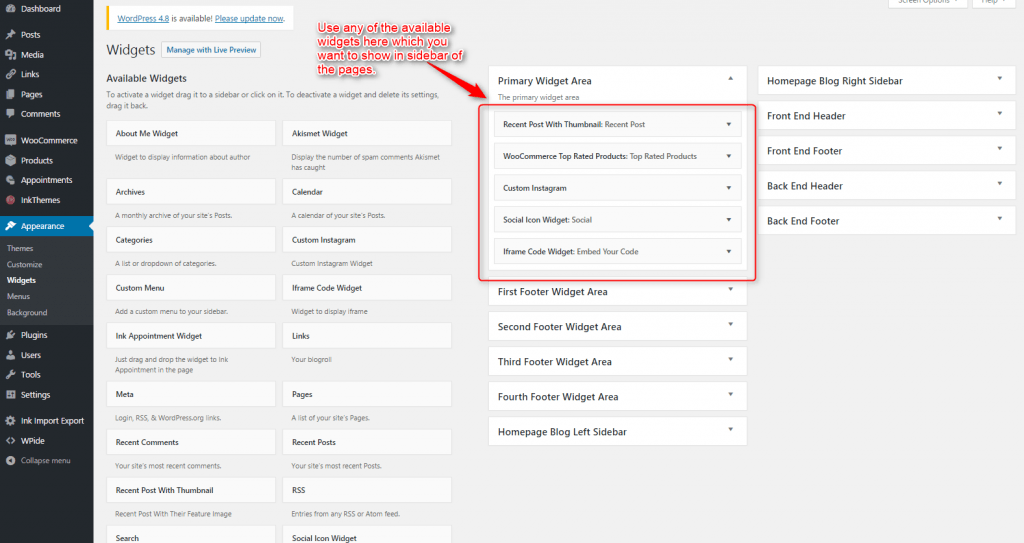
After adding widgets you can see the sidebar in any of the pages:

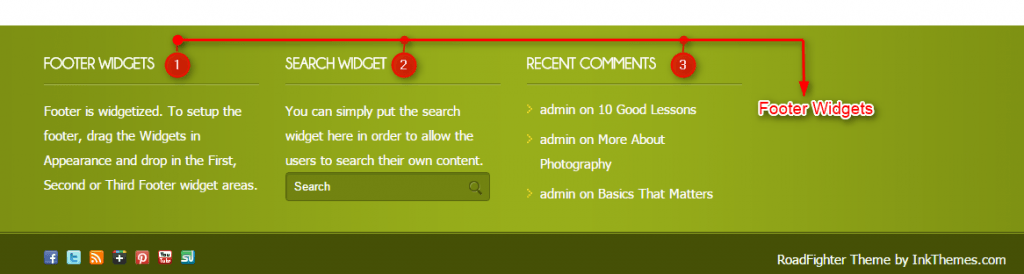
Widgets in Footer
For adding widgets in Footer same as sidebar widgets all you have to do is select Widgets option from Appearance panel , then drag the widget of your need & drop it in „First footer widget area, second footer widget area, third footer widget area and fourth footer widget area‟ according to your requirement, at the end click save button and your widgets are ready to use.

For example, your footer looks like
Thank You.
Once again, thank you so much for purchasing the RoadFighter theme. As we said at the beginning, we’d be glad to help you if you have any questions relating to this theme. No guarantees, but we’ll do our best to assist. If you have more queries related to the themes and InkThemes, you can visit the InkThemes support forums and ask your question.
