https://www.inkthemes.com/market/By creating a Fanpage on Facebook you can build closer relationship with the audience and customers. It helps you to grow your business by promoting your website. You can share your page by publishing the link to your page on your wall.
In the following tutorial I have created a Facebook Fanpage for my demo website in which Local Business WordPress theme is used. However, you can use any premium theme of InkThemes to create a Facebook Fan Page for your website.
What is Local Business WordPress Theme?
A Local Business WordPress theme has a specialty of the inbuilt lead capture system. If a user fills his details on the form, his contact information will be stored directly into your WordPress dashboard. So that you can notify the user about your services and products later on and turn them into a potential customer.
Steps:
Follow the steps given below to create your own Facebook fan page.
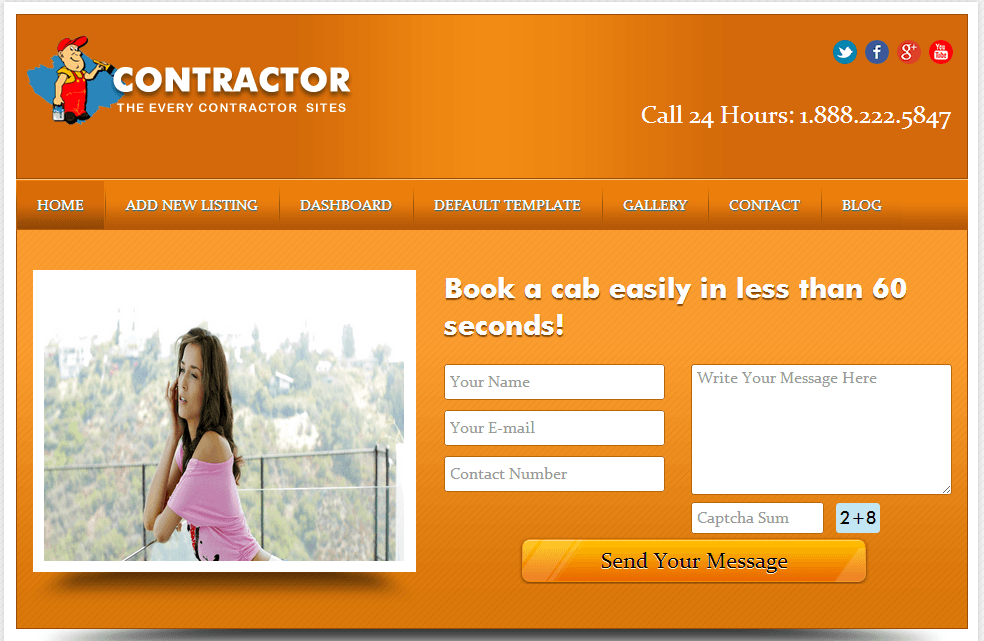
- Log in to your website for which you want to create a Fanpage on Facebook and activate Local business WordPress theme into the WordPress website.
- When I activated the theme it will be shown as given below
Step #1. Now log in to your Facebook account.

Step #2. After signing in to your account type the following in the URL www.Facebook.com/pages and press enter.

Step #3. After pressing the enter button a page will be opened as shown below. Now click on “Create a Page” button.

Step #4. On the next page, select “Local Business or Place” option.

Step #5. Choose your business stream and fill the details. After filling the details, agree to the terms of a Facebook page and then click on “Get Started”.

Step #6. Upload a profile picture for your page by using the option “Upload from Computer”. After uploading the picture click on “Next” button.

Step #7. On the next page, add a description about your business. After filling the details click on “Save Info” button. In case if you want to fill it later on, click on “Skip” button.

Step #8. Choose a unique address for your page or you can skip that option.

Step #9. Now if you want to advertise your page then select “Enable Ads” otherwise click on “Skip” button.

Step #10. You can add a cover to your page by selecting “Add a Cover” option. Keep in mind while uploading a cover for your page it should be 399 pixels wide. Otherwise it won’t be accepted.

Step #11. After uploading the picture click on “Save Changes” button as shown below.

Step #12. Now type “iframe” on the search option of Facebook and select “Static HTML: iframe tabs” as shown below in the figure.

Step #13. On the next page click on “Add Static HTML to a page” option.

Step #14. Now choose your category of page (which you have created) .

Step #15. After selecting your page click on “Add Static HTML: iframe tabs .

Step #16. On the next page click on the “star logo” option as shown in the figure.

Step #17. Now click on “done” option to get started with your application as shown in figure.

Step #18. On the next page at “index.html” type the following code –
<iframe src=”http://www.yourwebsitename.com” width=”810” height=”1800”></iframe>

Step #19. After typing the code click on “save & publish” button. The width and height can be adjusted further as per your requirement.
Step #20. Now refresh the page and your website will be opened as shown in the figure.

Step #21. Now copy the link of your page from the URL and log out from your account.

Step #22. Paste your link in the URL.

Step #23. Now your website’s page is ready and you can publish the link of the page on your wall.

If you want to make any changes further you can log in to your account and select your page to make any changes.
You may also like to read the following:
- How to Access Themes And Support Forum of InkThemes
- How to use Shortcodes Plugin
- Local Business WordPress Themes
How to use Geocraft WordPress Theme for City Business Directory – A Complete Procedure
How to create a Child theme in WordPress – A way to save Theme’s Modification
