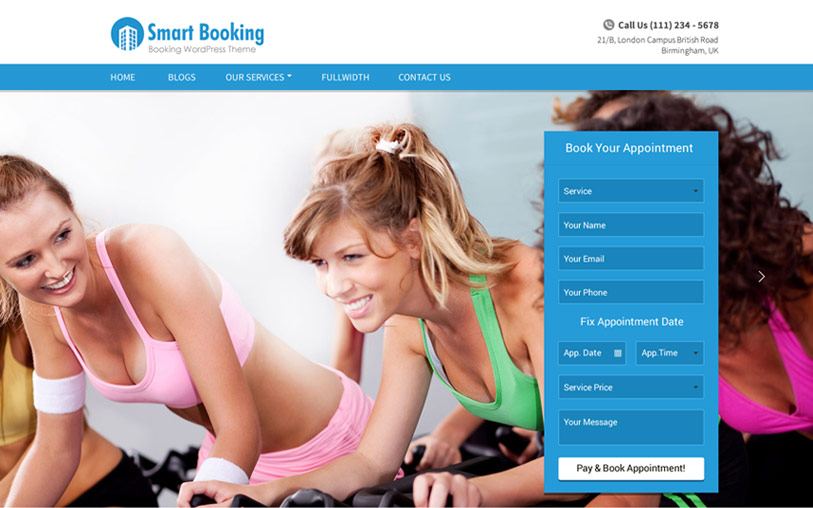
SmartBooking is one of the best appointment Booking theme that contains many effective features to bring more leads and appointments. Moreover, it gives an amazing look to your website.
SmartBooking theme comes with an integrated InkAppointment plugin. This increases the functionality and usefulness of the theme. You can easily manage your appointments and monitor your business very efficiently with the help of its features.
It is very important to have all the knowledge about the theme and how to use it in order to set up a profitable appointment booking website.
So this tutorial covers following points to make you understand about how to use the SmartBooking Business theme for your WordPress website.
- How to install SmartBooking?
- How to create Menus?
- How to create drop down menus?
- How to create pages?
- How to create blog posts?
- How to use color customizer?
- How to use the various functions of the Theme Options Panel?
- How to Install InkAppointment Plugin?
- How to use InkAppointment plugin?
How to Install SmartBooking?
Before installing this SmartBooking theme on your website make sure that:
You have a web server installed on your machine.
You have installed WordPress on your server.
Installing the theme is very simple and easy. It will hardly take a minute.
Just follow the simple steps given below.
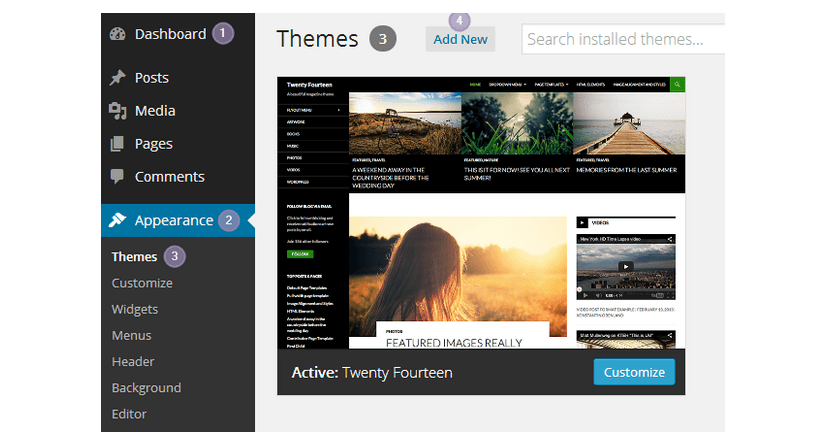
Go to your WordPress dashboard to install the theme and follow these steps.
Dashboard -> Appearance -> Themes -> Add New
Choose the downloaded ‘smartbookingtheme.zip’ and upload it on your dashboard.
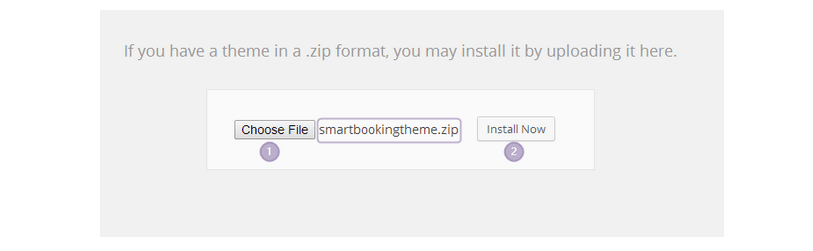
Upload -> Choose File -> Install Now
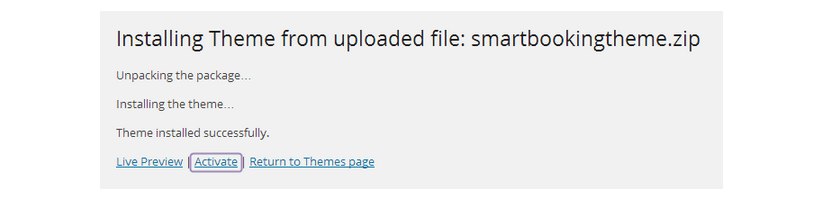
Click on ‘Activate’ and your Website is ready.
How to Create Pages?
To create a page, follow these steps:
Go to Dashboard -> Pages -> Add New
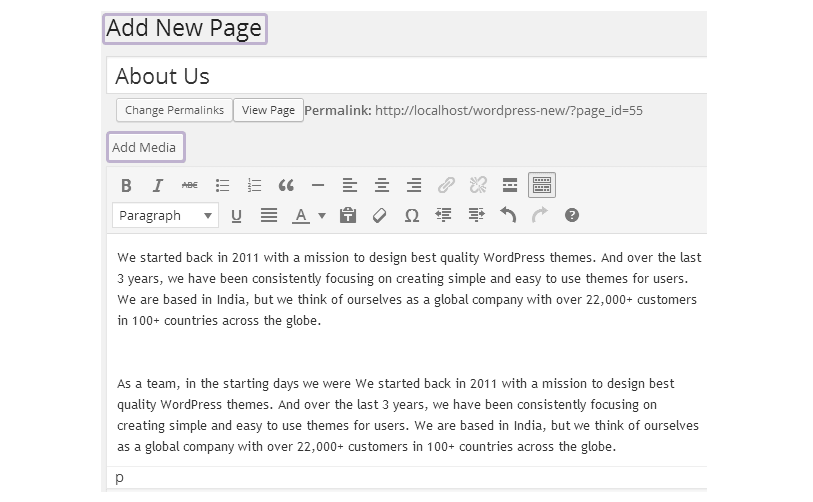
Select a desired Page Template as I have selected full width page template for the About Us page I’ve created.
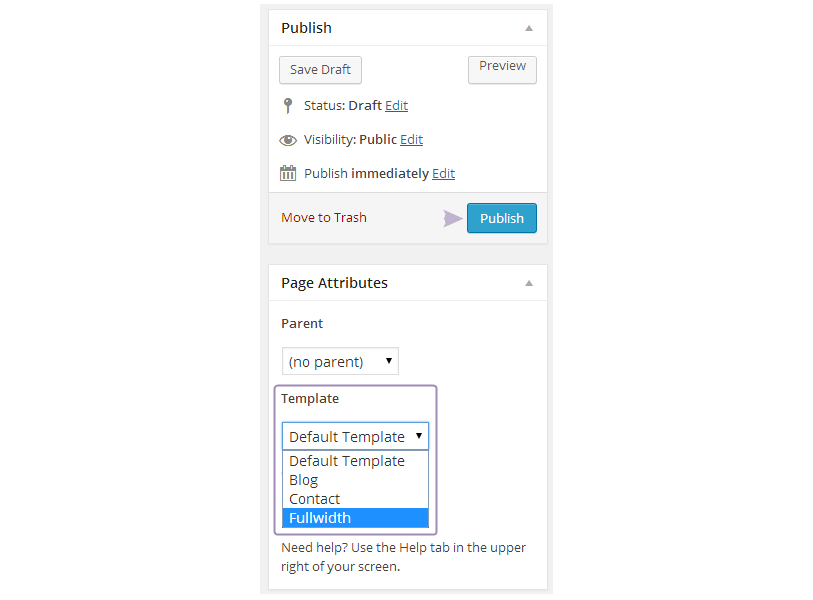
Click on ‘Publish’.
How to Create Menus?
Creating the menus is very simple. Follow the directions provided below:
Go to Dashboard -> Appearance -> Menus
Then, click on ‘create a new new menu’ -> Enter Menu Name, let’s say ‘Menu’.
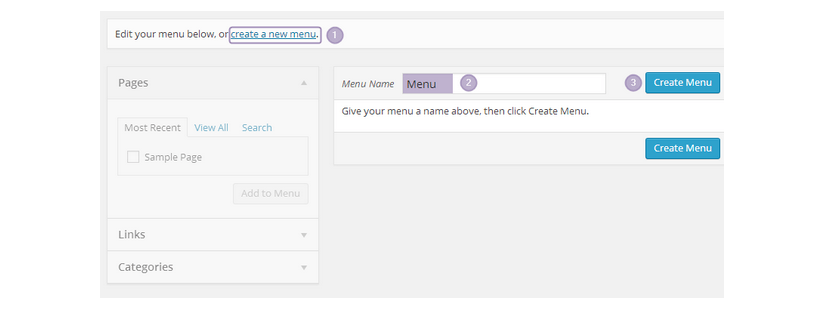
Click on Create Menu.
Next, you’ll need to add more pages to your menu so that they start appearing in the menu section.
Select pages from the Pages attribute section and click ‘Add to Menu’.
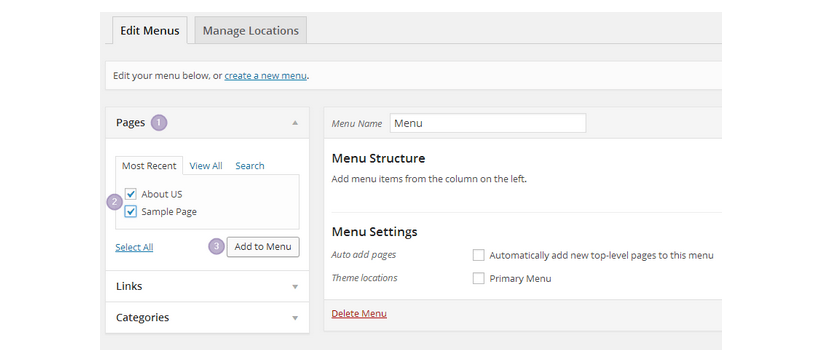
Pages will be added to the Menu.
Select theme location for this menu to appear.
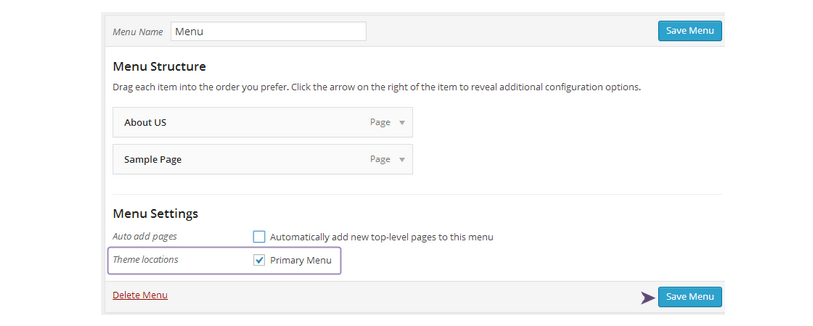
Click on Save Menu.
How to create a drop down Menu?
If you want sub-pages for the menu items, you can create drop down pages.
Just drag and drop pages under the main page for which want sub items to appear as it is shown in the image below.
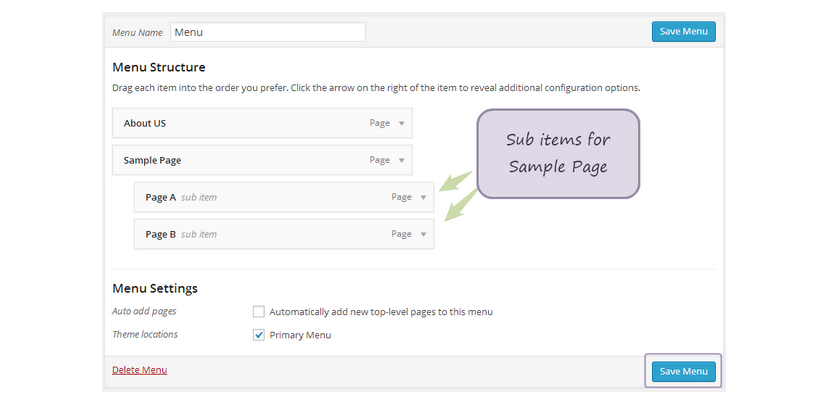
Then click on save menu.
How to create Blog Posts?
In SmartBooking theme, you can publish various blog post formats such as:
- Standard
- Image
- Gallery
- Video
- Link
- Quote
Select a format for any kind of post that you create.
Follow these steps for creating a blog post:
Go to Dashboard -> Posts -> Add New
Create your post, add images from the ‘Add Media’ option.
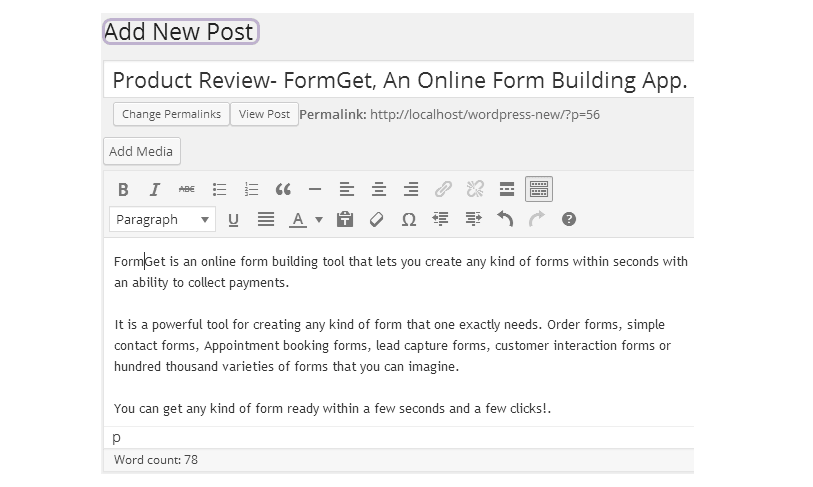
Provide embed code in case of a video post.
Set Featured image.
Select a category for your post.

Set featured image, select category.
Click on ‘Publish’.
How to use color customizers?
The colors of various displaying features in the theme can be easily customized. You can easily get desired theme color, fonts color, booking form color, etc.
Follow these steps to use color customizers:
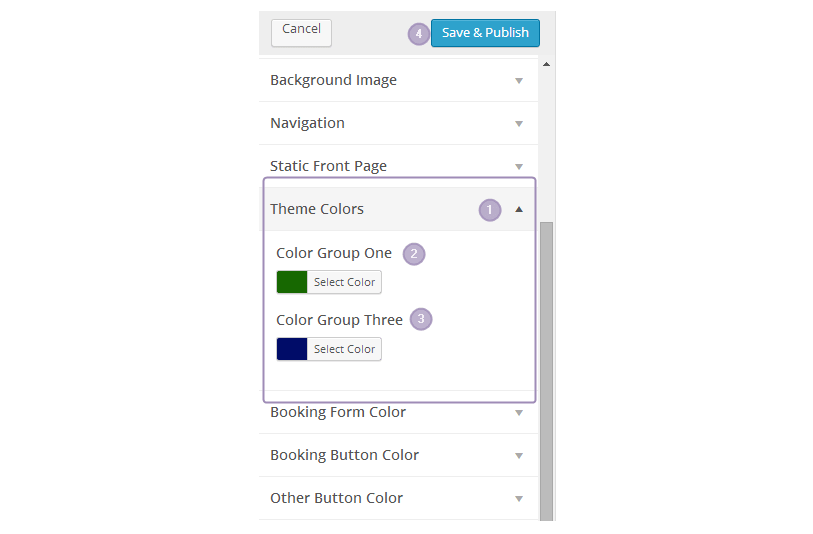
Go to Dashboard -> Appearance -> Customize
Here you find various options.
1. Theme Color
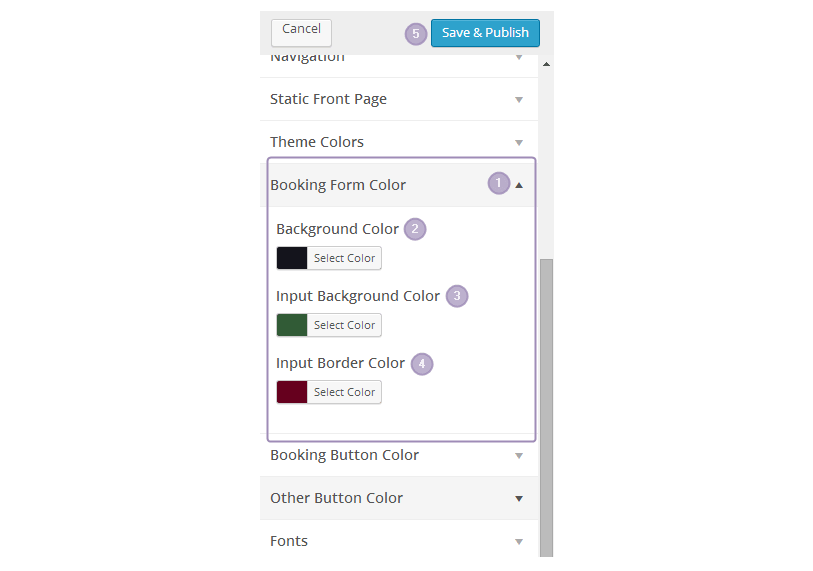
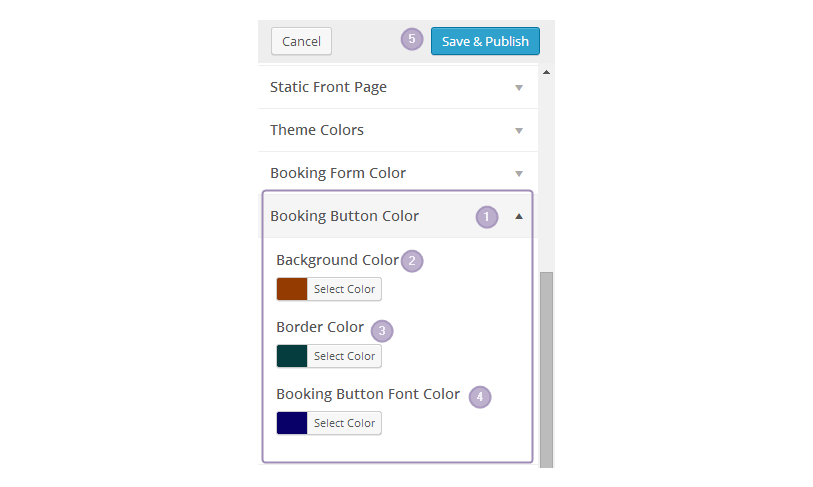
2. Booking Form Color settings:
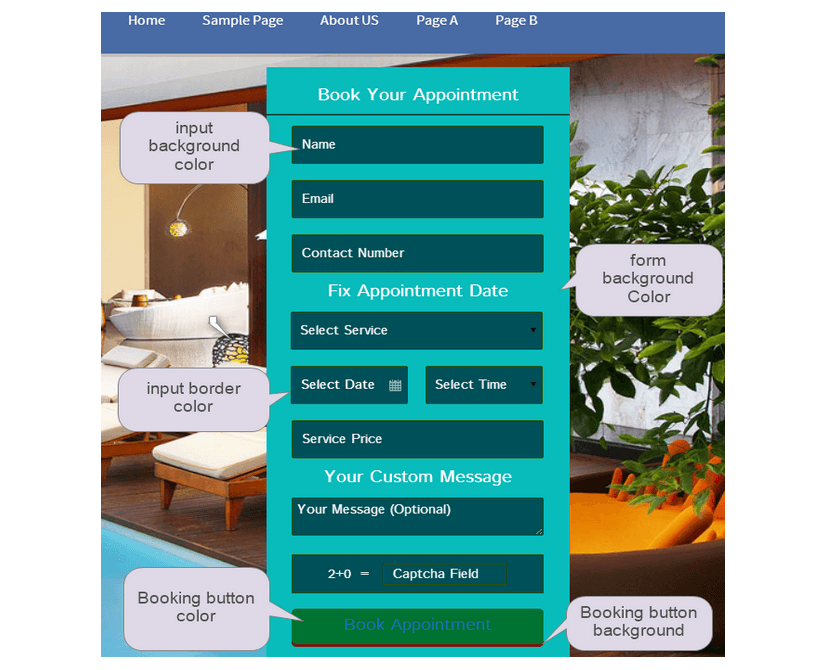
In customizer option, you will find two option with which you can change form color display settings.
3. Font Color
Click on ‘Fonts’. Here you can customize the colors for your blog headings and body text colors.

Click save and publish to save the changes.
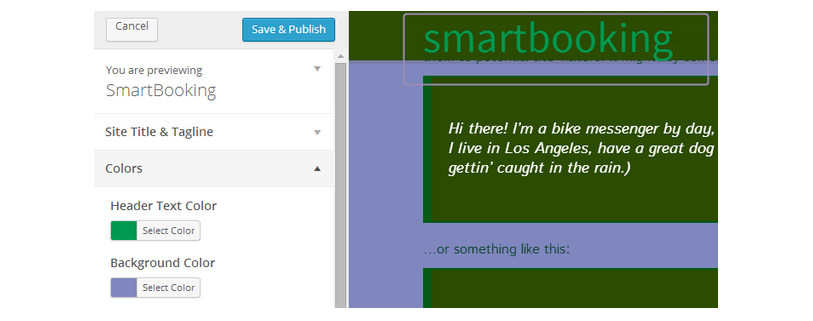
3. Header text and background color
In the customizer, you see ‘Colors’ option with the help of which you can change the header text and background color.
4. Other Button Color
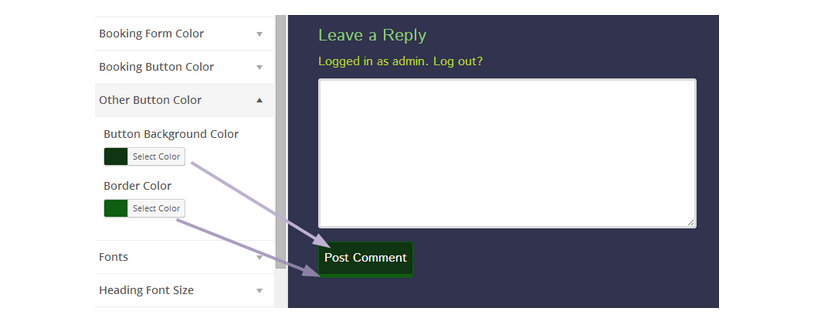
How to use the various functions of the Theme Options Panel?
There are various options in the theme options panel from where you can use various features in the theme.
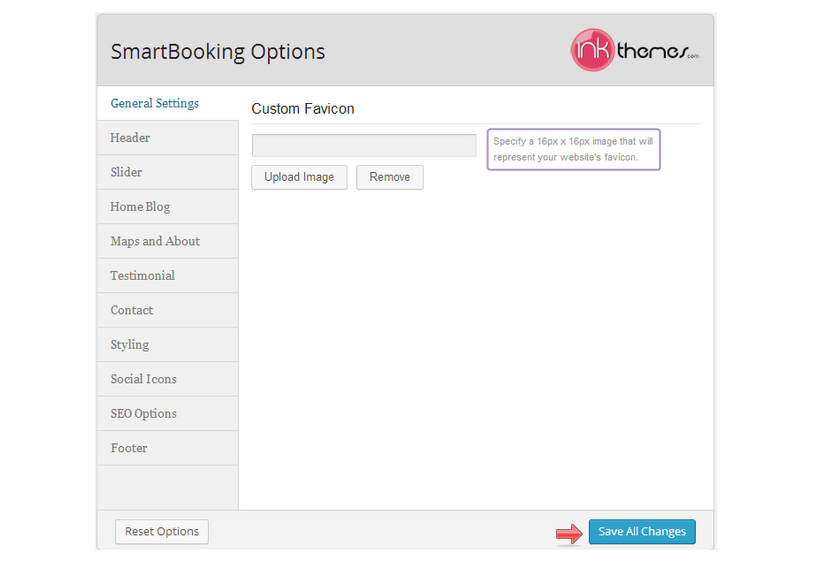
Go to Dashboard -> Appearance -> Theme Options Panel
1. Uploading favicon
2. Uploading Logo, Banner Image, in the Header Section.
Theme Options Panel -> Header
In the header section, you can upload logo, banner image and a redirect link for your banner image. Also add your contact details to display on the header section.
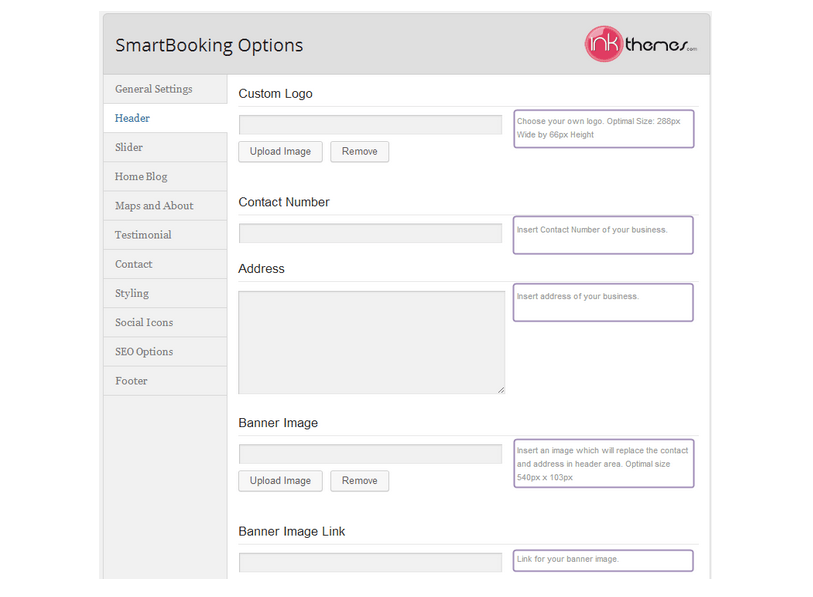
Then, Click on Save All Changes.
3. Slider Settings
Theme Options Panel -> Slider
Set slider speed and add slider images. Eight images can be added to the slider. However, there is option to add unlimited slider images with shortcode.
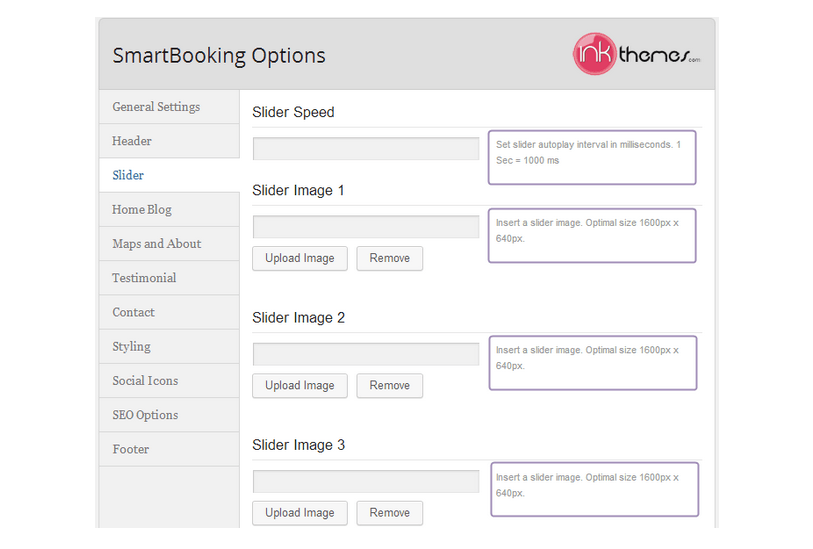
Upload Images and save all the changes.
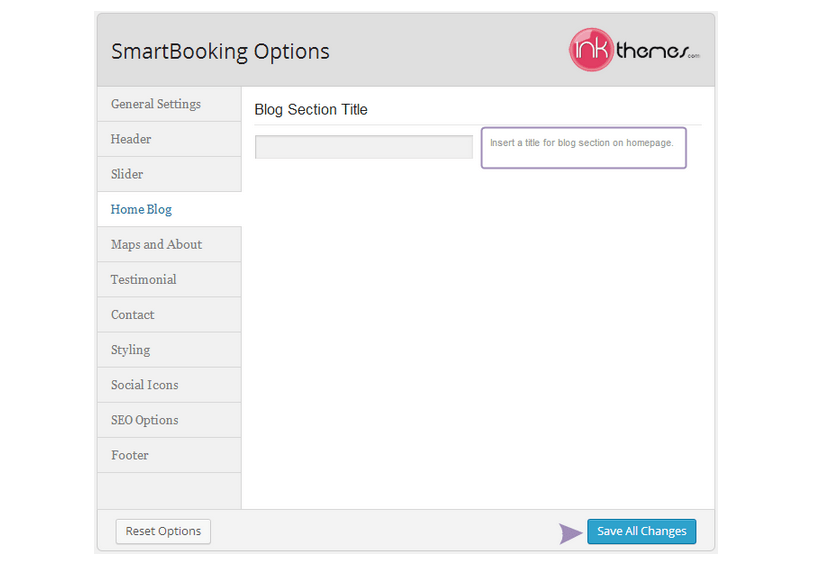
4. Giving a title to the Blog Section.
Under the Theme Options Panel, you see the Home Blog Option. Here you can give a title for your blog section to display on the homepage blog section.
5. Homepage About Section and Contact Map Settings.
The fifth option you find in the theme options panel is Maps and About. Here you can give heading and description for the About section and give map iFrame code in the box to display on the homepage.
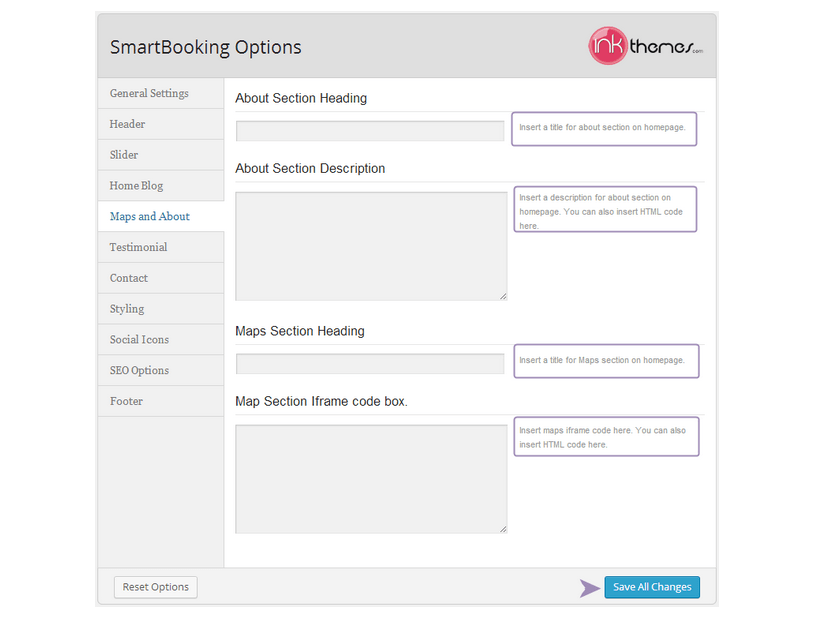
Then click ‘Save All Changes’.
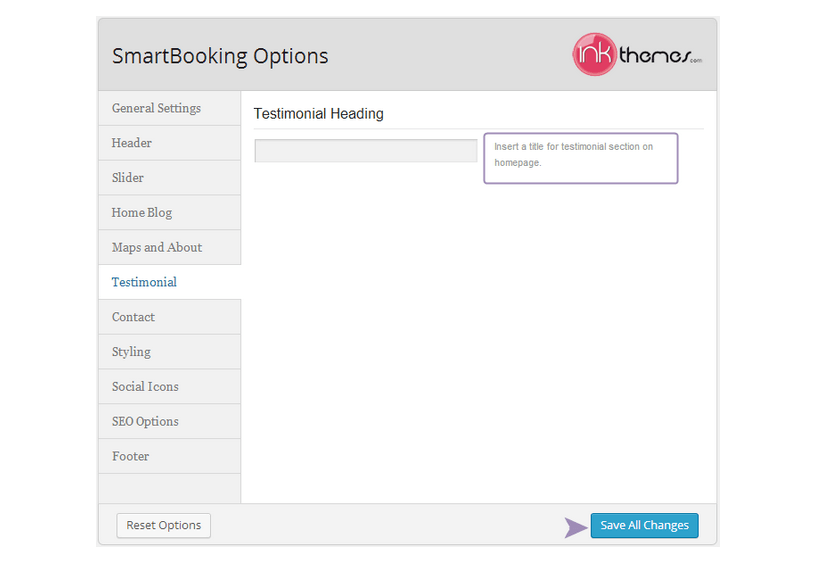
6. Provide a heading to the testimonial section.
Next is the option of Testimonial. Simply give heading a heading to display in the testimonial section and then save all the changes.
7. Contact Map for Contact Page.
You can use this option to display contact map on a page other than the homepage. Put map iframe code and select desired recaptcha settings.
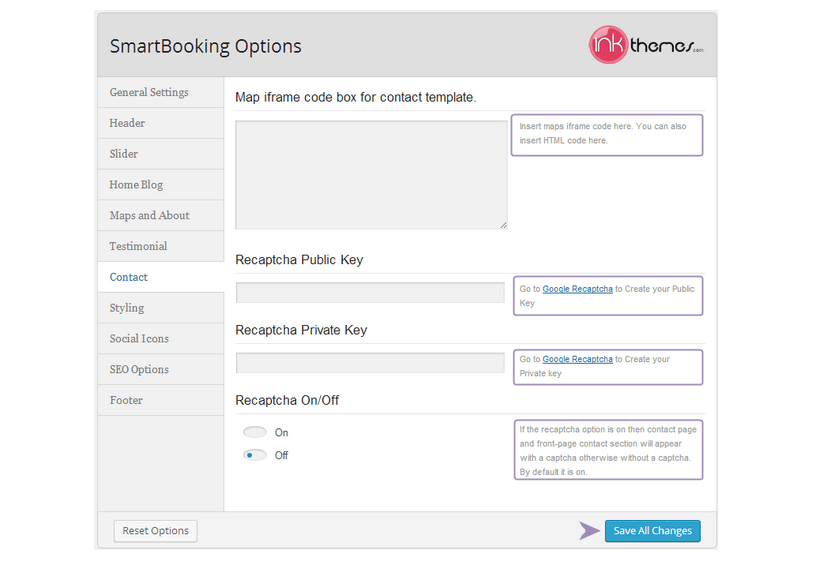
-> Save all changes.
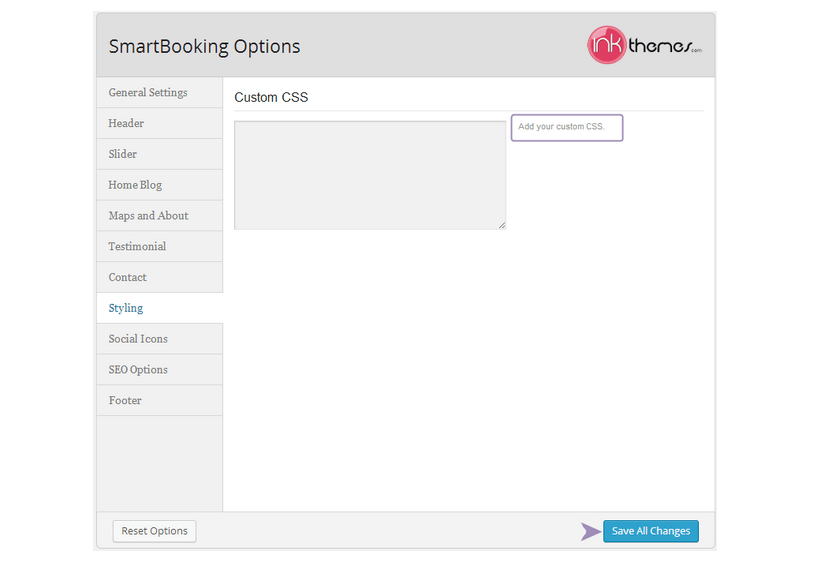
8. Styling Options
Add custom CSS code to change the color of your theme. However, using customize option under the dashboard for this would be more appropriate.
9. Social Icons
You can display various social icons in the bottom of your website. Follow these steps to add social icons.
Theme Options Panel -> Social Icons
Enter URLs of your social networks in the specific fields provided.
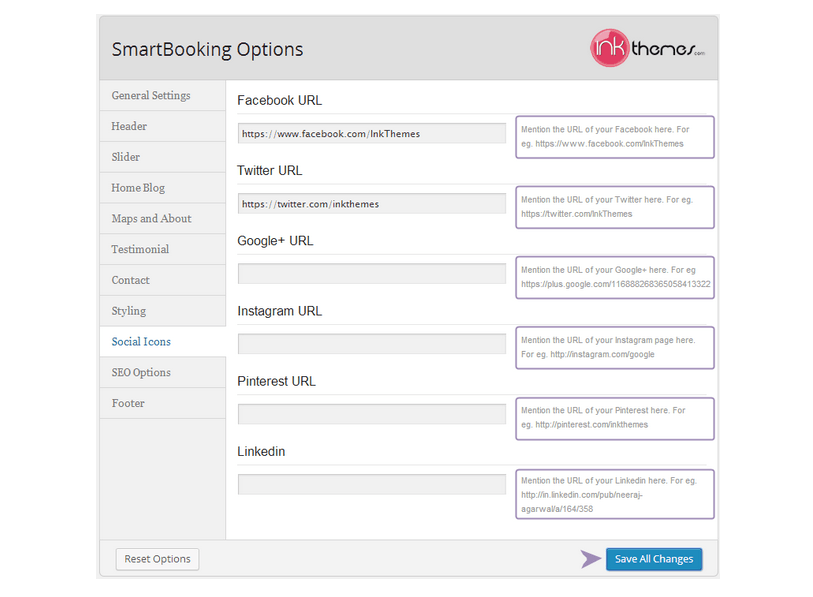
Then click ‘Save All Changes’.
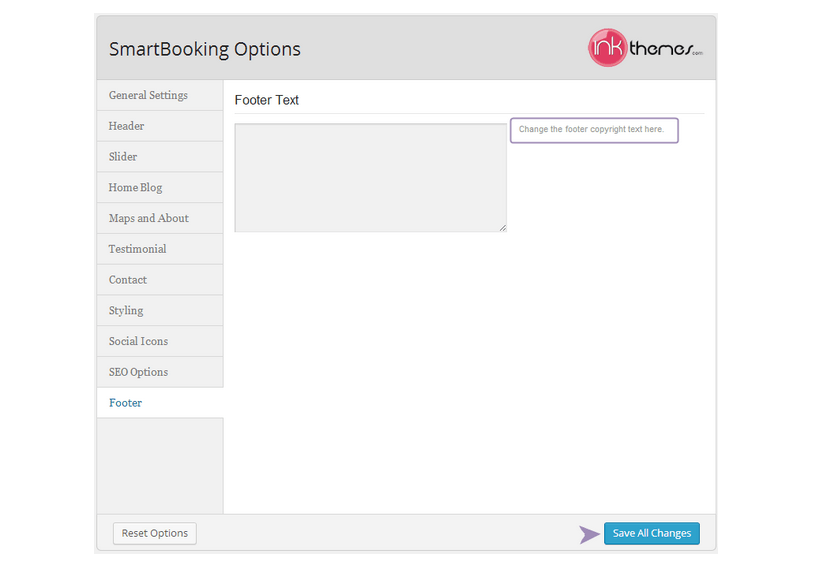
10. Footer
This is last option in the theme options panel.
Here you can write copyright text or anything you want to display in the bottom end of your website.
How to install the InkAppointment Plugin?
InkAppointment is a very effective plugin that comes integrated with this SmartBooking theme.
It displays a booking form on your website so that your customers are able to book an appointment with you. You can also collect leads that will be directly stored in your dashboard.
Follow these steps to be able to use the InkAppointment plugin.
As soon as you download and activate the SmartBooking theme, You will see Install Plugins option under Dashboard in the Appearance section.
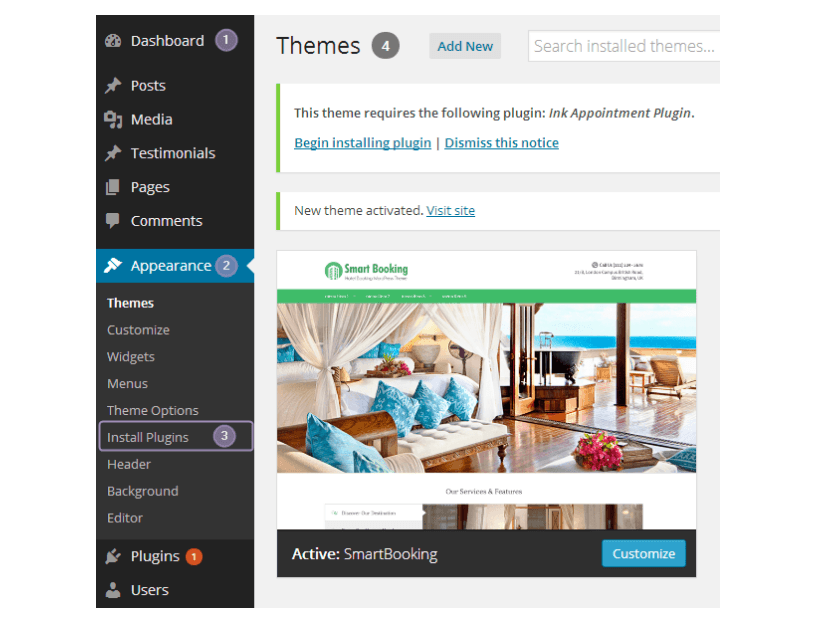
Click on Install Plugins. Now you see the InkAppointment plugin there which requires to be installed.
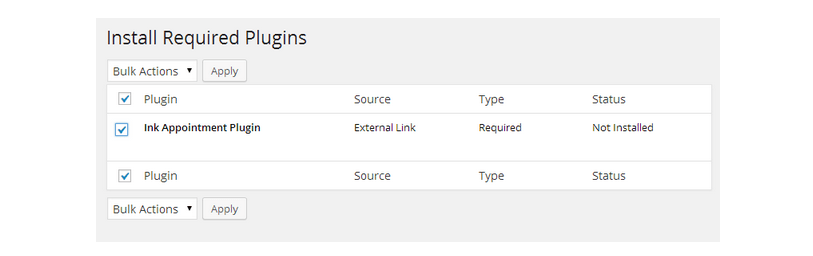
Install the plugin.
Now go to Dashboard -> Appearance -> Widgets
You will find InkAppointment widget in the widget section. Add InkAppointment widget to booking form widget area.
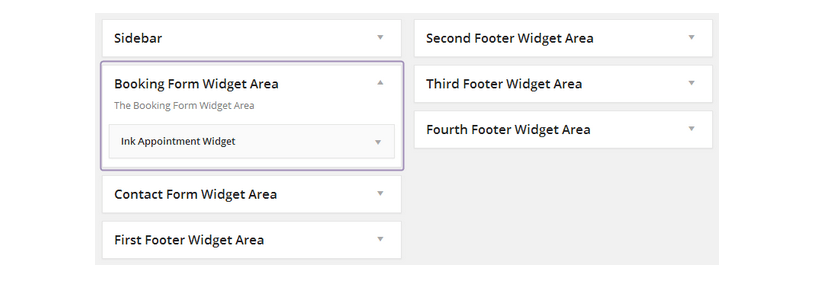
A form will then start appearing on the booking form widget area on your homepage.
How to use InkAppointment plugin?
When you have installed the plugin, you’ll see an option under your dashboard named as Appointments.
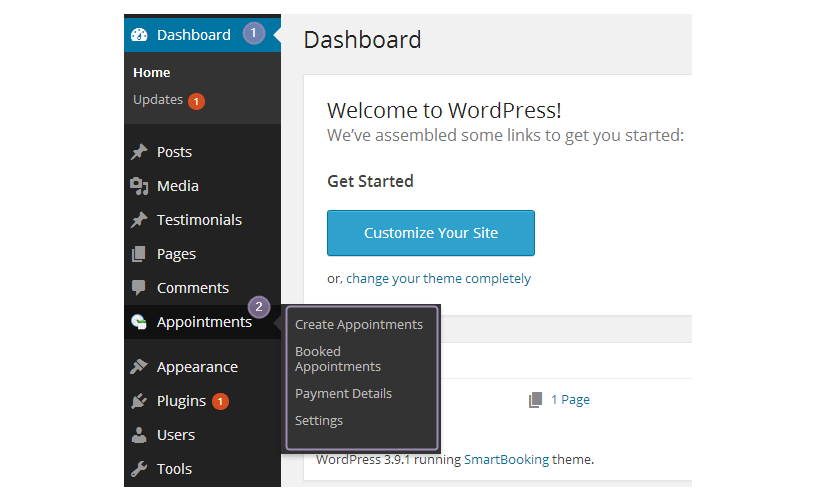
Here you will find option to do appointment settings via Crete Appointment option, See the data of your customers stored in the backend via Booked Appointments option, view payment details manage payment settings.
InkAppointment plugin is very easy to use. It just requires simple steps.
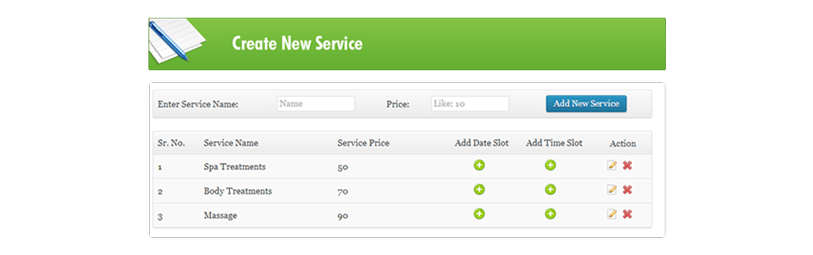
Step 1: Create Services
Spet 2: Specify Date and Working Days of Appointment

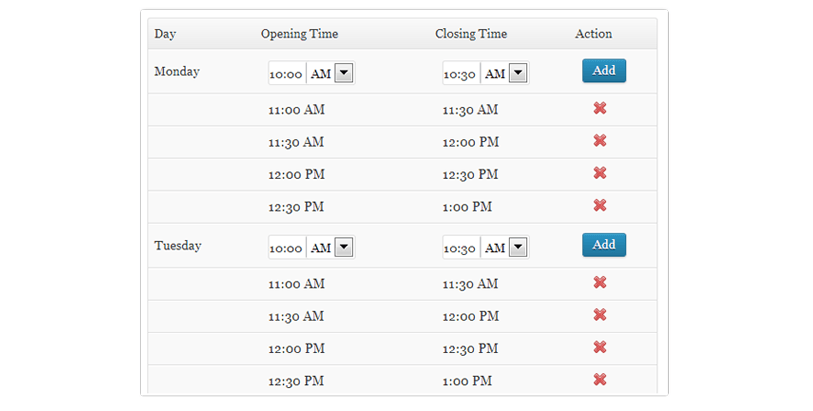
Step 3: Set Time Slots For Appointments & Start Booking
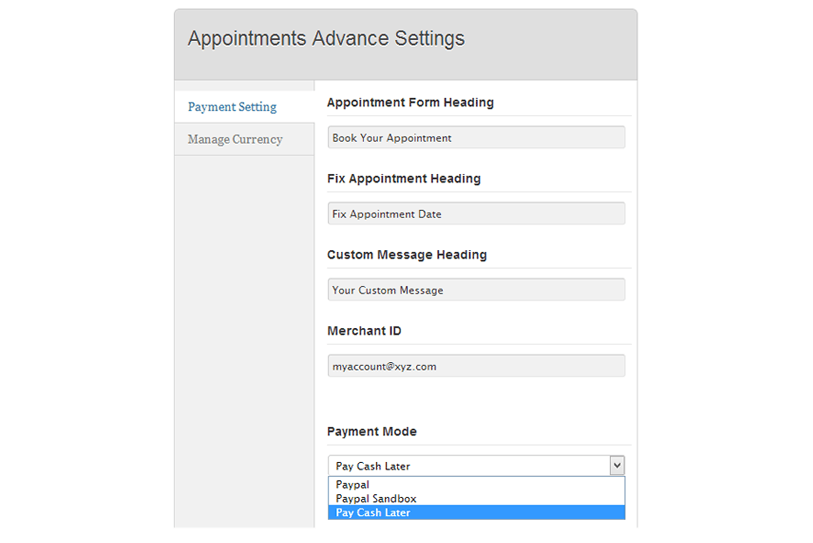
Step 4: Use Different Modes Of Payment
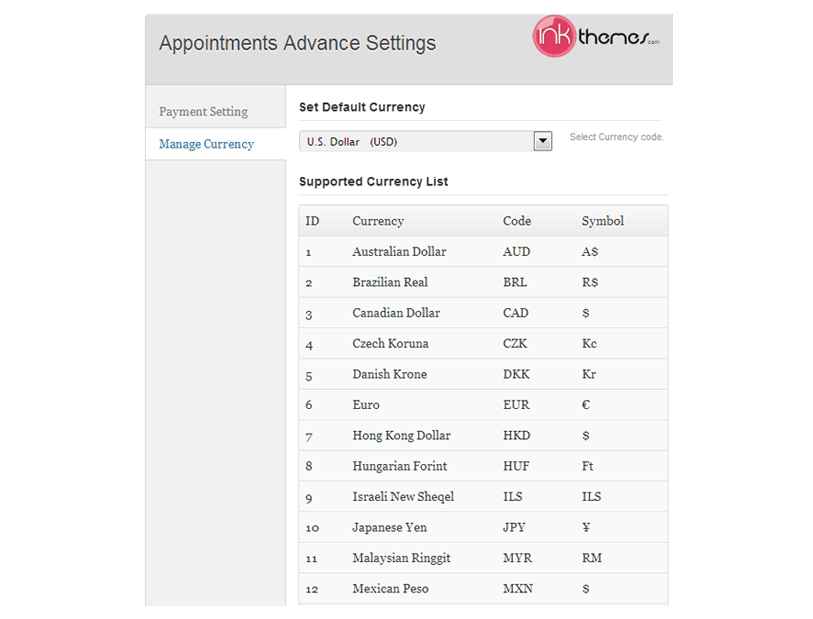
Step 5: Various Modes Of Currencies For Accepting Payments
In case if you need any help regarding theme tutorials, you can follow InkThemes YouTube channel.
https://www.youtube.com/channel/UCxrV5C3YZ8p2Zq_n70cN9aQ
Buy Theme- https://www.inkthemes.com/members/signup/QRcGQxyov
