In the last tutorial, I have already covered how to use MailChimp API in WordPress plugin.
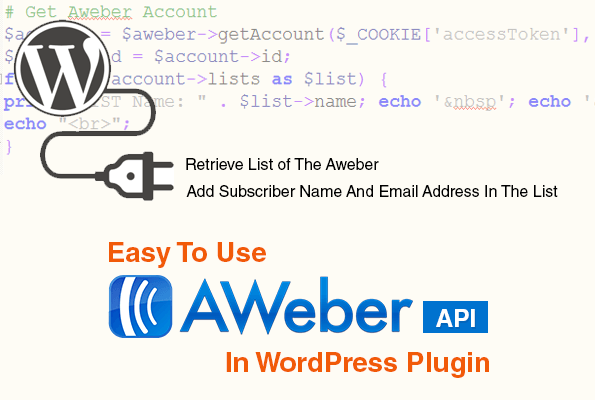
Now, in this tutorial, you will come to know how to use the Aweber API in WordPress plugin i.e. how to retrieve lists that you have already created under your Aweber account and how you can add the subscriber to that list.
Also, try.
MailGet – Email Marketing affordable and highly reliable. They have API to collect emails and send autoresponders.
[dlv dl_url=”https://www.inkthemes.com/wp-content/uploads/2014/05/aweber1.zip” dl_text =”Download Aweber Files”]
It is assumed that you have successfully created Aweber free developer account and create an application.
Every time you create a new application, it will generate an app id, consumer key, and consumer secret key, as you can see in the below image.
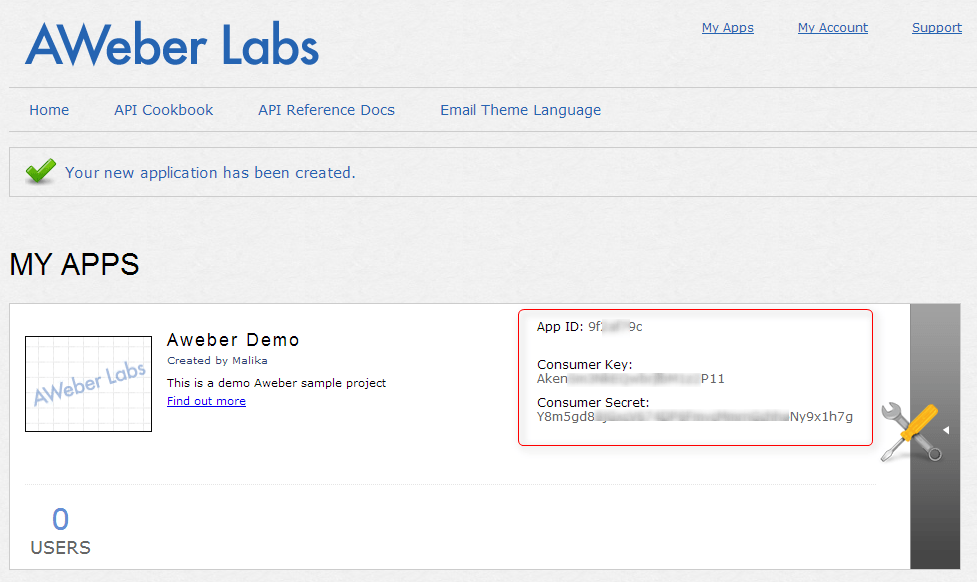
This app id, consumer key and consumer secret key are used to connect Aweber app to your developer account. You need to enter it in the below code.
[php]<?php
require_once(‘aweber_api/aweber_api.php’);
$consumerKey = “Your-Consumer-key”; # Put your consumer key here
$consumerSecret = “Your-Consumer-secret-key”; # Put your consumer secret key here
$aweber = new AWeberAPI($consumerKey, $consumerSecret);
?>
[/php]Note: You also need to include an Aweber API PHP library in your project.
Therefore, I have created a new folder named, Aweber where I have saved my above PHP file named, demo.php file and the Aweber library files. You can download library files from here.
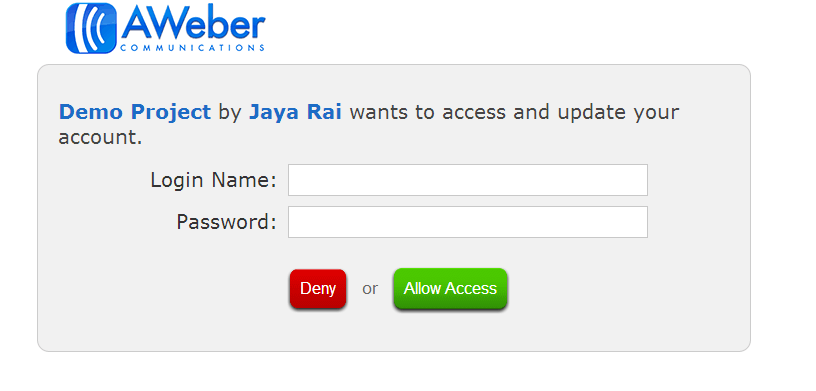
While connecting Aweber API to your account, Aweber API requires OAuth authentication in order to gain access to your account.
Therefore, you will be asked to login into your Aweber account, similar to the below image.
You can easily implement this functionality using below.
[php]<?php
// Authenticate your account using “oauth”
if (empty($_COOKIE[‘accessToken’])) {
if (empty($_GET[‘oauth_token’])) {
$callbackUrl = ‘http://’.$_SERVER[‘HTTP_HOST’].$_SERVER[‘REQUEST_URI’];
list($requestToken, $requestTokenSecret) = $aweber->getRequestToken($callbackUrl);
setcookie(‘requestTokenSecret’, $requestTokenSecret);
setcookie(‘callbackUrl’, $callbackUrl);
header(“Location: {$aweber->getAuthorizeUrl()}”);
exit();
}
$aweber->user->tokenSecret = $_COOKIE[‘requestTokenSecret’];
$aweber->user->requestToken = $_GET[‘oauth_token’];
$aweber->user->verifier = $_GET[‘oauth_verifier’];
list($accessToken, $accessTokenSecret) = $aweber->getAccessToken();
setcookie(‘accessToken’, $accessToken);
setcookie(‘accessTokenSecret’, $accessTokenSecret);
header(‘Location: ‘.$_COOKIE[‘callbackUrl’]);
exit();
}
?>
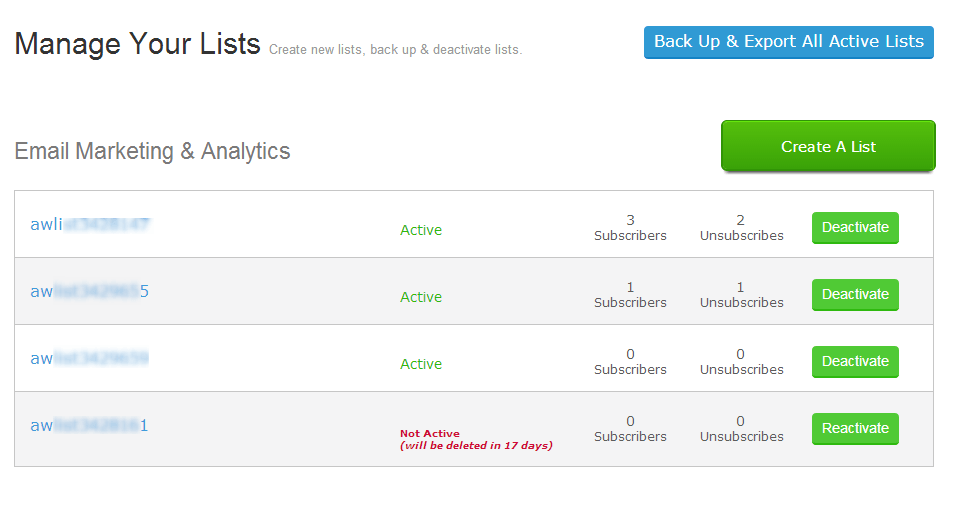
[/php]You can create as many lists you want in your Aweber account, as you can see in the below image there 3 active and 1 not active list in my account.
Now, you can easily fetch these lists, i.e. its names and respective id’s using below code. Moreover, you can also set the cookies to authenticate the user. So just add the code under demo.php file followed by the above code.
[php]<?php
// Set the cookies to authenticate the user
# Get Aweber Account
$account = $aweber->getAccount($_COOKIE[‘accessToken’], $_COOKIE[‘accessTokenSecret’]);
$account_id = $account->id;
foreach ($account->lists as $list) {
print “LIST Name: ” . $list->name; echo ‘ ’; echo ‘ ’; echo ‘ ’; print “LIST Id: ” . $list->id;
echo “<br>”;
}
?>
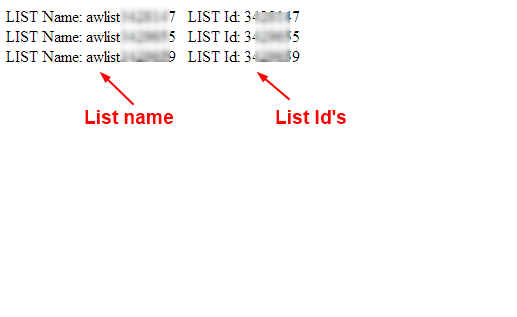
[/php]When you run the code, you will get the entire list names and id’s in the output screen.
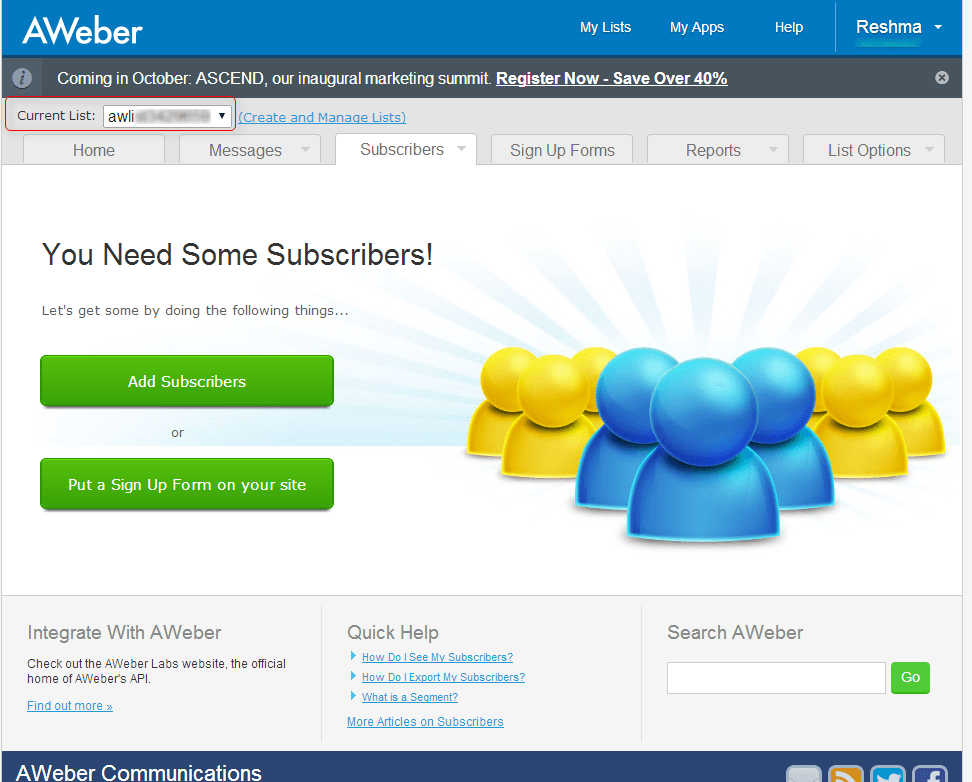
Once the list is created, you need to add subscribers to it. As you can see in the below image, a list does not contain any subscriber.
But, you can easily add subscribers to the list with the code.
For that, you need to provide a list id where you want to add a subscriber, followed by subscriber name and its email address.
Additionally, if any exception arises while adding subscriber to the list, then you can easily catch it by displaying an error message on the output screen.
[php]<?php
try{
$list_id=’List-ID’; // Enter list Id here
$listURL = “/accounts/{$account_id}/lists/{$list_id}”;
$list=$account->loadFromUrl($listURL);
# create a subscriber
$params = array(
’email’ => ‘Subscriber-email-address’,
‘name’ => ‘Subscriber-name’
);
$subscribers = $list->subscribers;
$new_subscriber = $subscribers->create($params);
echo “Thank you for subscribing!”;
}
// Catch the exceptions here
catch (Exception $exc) {
print $exc->message;
}
?>
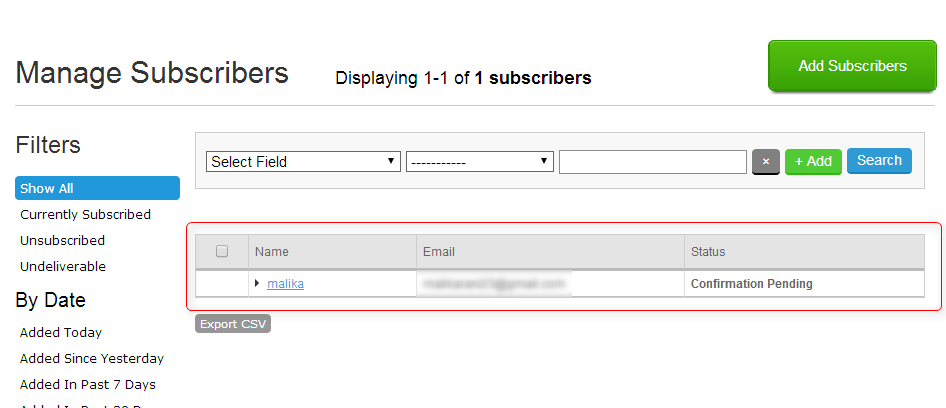
[/php]As soon as you run the above code, the subscription message send to the subscriber email. It seems to be pending until the subscriber confirmed it. It will be more clear to you from below image.
Conclusion
I hope the above code makes it easy for you to use Aweber API in WordPress plugin. If you find any difficulty in executing the above steps then do let me know in the comment section. I will definitely help you out. Also, share your thoughts about the post.
You might also be interested in:
