The first thing that I learned in WordPress was its installation process on localhost, unknown with the other unique features that it has. So after the various research, today I am here to present some useful & simple steps of How to Install WordPress on Localhost so it might be more easy to install.
No doubt there are a variety of free WordPress themes, premium WordPress themes available over the web but first getting hands settled on WordPress is the key to go ahead.
As I gone through step by step, learned more interesting stuff, I realized WordPress is not only a CMS but a great blogging platform as well.
Other Useful WordPress resources:
- WordPress Speed Optimization 2022
- 7+ SEO Friendly WordPress Themes
- How to install WordPress locally on Mac system
How it simply opens the online world for you to explore yourself.
A great helping platform to share your experience with others.
This post is dedicated to every beginner who are seeking to start with WordPress and needs online exposure.
I hope at the end you will easily install WordPress on your system and play around with amazing CMS application to lift up your WordPress Blog or Website.
Though this tutorial is about installing WordPress locally on WAMP, but let me clear you few basic points about WordPress-
- WordPress is a free and open source blogging tool – a content management system (CMS) based on PHP and MySQL.
- To use WordPress you must have a server (WAMP, XAMP) installed on your machine for its working environment. Without a server you won’t be able to install WordPress.
- The server you will install, it should support PHP and MySQL requirements.
- Installing WordPress is quite easy and simple, so I suggest you to be patient.
In this post, I have used WAMP software (supports PHP and MySQL) for installing WordPress. You can use any web server of your choice to install WordPress.
12 Simple Steps for Installation of WordPress
Step #1 Download WAMP Server
As I said earlier WordPress needs a web server (which could be anyone, for e.g. I have used WAMP software for installing WordPress) to work on so first you need to download and install a software called WAMP (which has prebuilt localhost server) on your machine.
–>WAMP stands for Windows Apache MySQL and PHP.
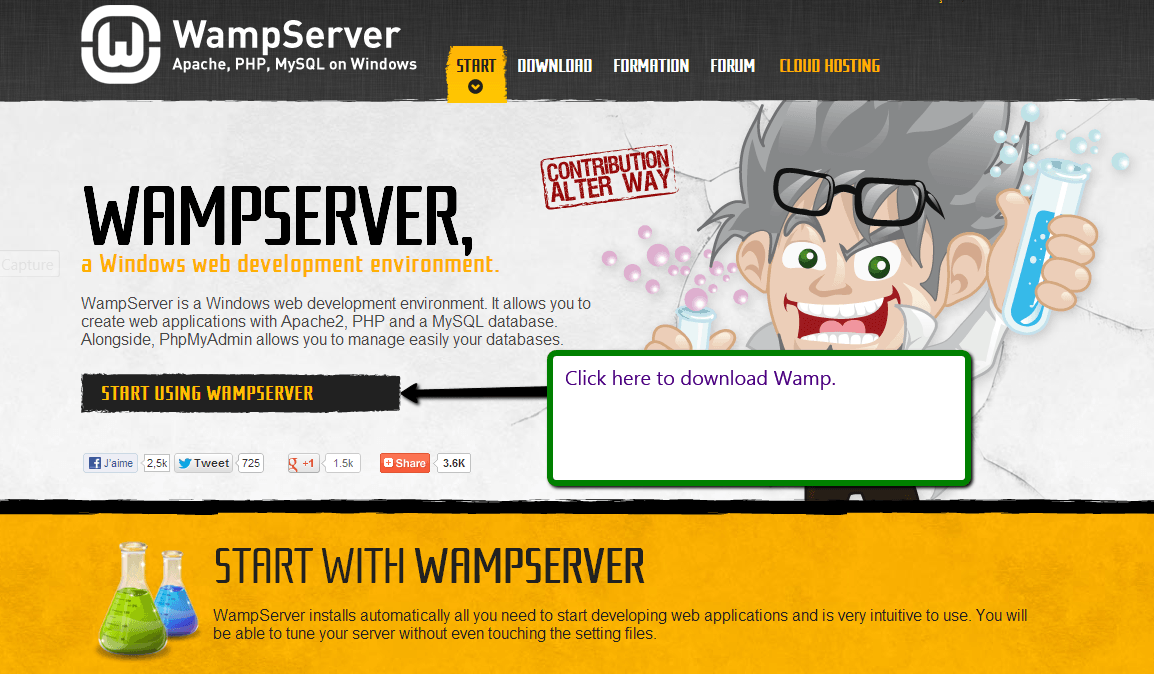
Simply open any one of your browsers and download WAMP software on your system.
This will provide a platform to install WordPress easily.
Remember one thing, while installing WAMP, no other servers should be in active mode otherwise it will conflict installation of WAMP.
Step #2 Install WAMP Server
After downloading WAMP server, just double click on its icon to run and install it in one of your directories (By default it gets installed on Local disk C).

Step #3 Activating WAMP Server
Remember, every time you turn on your machine, first, you will need to activate WAMP server simply by double-clicking on its icon.
After activating it that you will see a green “W” mark (which looks red by default) on your task-bar.

Step #4 Download WordPress Zip
Now open your browser. Go to www.wordpress.org and easily download the latest version of WordPress.
Step #5 Open Directory Where You Have Install WAMP
Open your directory where you have installed WAMP server and perform the following steps.
Directory (Local disk C, by default wamp, is installed in this directory) –> wamp –> www–> copy the zip folder of WordPress here and do right click on it and select “extract here”.
Now make a copy of the folder and rename it, here for e.g., it is renamed as “wordpress1”.
Making a multiple copies of WordPress and renaming will save your time for downloading the WordPress again (In case if you need the download file again)..

Step #6 Open Your Browser Window
Open your web browser window and type the following on your address bar “localhost/phpmyadmin/” and press enter.
The following page shown in figure will display on your screen:

Now, select the database and create a database for your WordPress, let’s say for e.g. “table” as shown in the figure below.
Simply click on create and your database is ready to use.

Step #7 Type “localhost” On Your Browser
Now type “localhost” on your browser. From there, select your copied folder (the one which you renamed for your WordPress website).

Step #8 Create a Configuration file
After this, following page will be obtained as shown in the figure below.
Now, click on the button ”Create a Configuration file” on the same page.

Step #9 Click “Let’s go” button
Now, after performing the above step, on the next page click on “Let’s go” button.

Step #10 Fill Database Connection Details
Now, this step is very important. You need to be little careful here. Keep in mind few things and proceed in this way:-
- Database Name should be same as that what you have created earlier for your WordPress.
- Username is “root” by default as per MySQL username.
- The password should be left blank if you haven’t mentioned it at the time of creating your database otherwise type the same one if you have mentioned it earlier.
- Leave the other fields as it is. Now, your page should look like as shown in the figure below. At last click on “Submit” button to proceed further.

Step #11 Fill Other General Information and Click “Install WordPress”
After this simply fill the respective fields on the next page and at last click on the button ”Install WordPress”. Your page will look like as shown in the figure below:

Step #12 You Have Successfully Installed WordPress
And finally here comes your destination point.
Bingo! you have successfully installed WordPress on your machine.
Just to make sure that you have done all the steps in a perfect manner, you can log in to your account.

Installing WordPress is a lot easier than any other work.
Once you become familiar with this exciting platform, you can do anything from blogging to making a website. It is all free.
This post was only about installing WordPress on Localhost (WAMP server), however, you can click the button below and learn a complete tutorial series to understand the process after installing the WAMP.
LEARN COMPLETE WORDPRESS TUTORIALS
Purchase a domain for yourself. Install the WordPress on it. And start doing wonders.
I hope this was as easy as I felt while installing WordPress on my localhost.
Use this new technology to make effective websites for your business environment. If you are all set, you can download this Free ColorWay theme and create your website on WordPress for free.
Download Free Colorway theme & Create Your Website
Let me know how simple and easy it was for you. 🙂
